How to use collections.
Collections group the things that belong together, even when they live in different rooms. Make one, fill it, find it again in Browse, and share it with a link when you want to show it off.
Start a collection
A space is where a thing lives. A collection is what it's part of: trading cards, vinyl, camping gear, the kitchen stuff you'd grab first. Items keep their space when you add them to a collection, and one item can be in several collections.
 Step 01
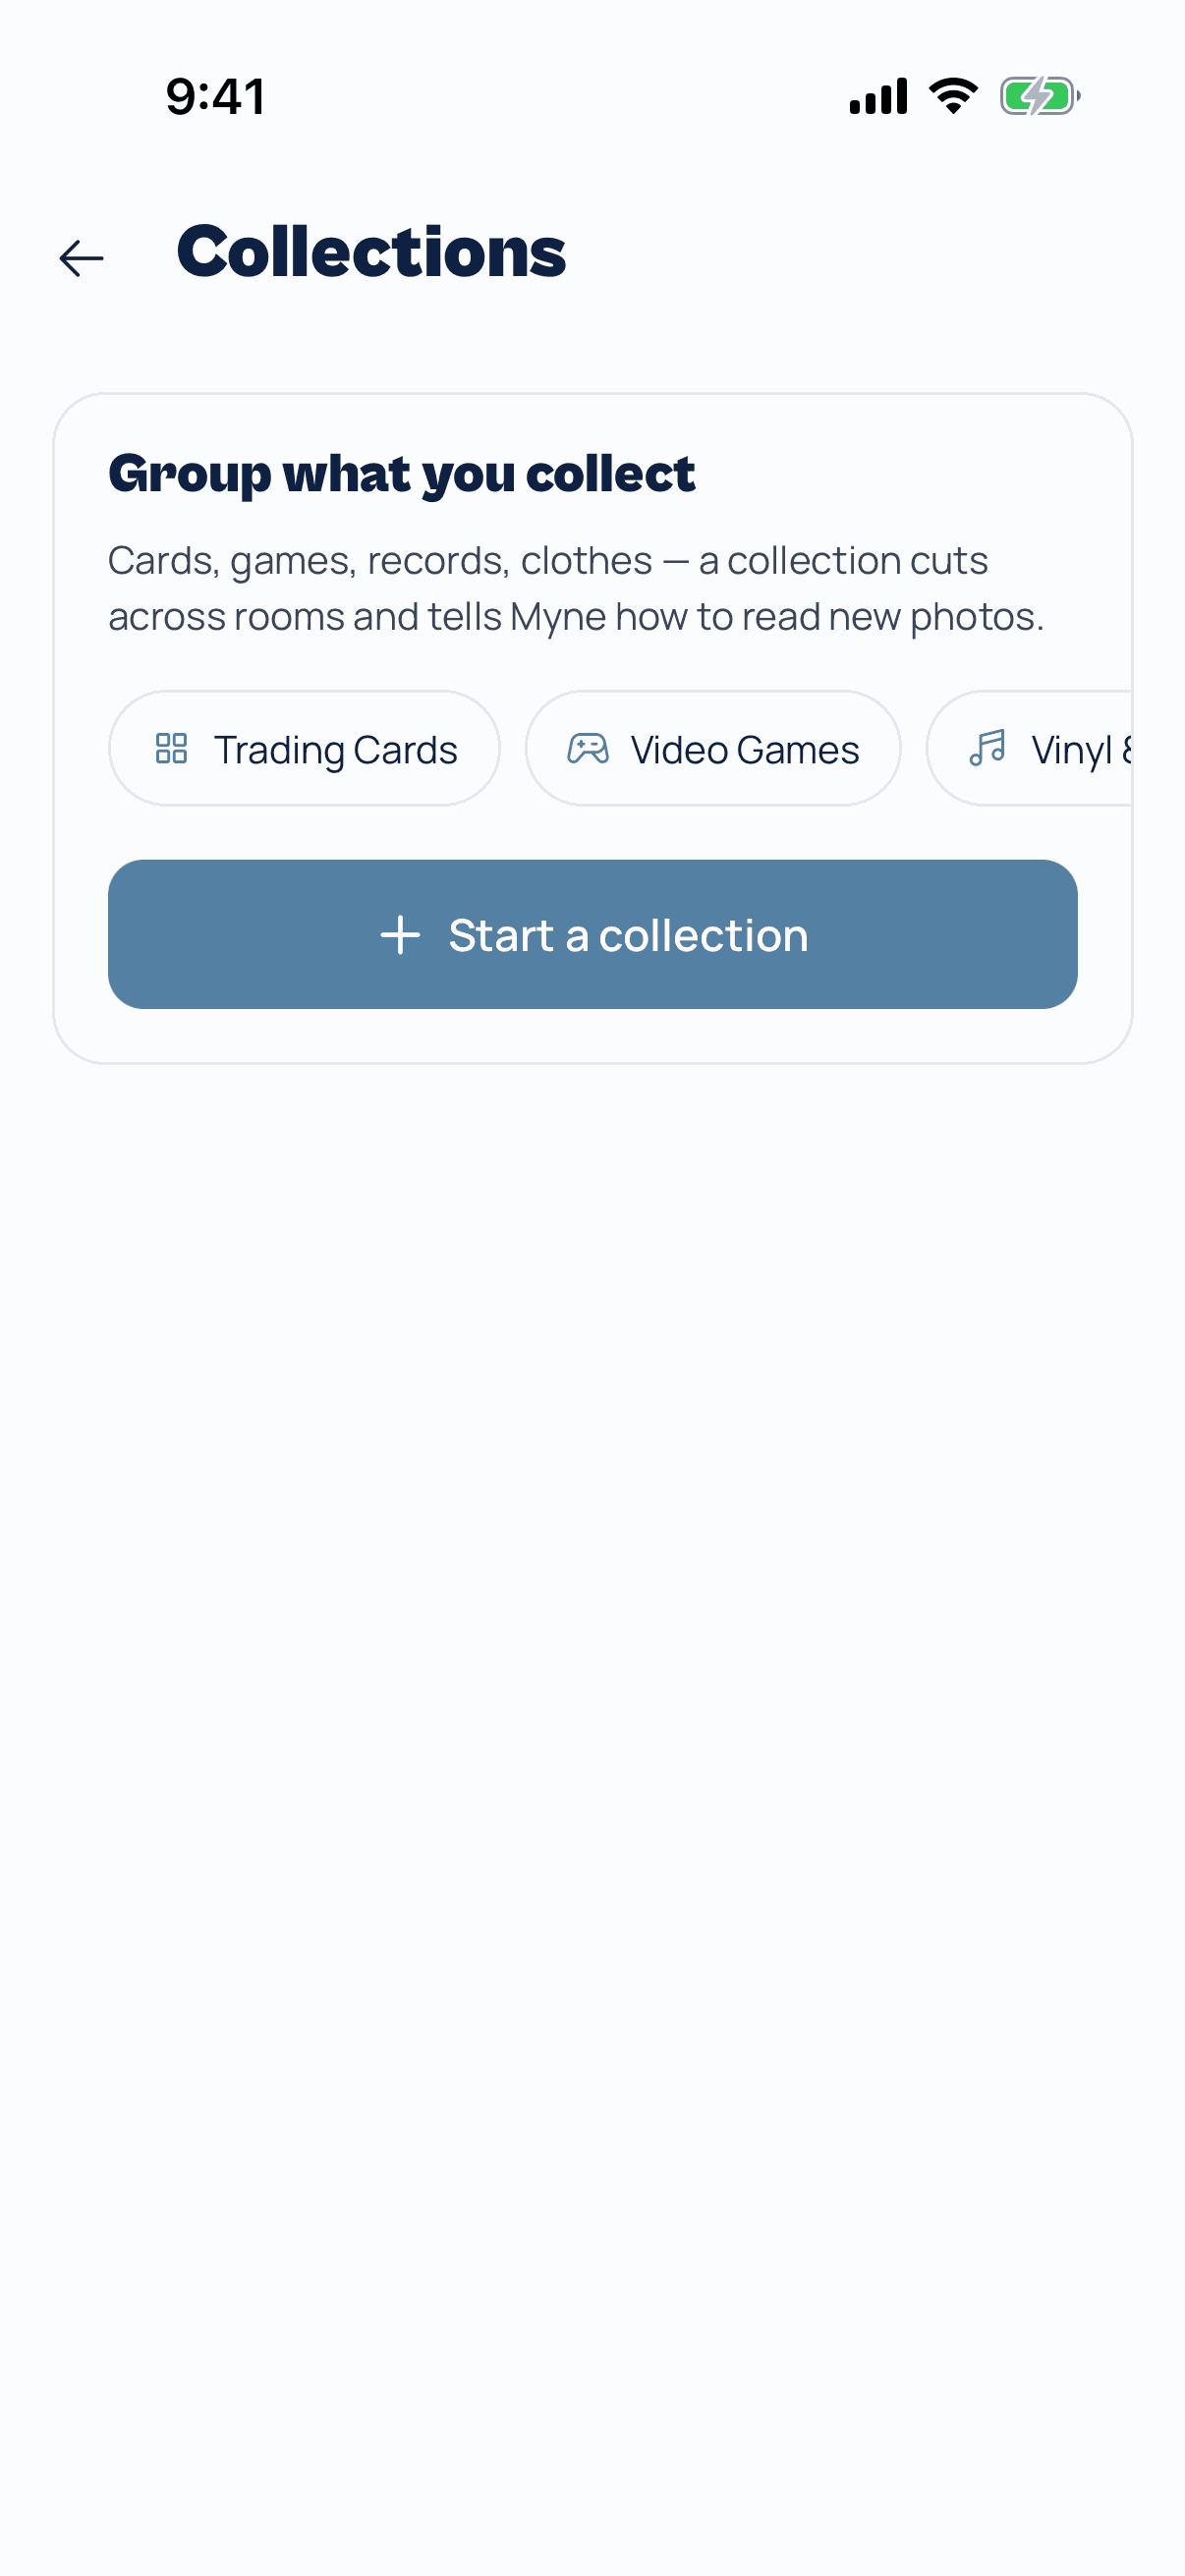
Open Collections from Home
Tap Collections at the top of Home. Your first time there, you'll see a few ideas to start from. Tap Start a collection.
 Step 02
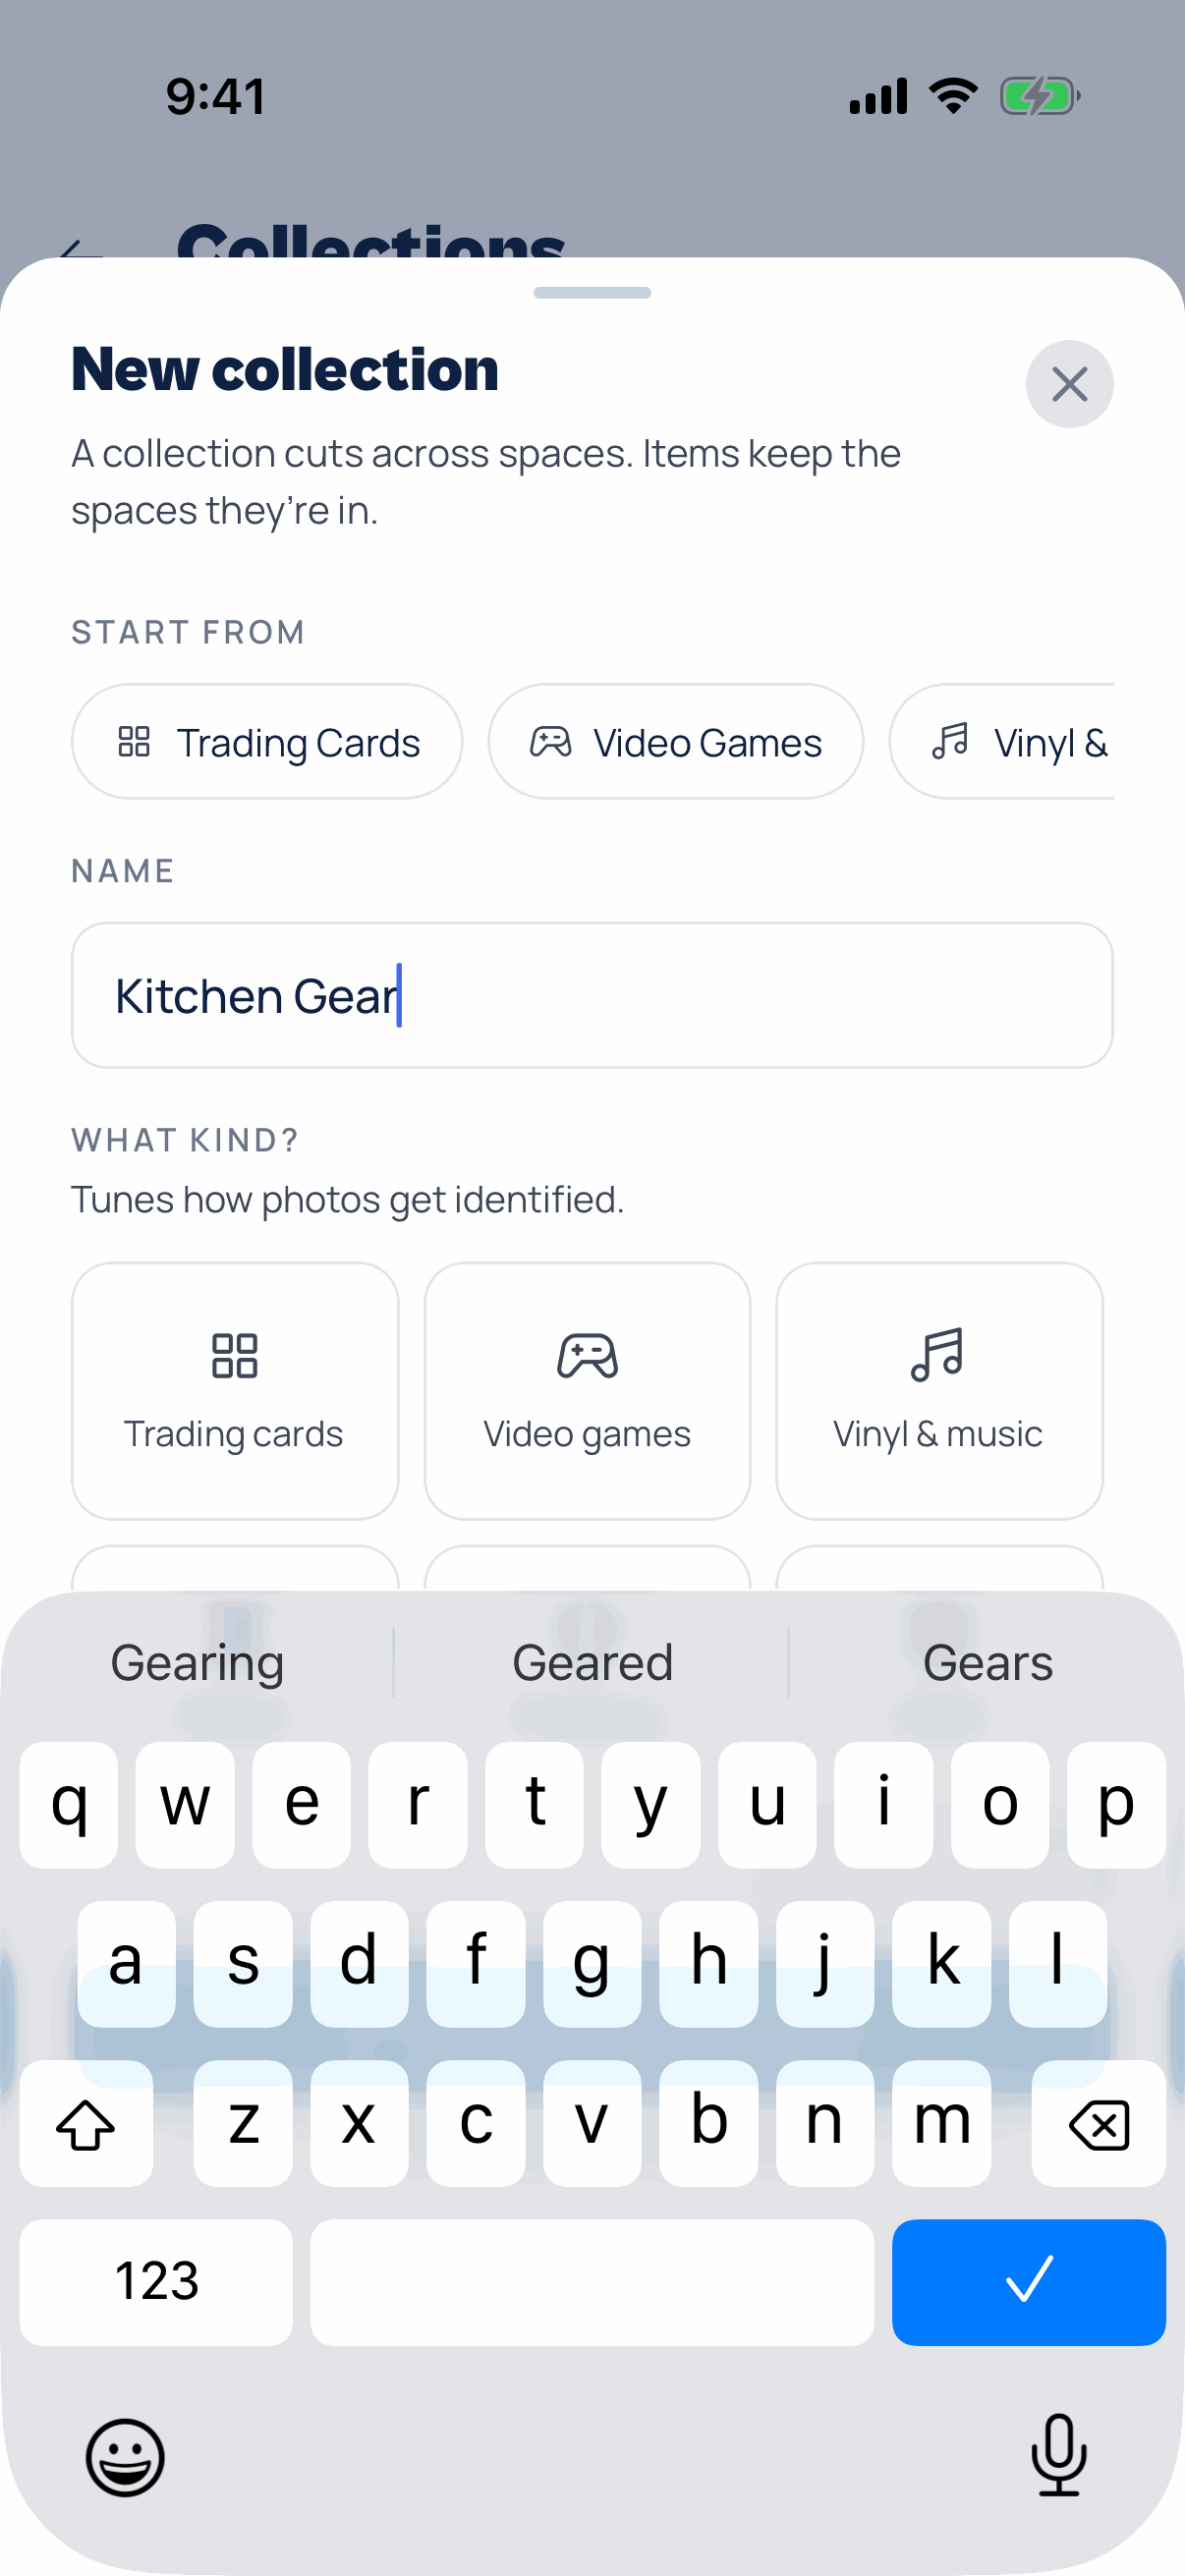
Give it a name
Type a name, like Kitchen Gear or Camping Kit. Or tap one of the Start from ideas at the top to fill in the name and type for you.
 Step 03
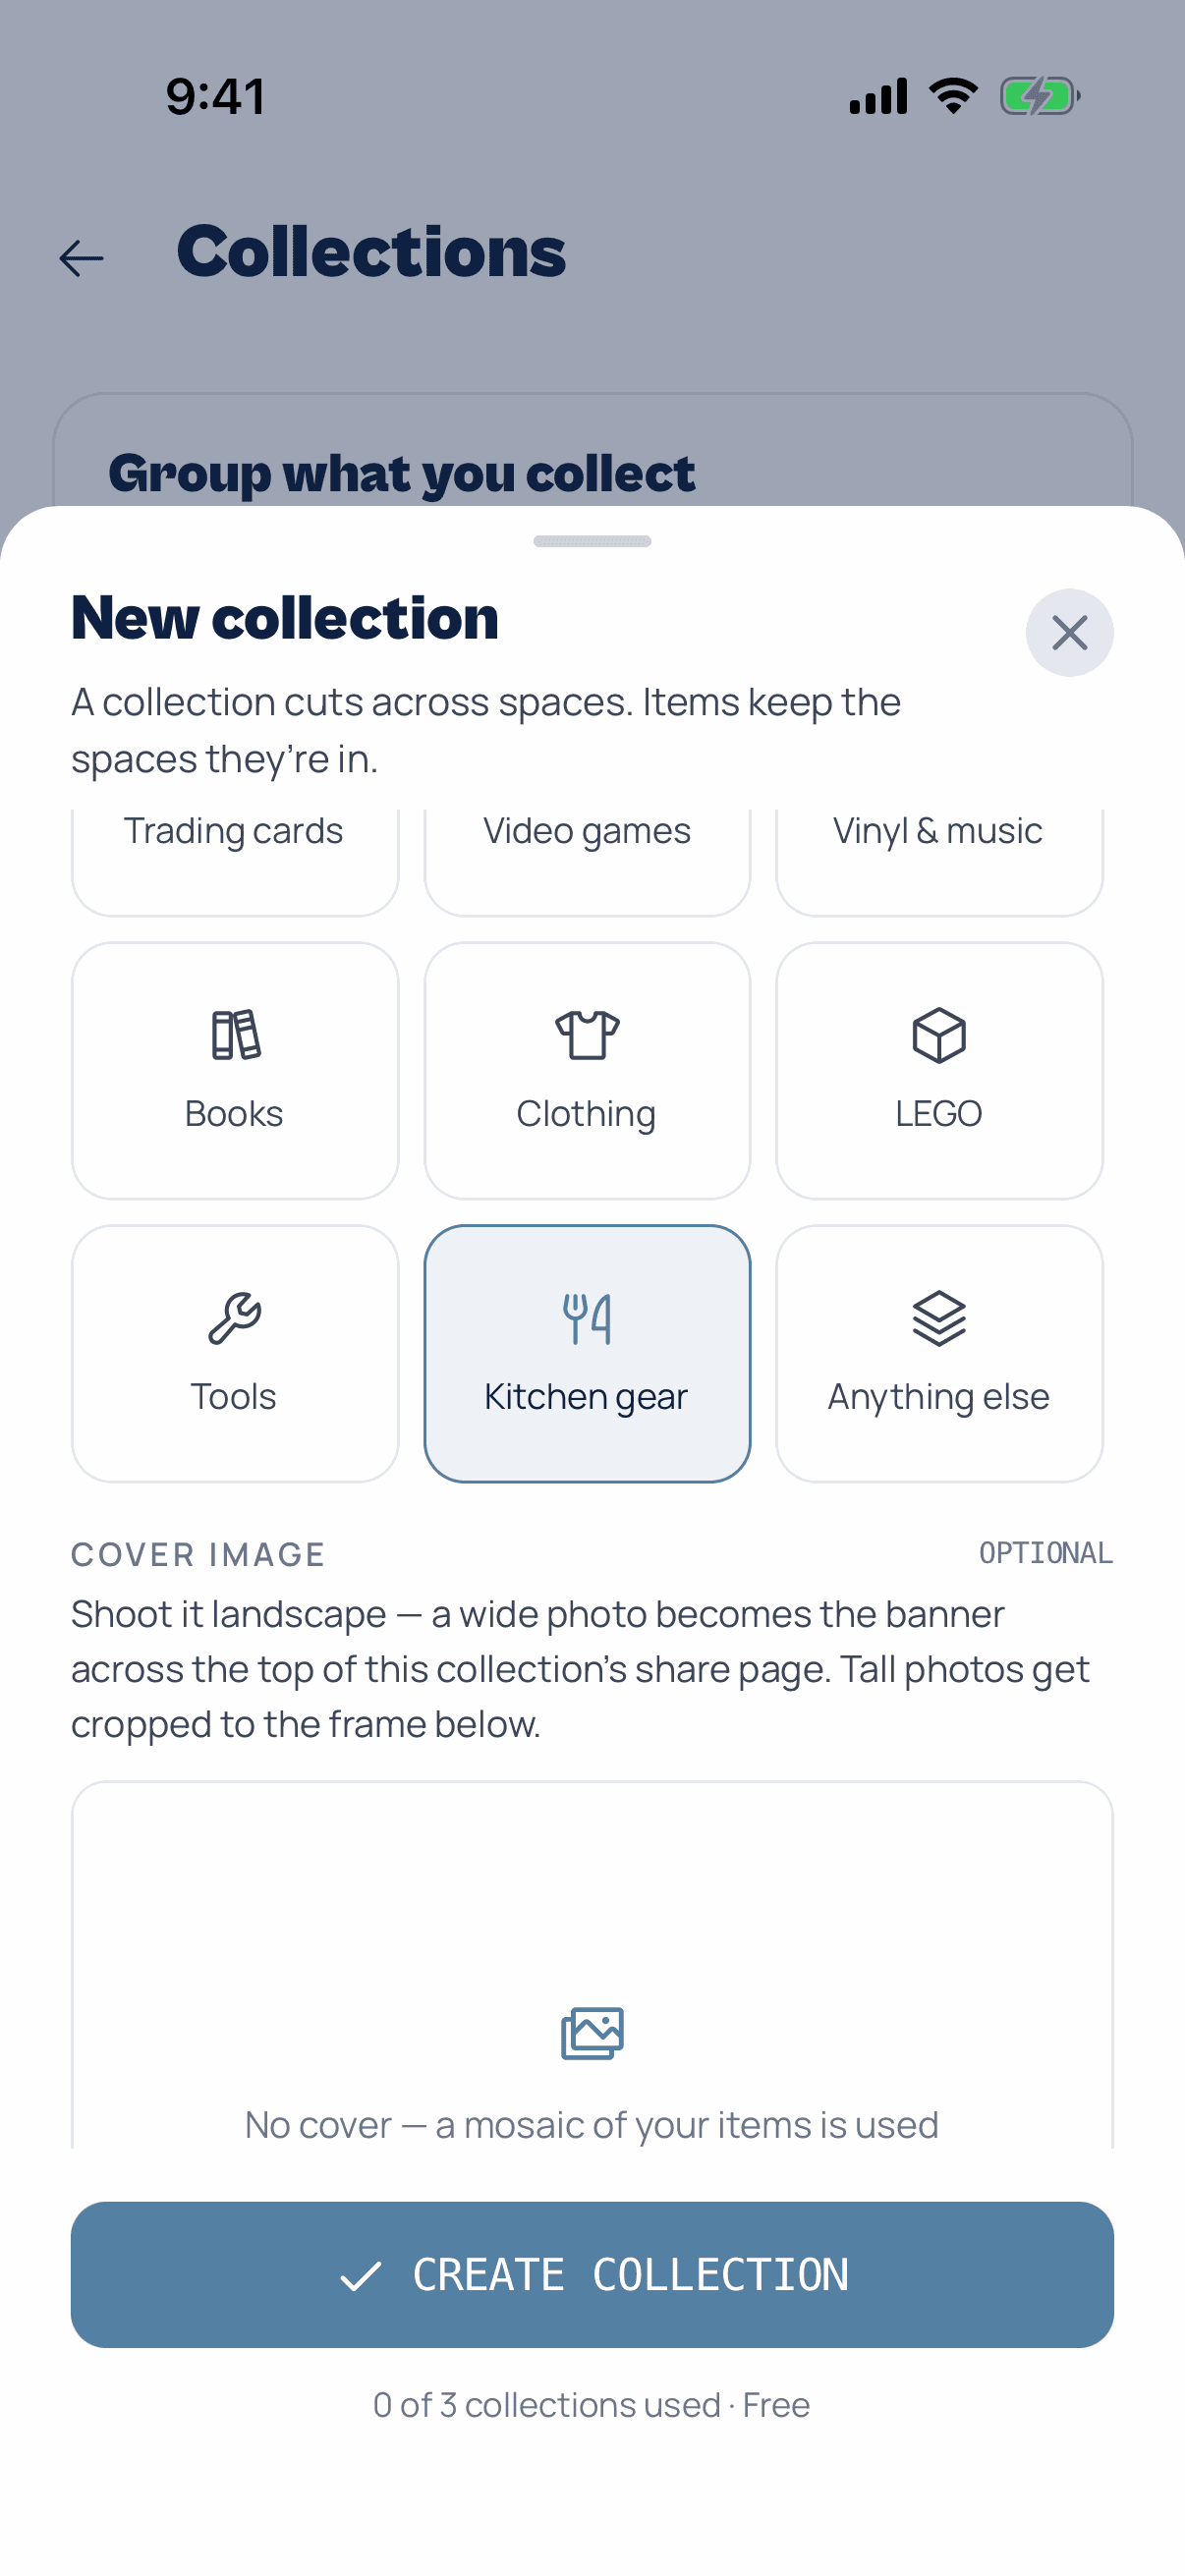
Pick what kind it is, then create it
The type tells Myne how to read new photos you add to the collection. A Trading cards collection looks for the set and card number, for example. Pick the closest one, or Anything else.
A cover photo is optional. Shoot it wide, because it becomes the banner on the collection's share page. With no cover, Myne makes a mosaic from your items. Tap Create collection.
TipThe free plan includes three collections. Plus and Pro have no limit.
Put things in it
Add things you've already tracked, photograph new ones straight into the collection, or add a batch from Browse.
 Step 04
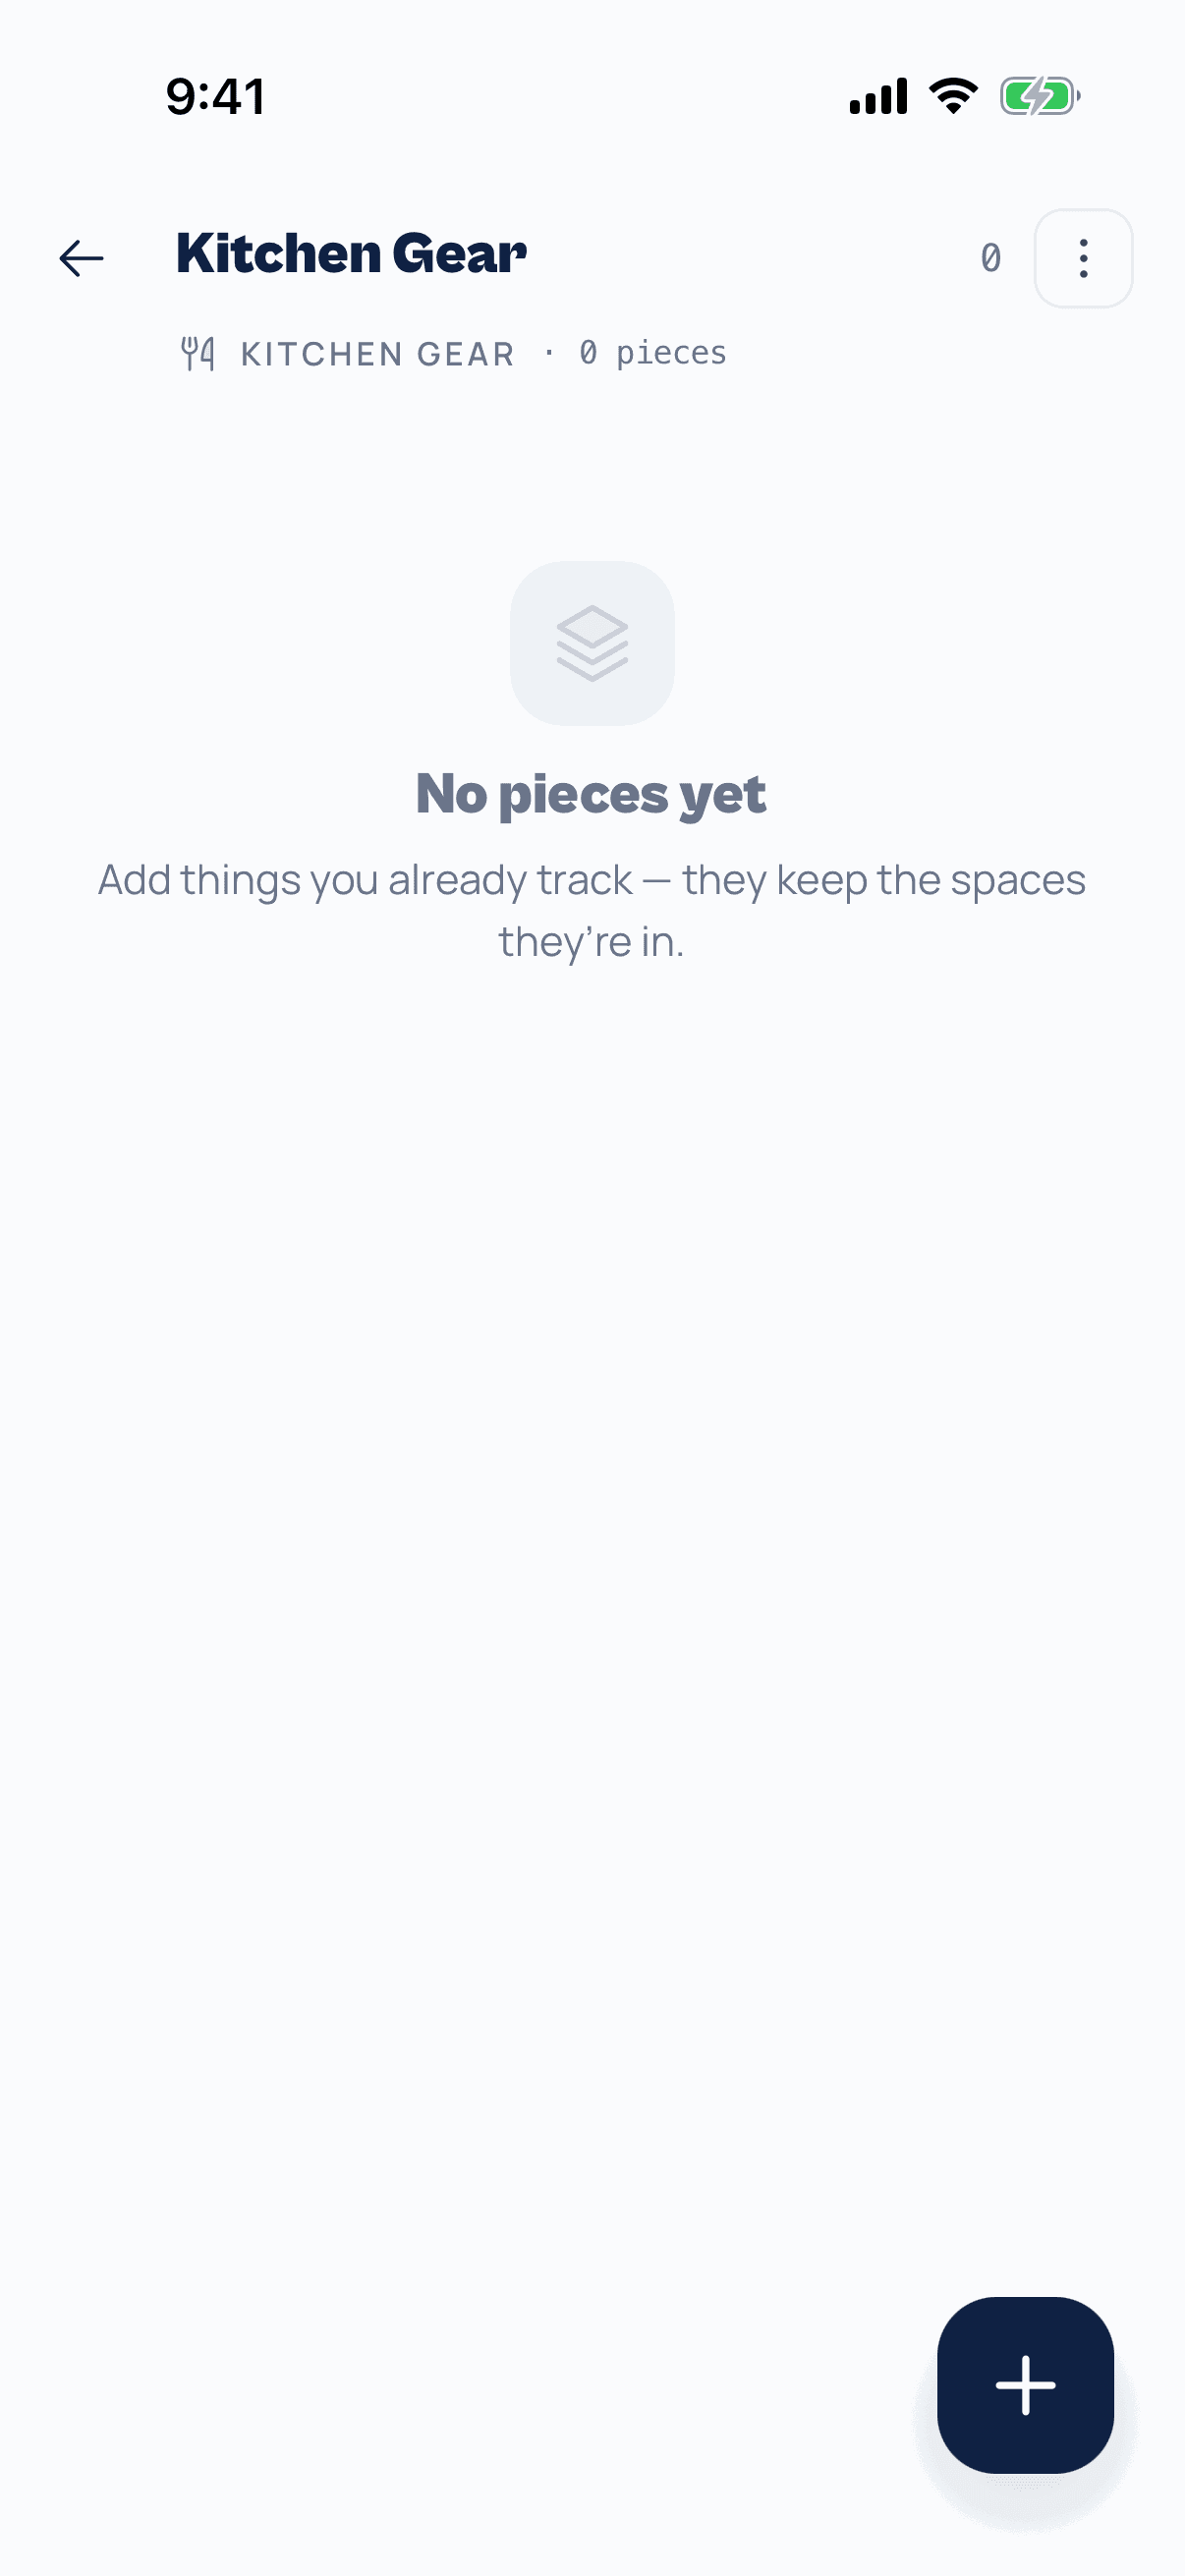
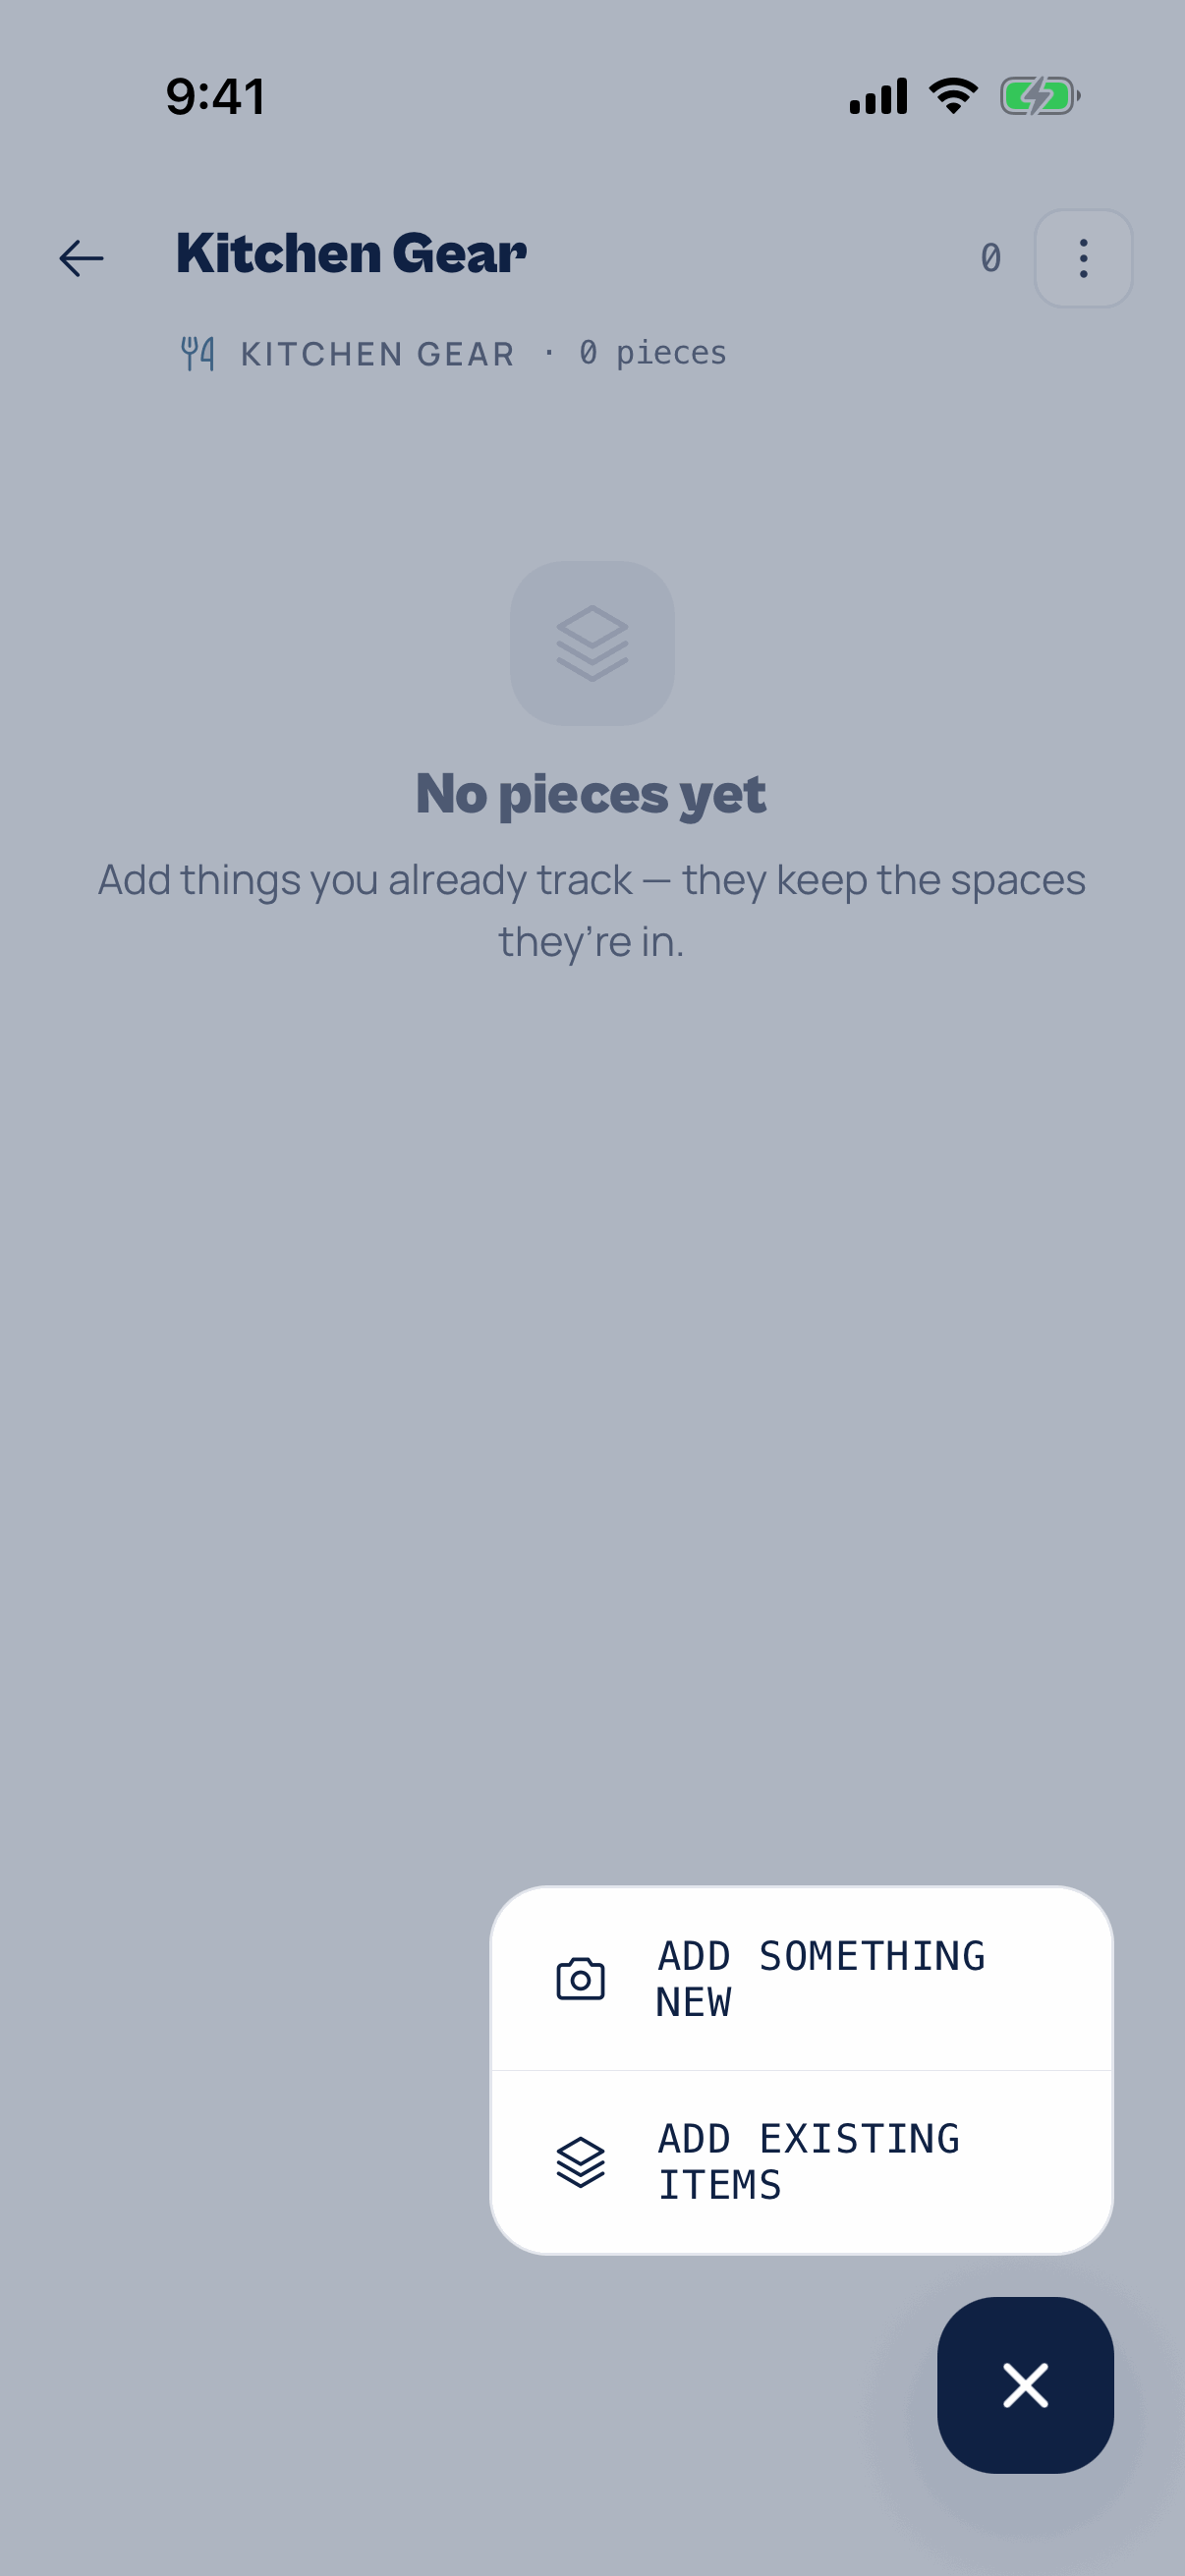
Tap + in the new collection
A new collection starts empty. Tap the + in the corner.
 Step 05
Choose new or existing
Add something new opens the camera, and the items you photograph land in this collection. Add existing items lets you pick from what you already have.
 Step 06
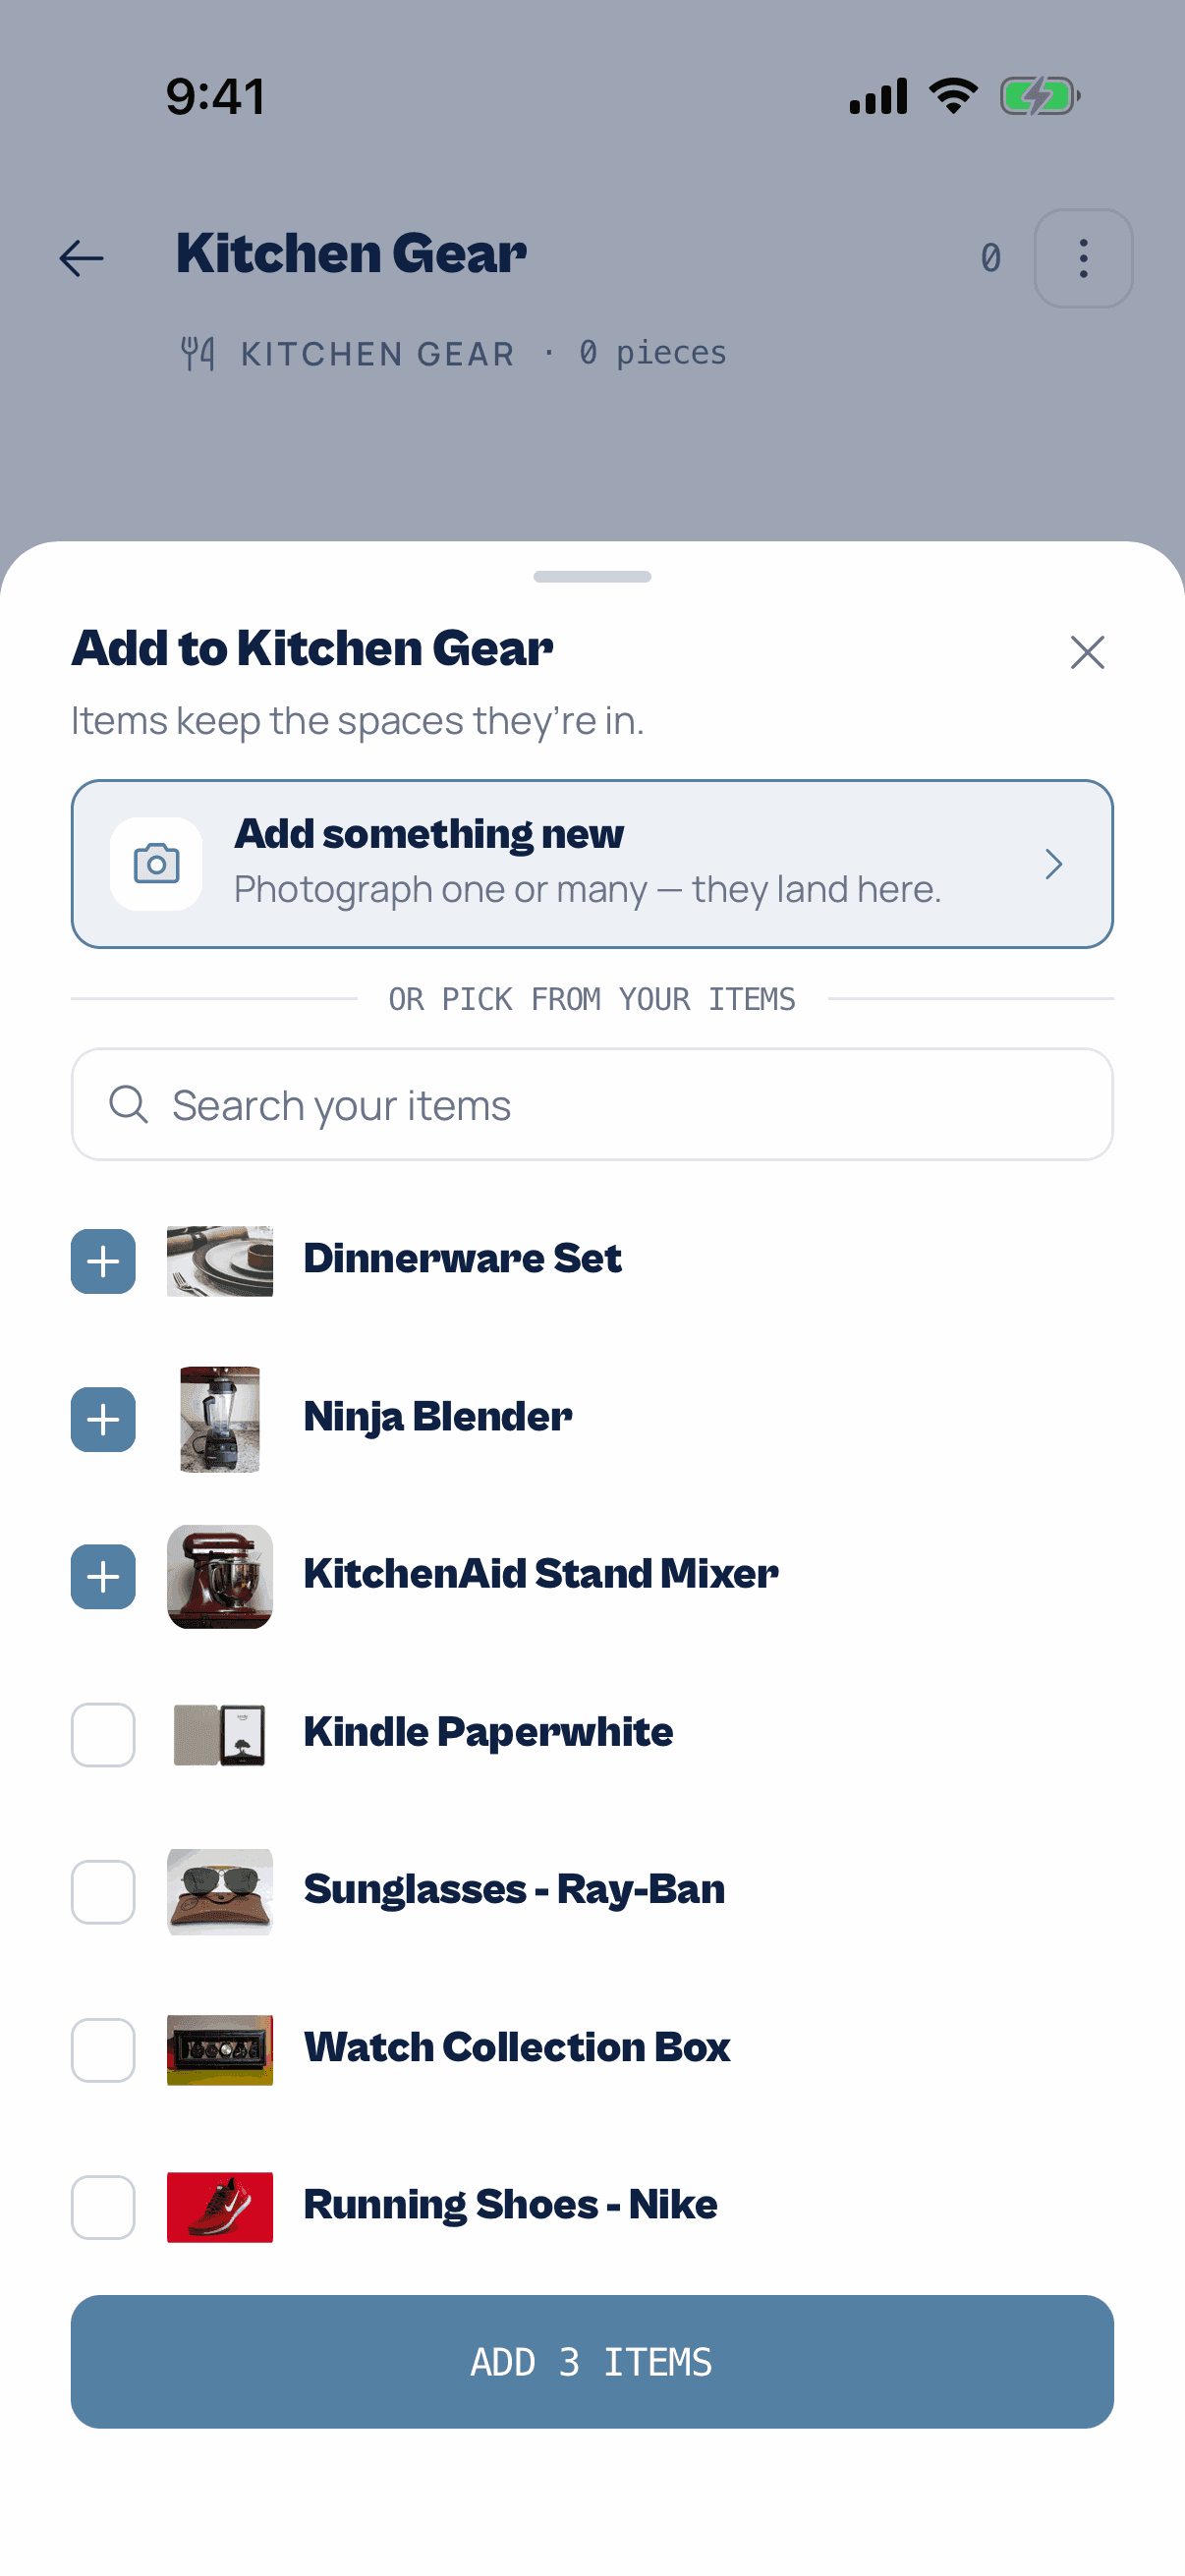
Tick the items and add them
Search or scroll, tick each item, then tap Add. They stay in the spaces they're in. The blender is still in the Kitchen, it's just in Kitchen Gear too.
 Step 07
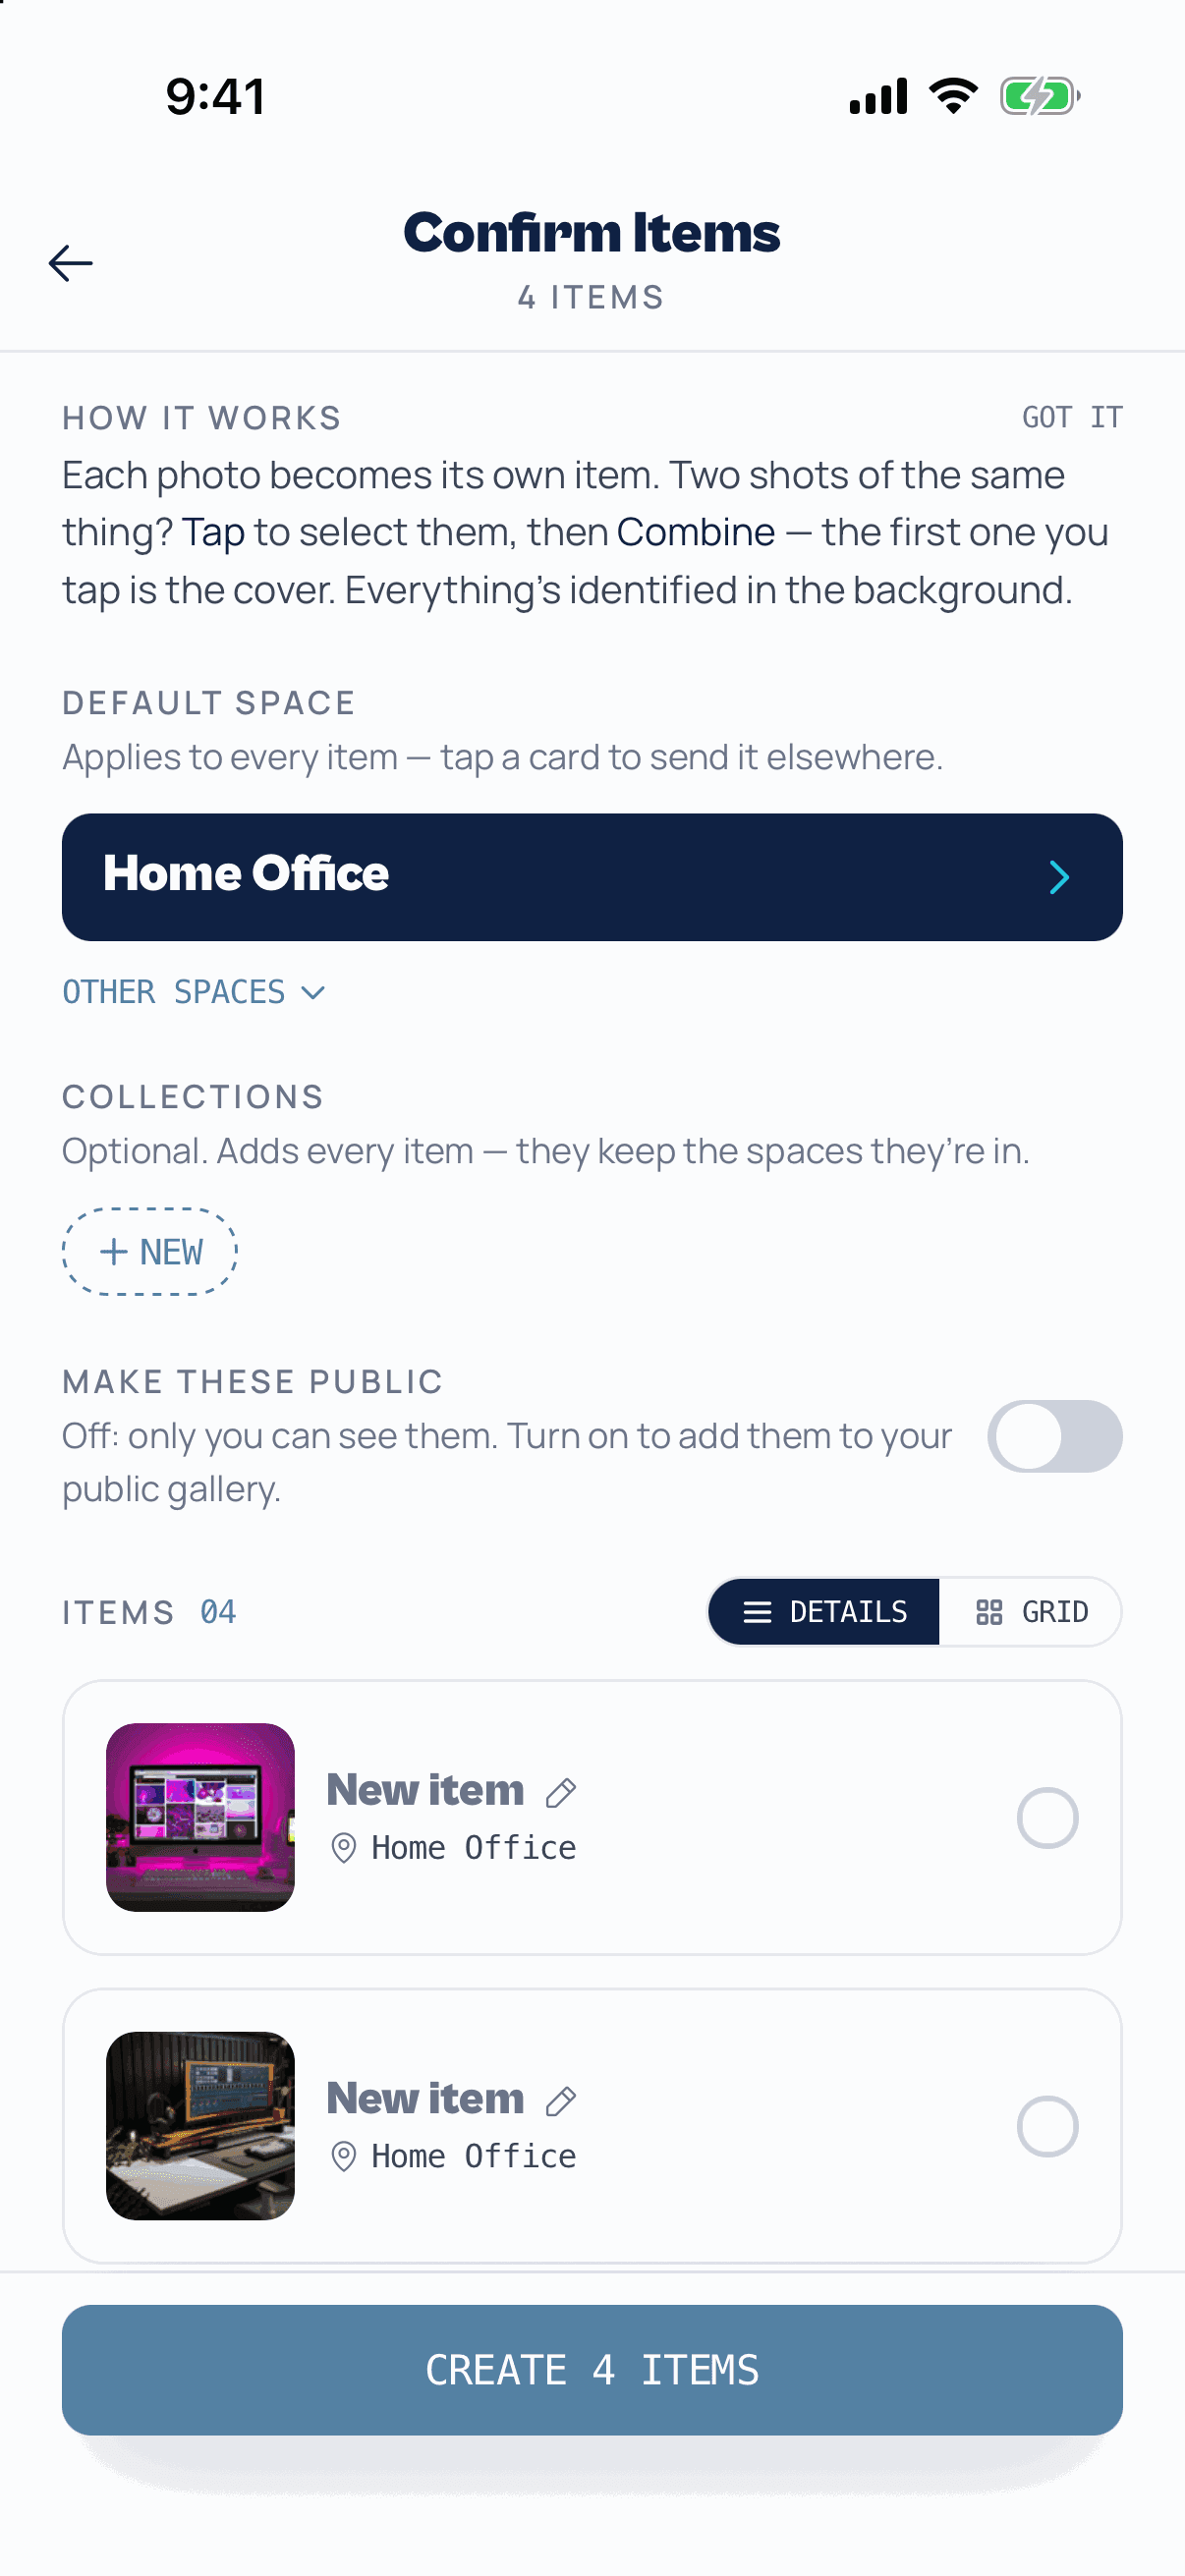
Or add them as you photograph them
On Confirm Items, after you take photos, the Collections line adds everything in that batch to a collection. Tap New to make one on the spot.
Already have the items? In Browse, select several and tap the stack button in the bottom bar to add them all to a collection.
Use your collections
Each collection has its own page, and they show up in Browse alongside your items and spaces.
 Step 08
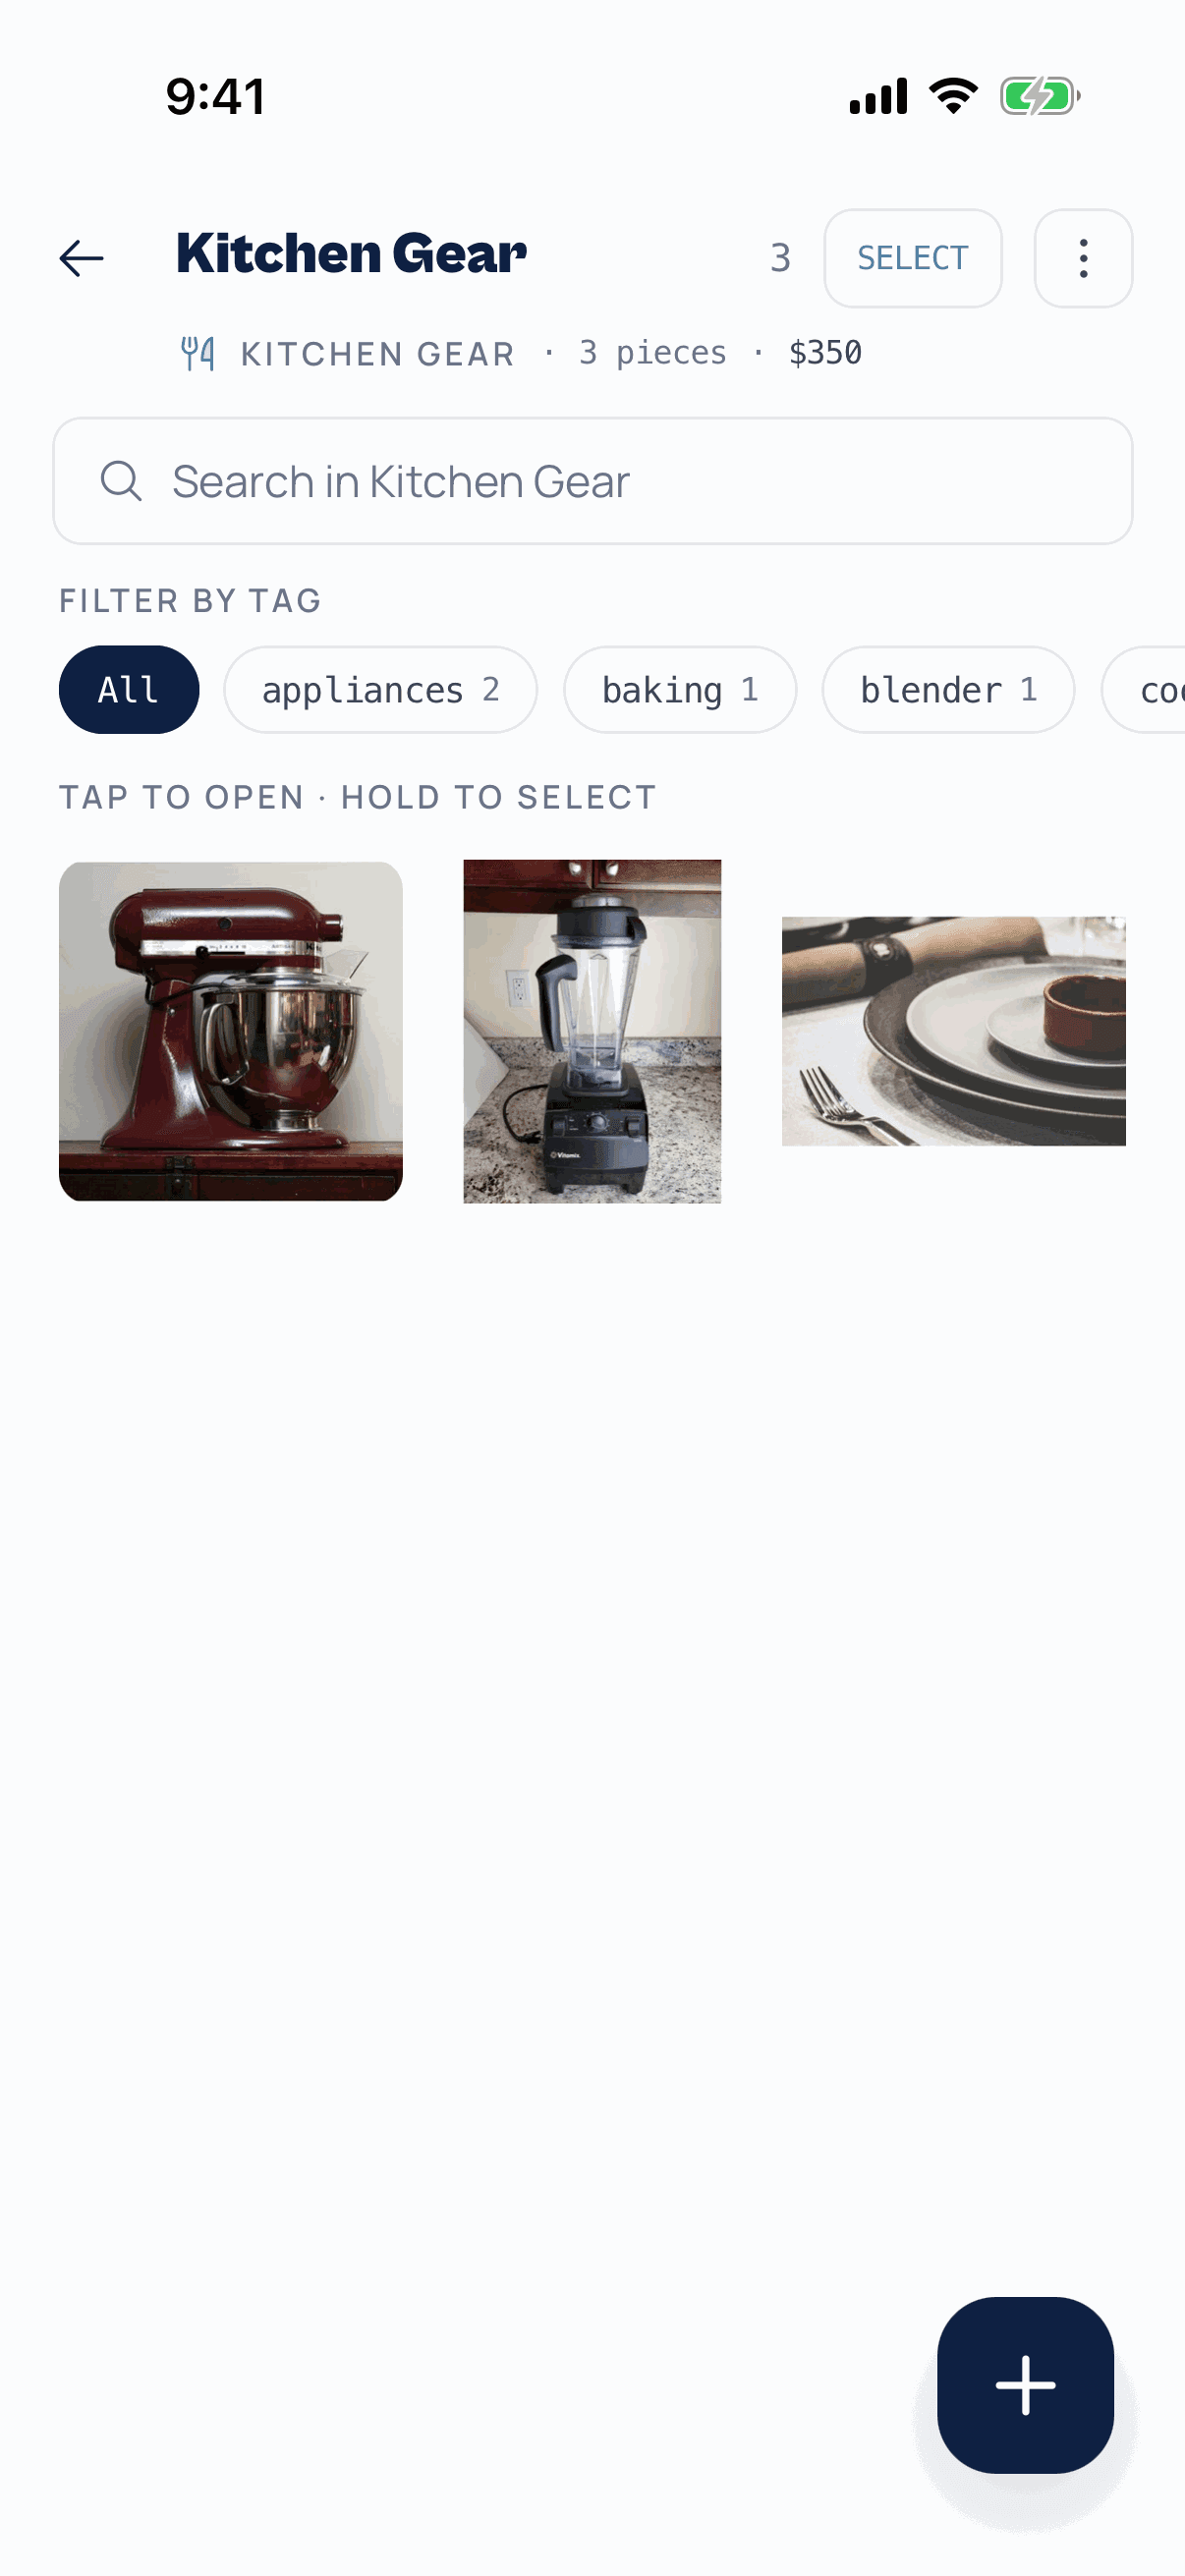
Open a collection
The top line counts the pieces and adds up their value. Search inside the collection, or tap a tag to show only those items.
Tap an item to open it. Press and hold to start selecting, for example to take a few out of the collection.
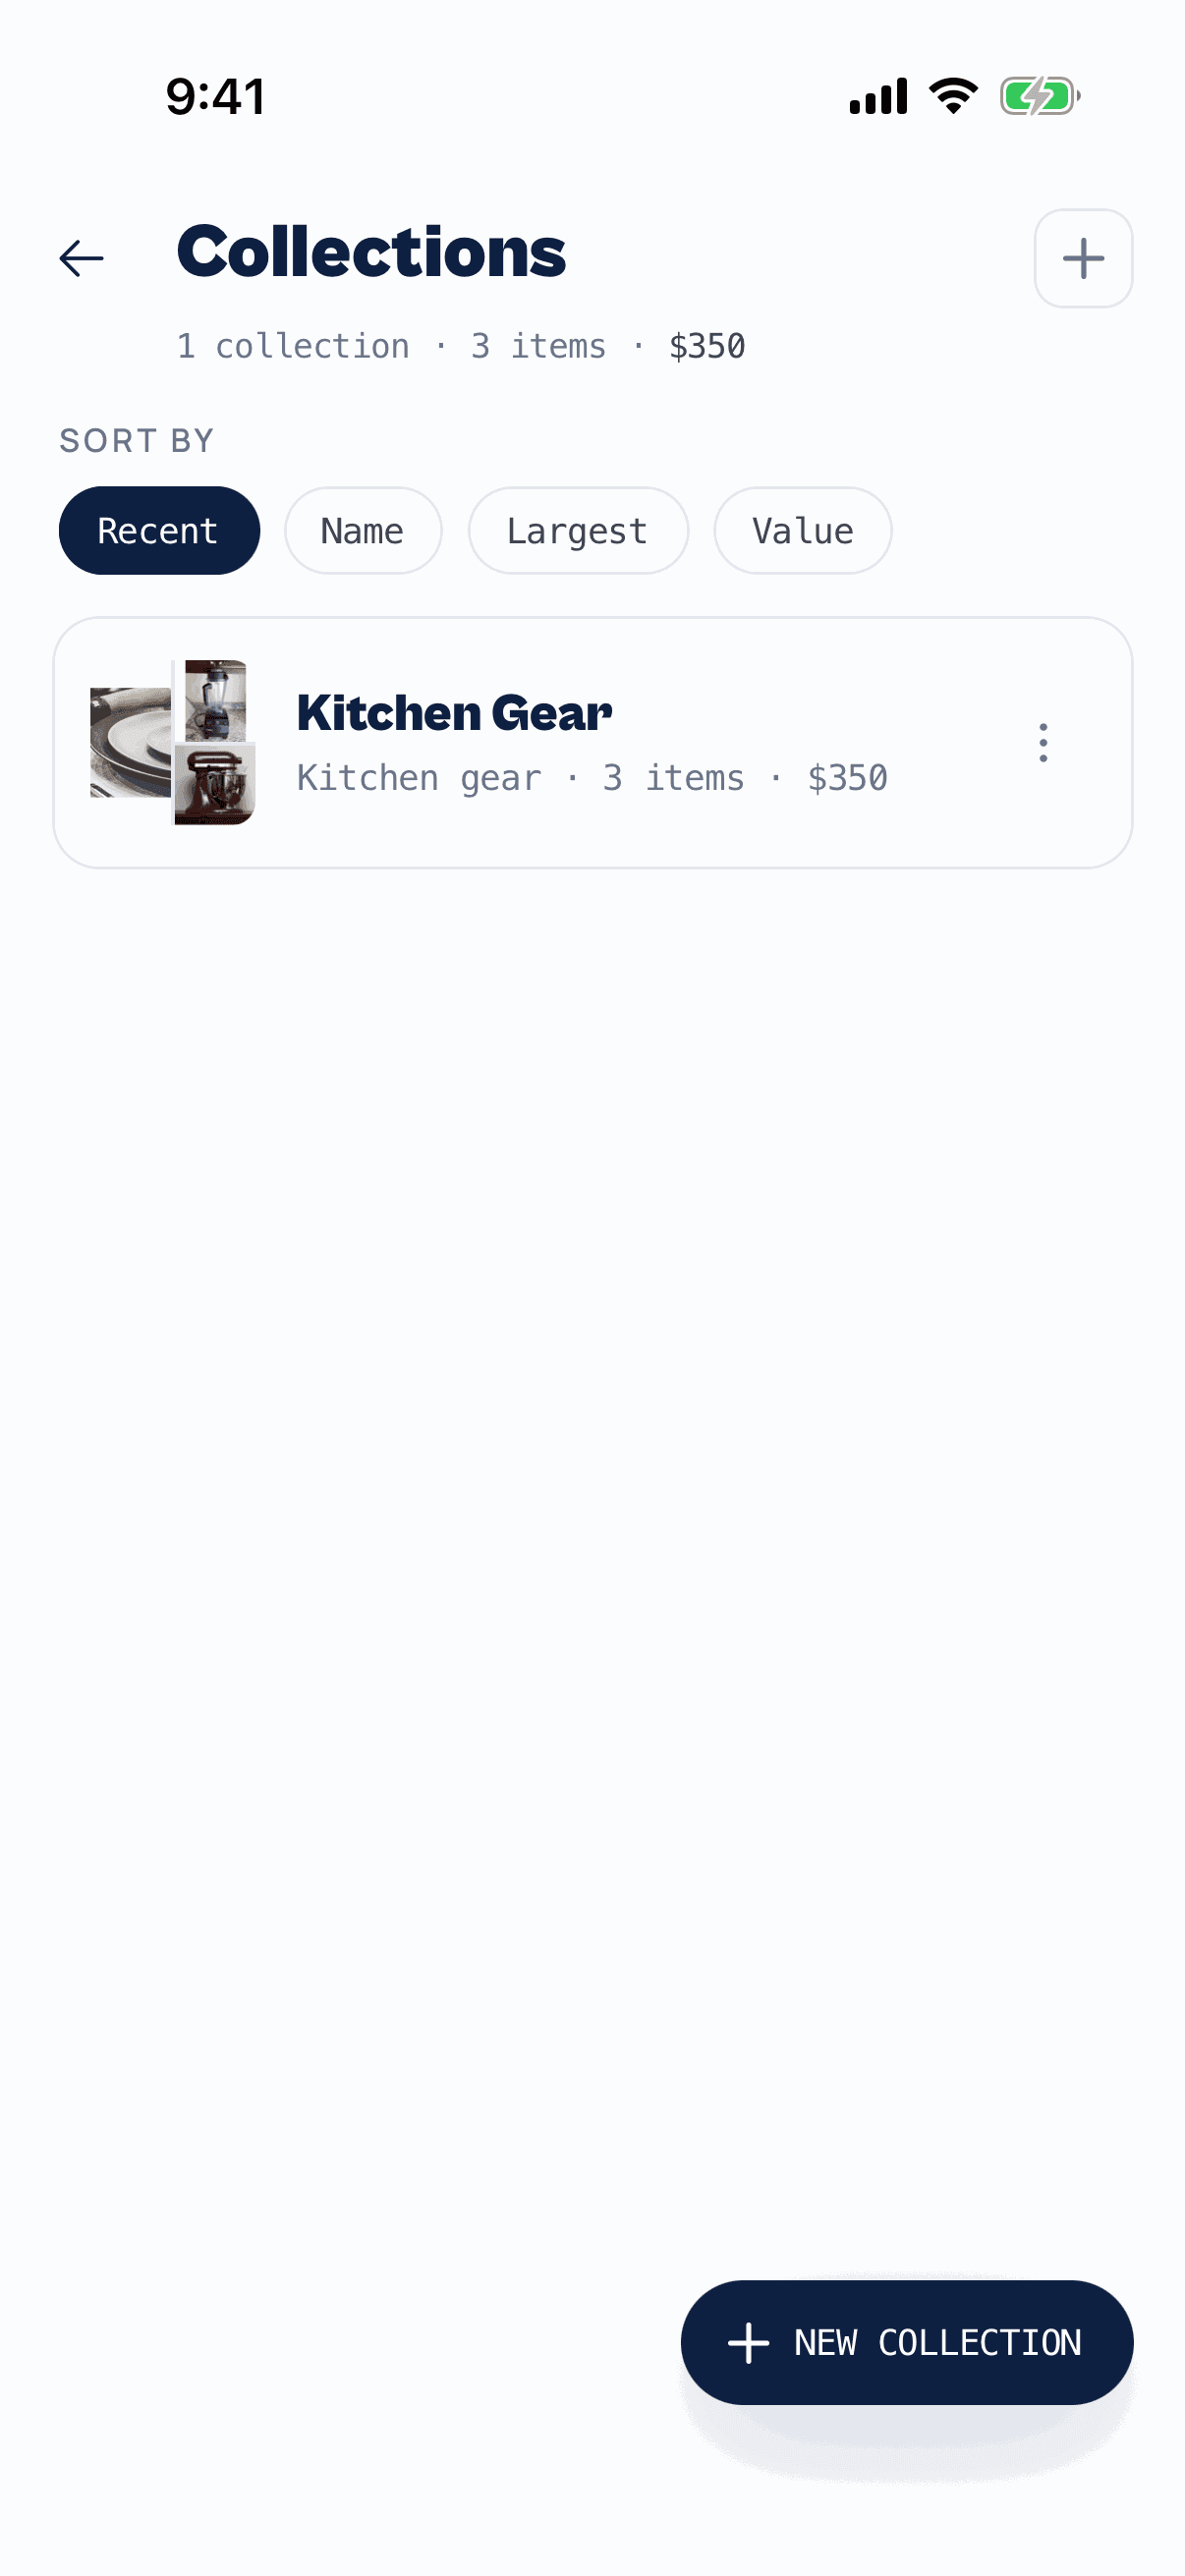 Step 09
See all your collections
The Collections screen lists every collection with its item count and value. Sort by Recent, Name, Largest or Value, and use New collection to make another.
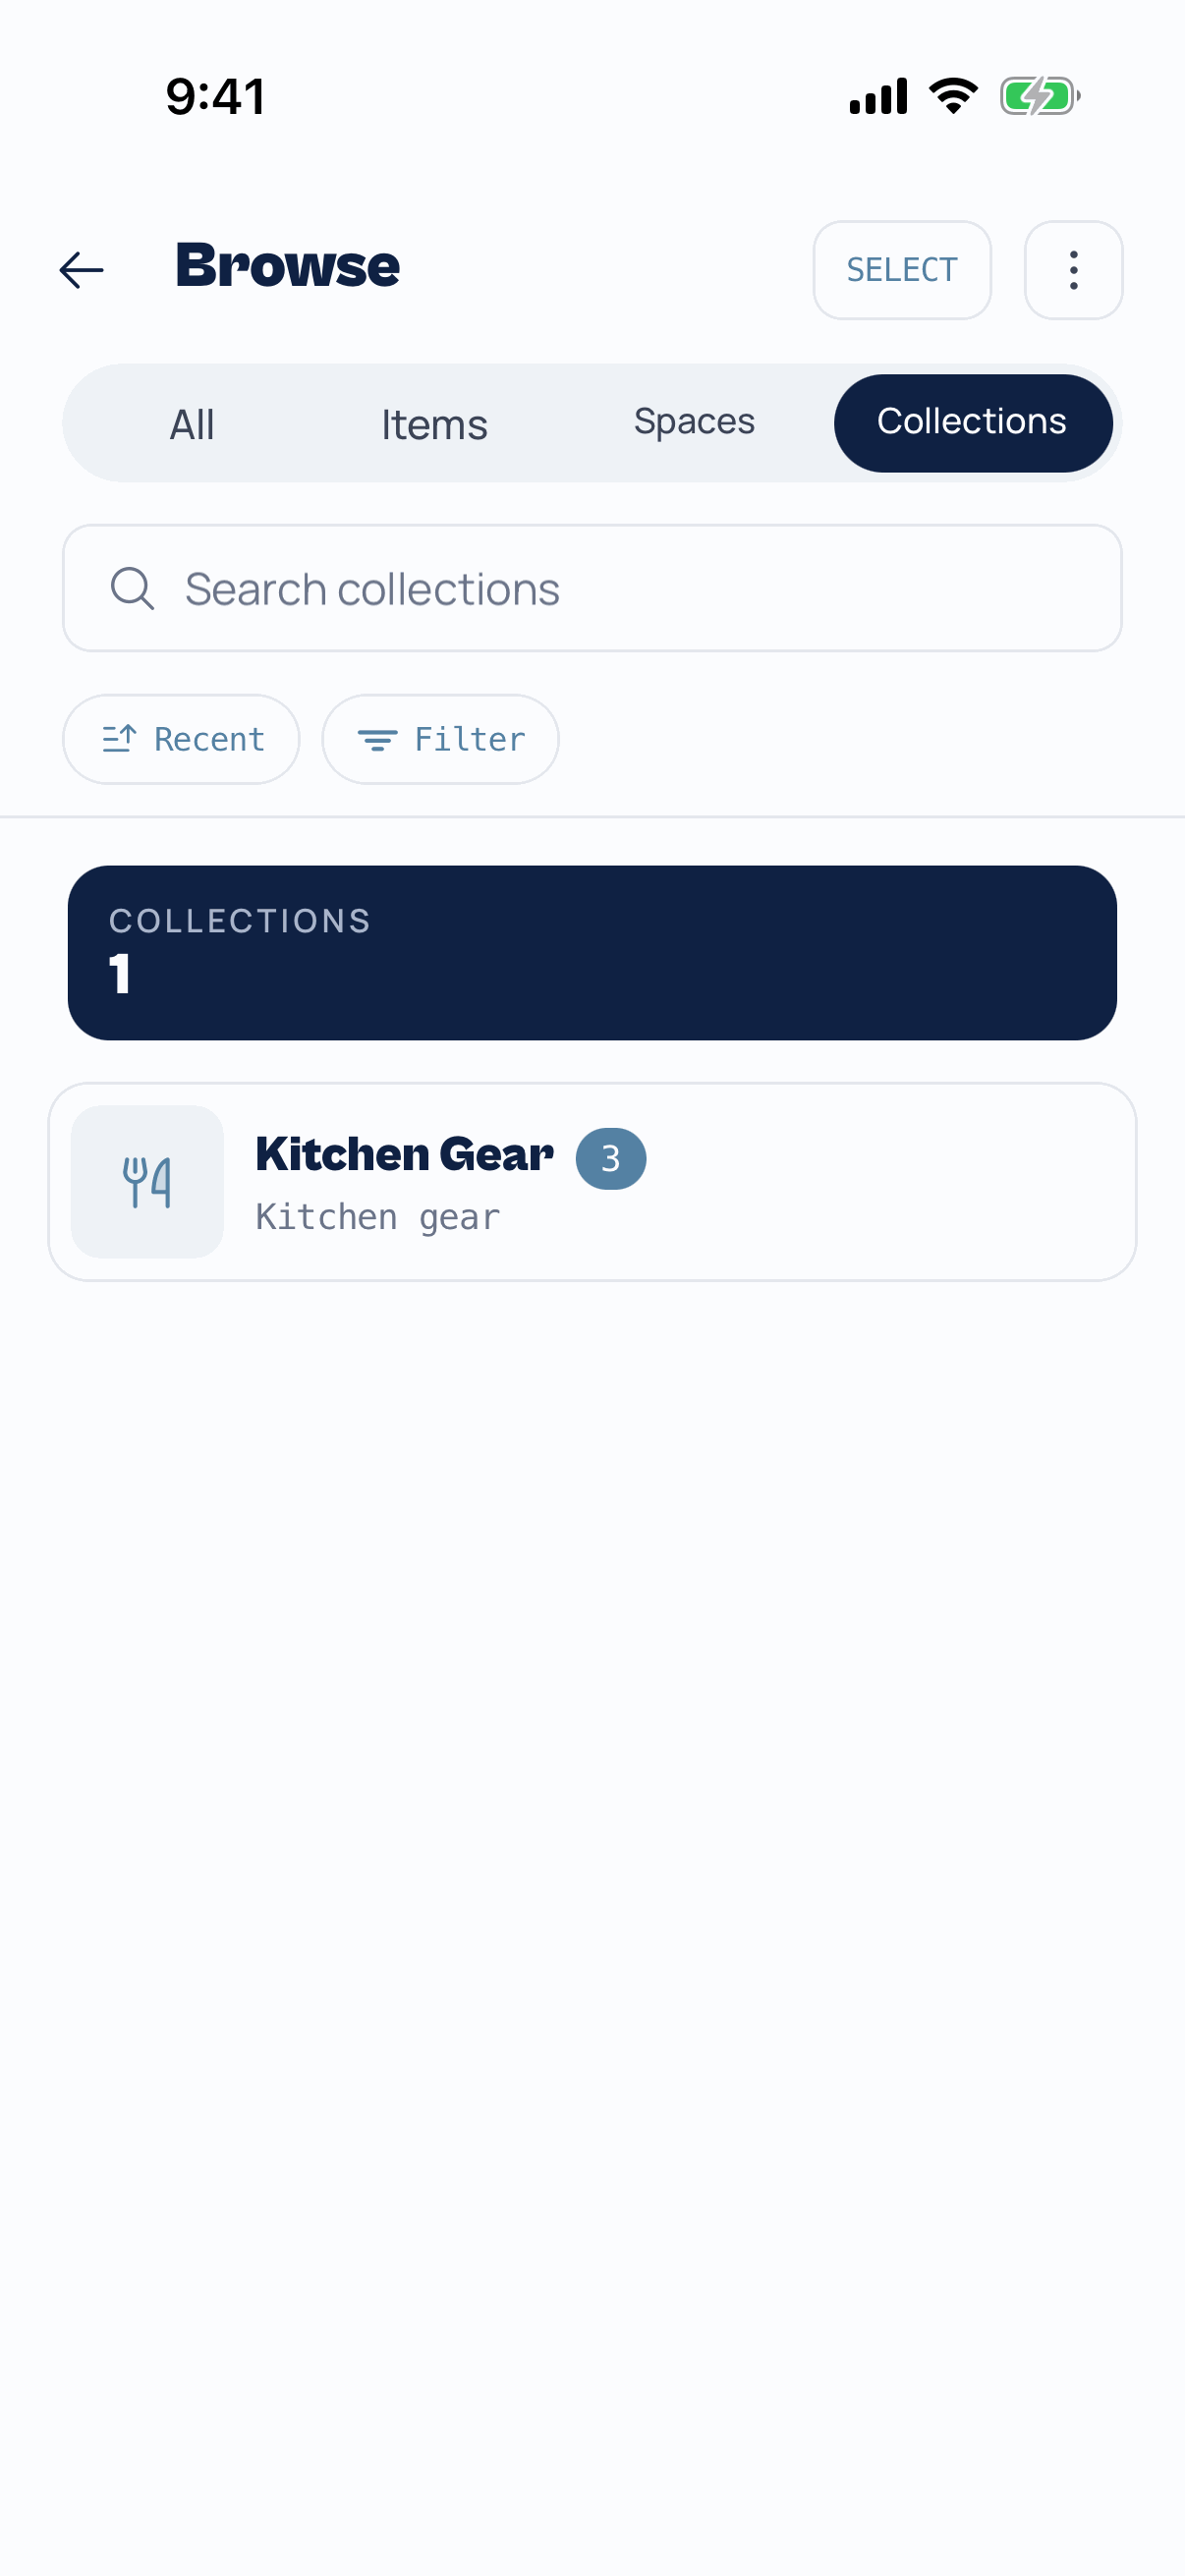 Step 10
Find them in Browse
In Browse, the Collections tab lists them too. On the Items tab, open Filter and pick a collection to see only its items, combined with any other filters you like.
Edit, share or delete
Collections are private until you share one. Sharing gives it a public page with a link you can send to anyone.
 Step 11
Open the ⋮ menu
On the collection's page, tap ⋮ in the top corner. Edit collection changes the name or type. Delete collection removes the collection only. Your items stay put, in the spaces they're in.
 Step 12
Share it with a link
Tap Share collection, then Create a share link. Anyone with the link can see the names, photos and values of the items in it. Copy the link and send it.
Changed your mind? Open the same sheet and tap Stop sharing. The link stops working straight away.
TipSharing a collection also makes its items public in your gallery. Stopping the link doesn't hide them again; the same sheet has a separate option for that.
Keep going
How to add items
One thing at a time or a whole shelf at once, from the camera, your photo library, or a barcode.
Read →How to browse and find things
Search, sort and filter everything you own, walk your spaces, and change many items at once.
Read →Stuck on something else? The support page answers the common questions, and you can write to us from Settings in the app.
Start your first collection.
Cards, records, tools, the good china. Group them, see what they're worth, and share the page. Free to start.