How to add items.
Add one thing with a few close-up photos, or a whole shelf at once from the camera or your photo library. Either way, Myne names each item, files it in a space and estimates what it's worth. Here's every step, with screenshots.
Open the add menu
Everything starts from the same place. You choose whether the photos you're about to take are of one thing or of many things.
 Step 01
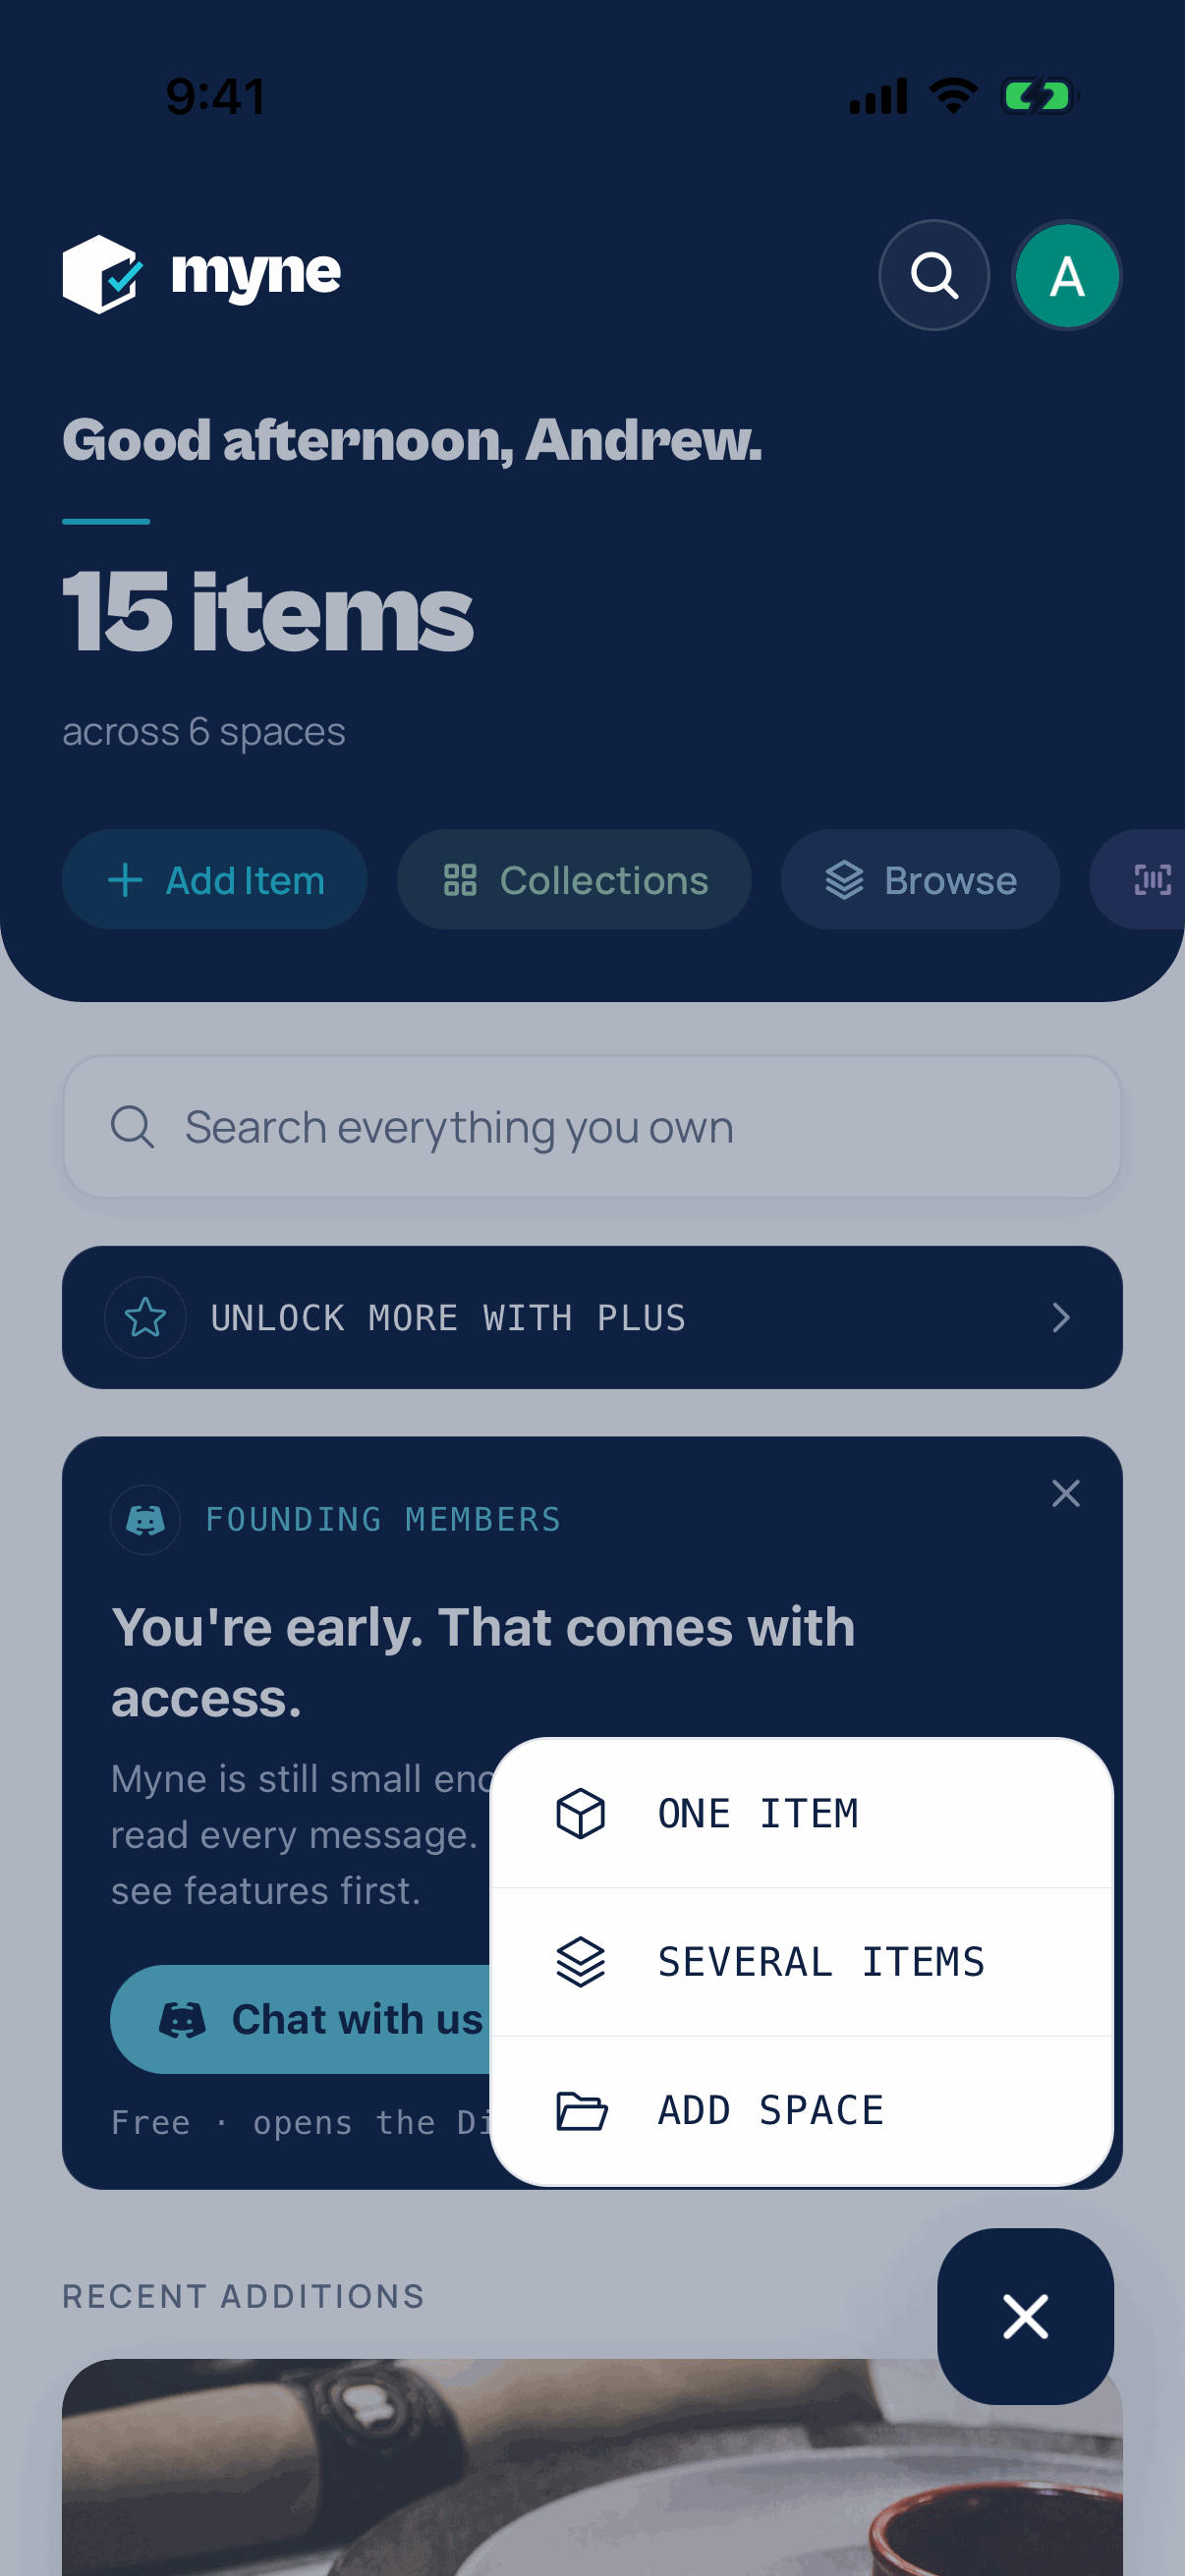
Tap the + button on Home
The round + sits in the bottom corner of Home. Tap it and pick One item or Several items. Add Item at the top of Home skips the menu and opens the camera, where the same switch sits under the viewfinder.
One item: every photo you take is of the same thing, and they become a single entry with several photos. Several items: each photo becomes its own entry. Use it to clear a shelf or a whole drawer in one go.
TipAdd space is for making a new room, closet or box to put things in. You can also make one later, while you add.
Add a single item
Best for anything valuable or easy to confuse with something else: a watch, a camera, a guitar. A few angles help Myne get the exact model.
 Step 02
Take a few photos of it
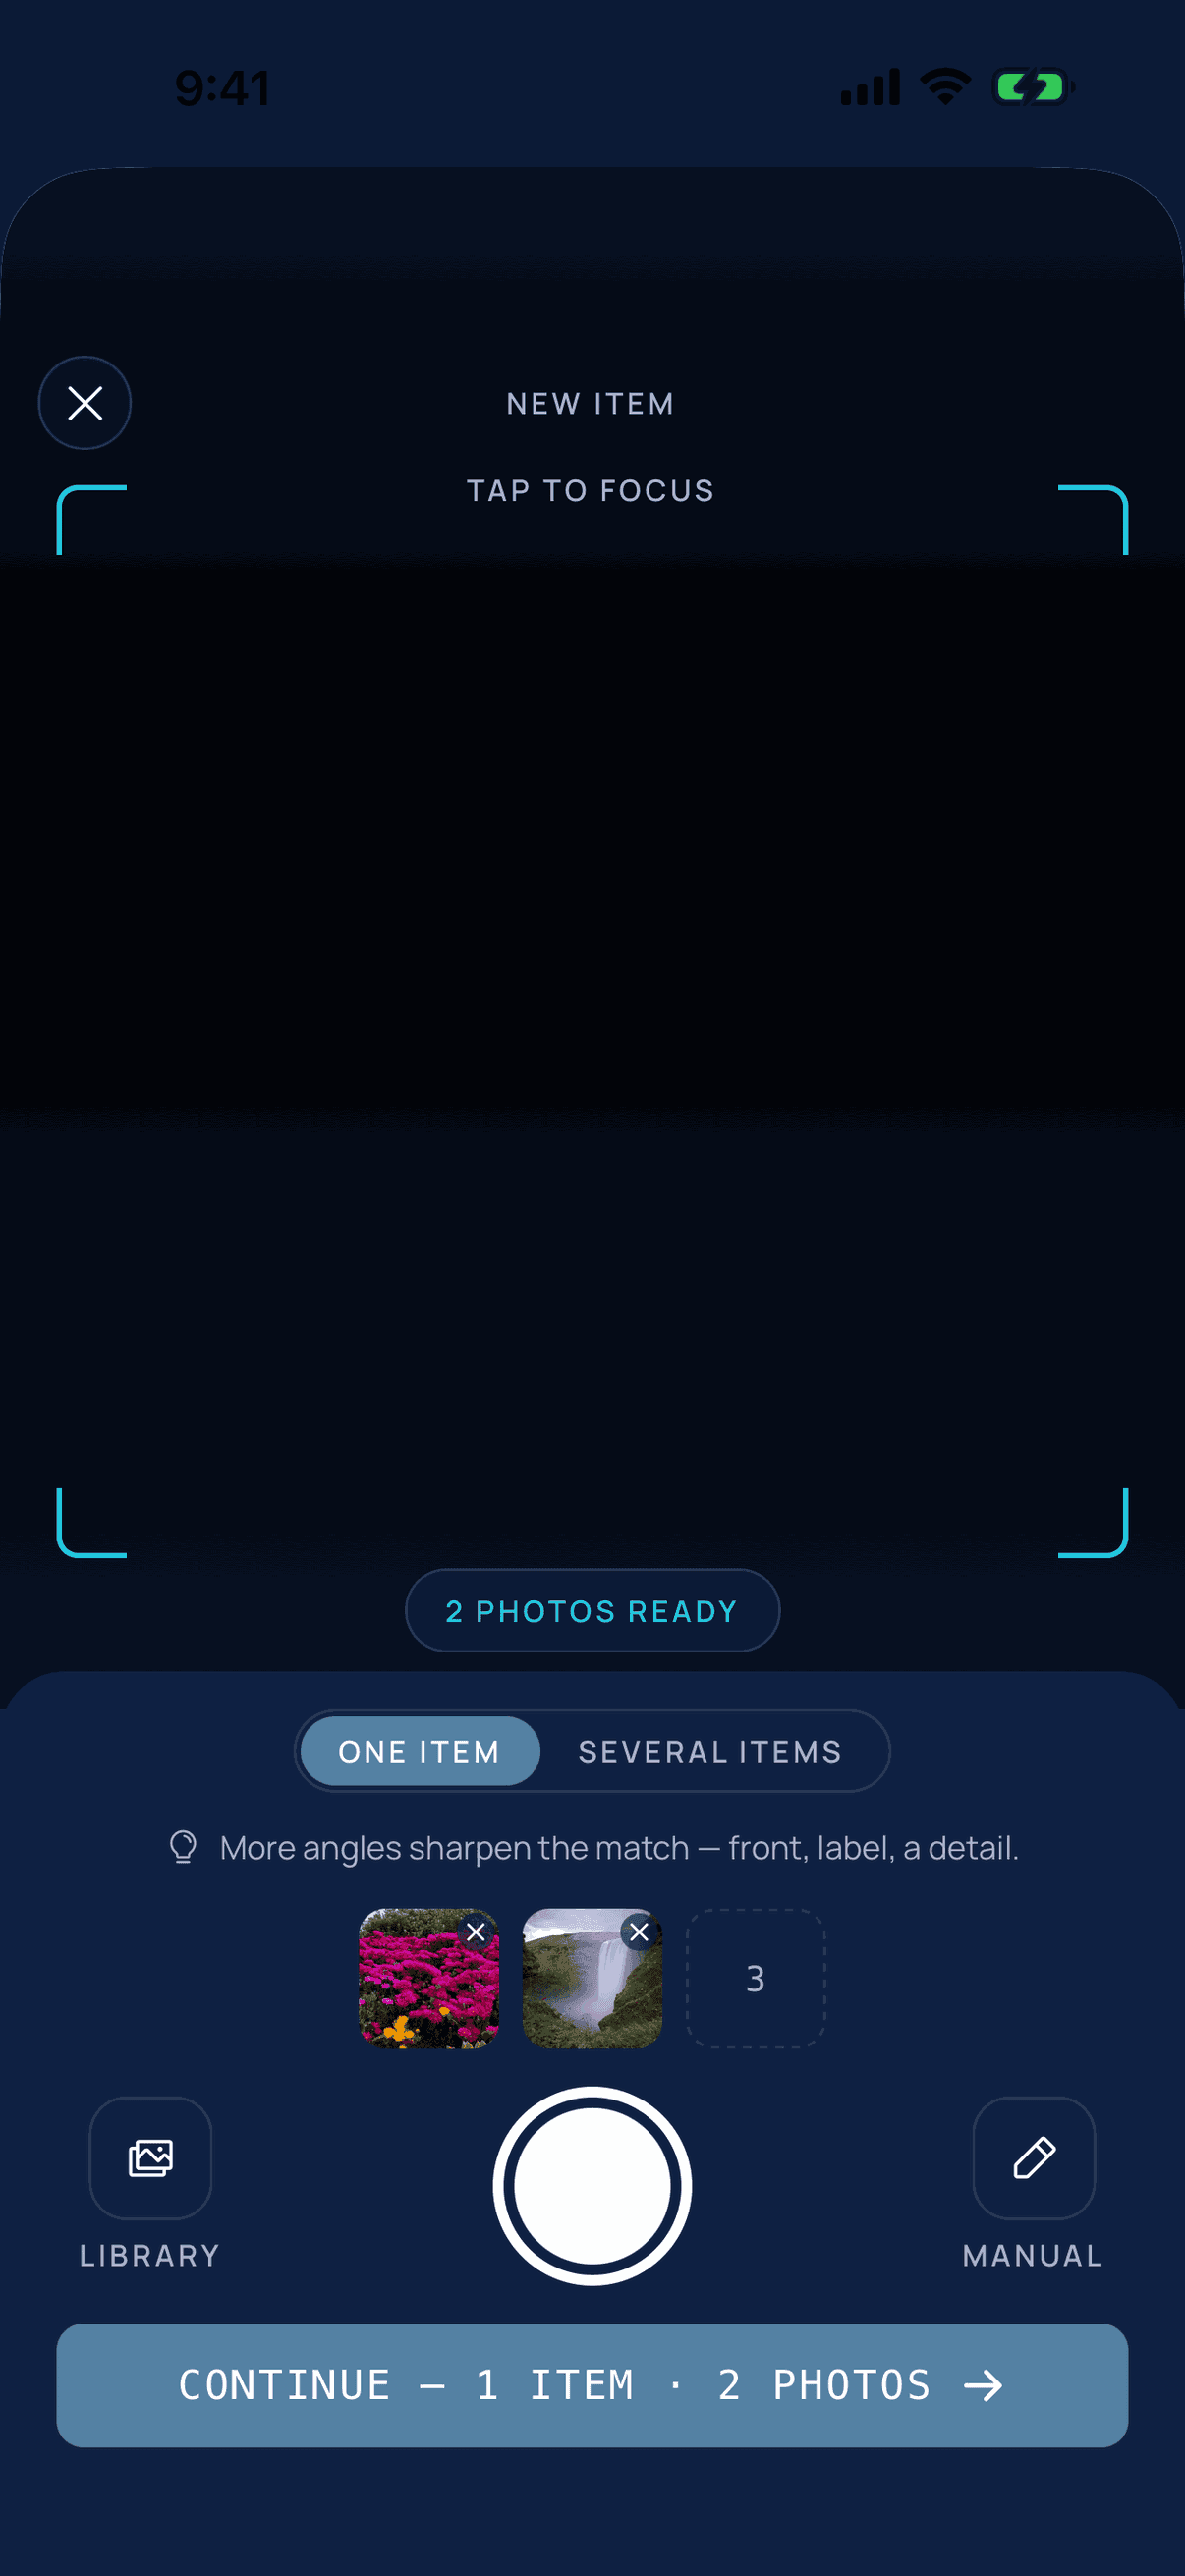
Point the camera at the item and tap the shutter. Keep going for other angles: the front, the label, the model or serial plate. One item holds up to six photos.
Tap the × on a photo in the tray to drop it. When you're happy, tap Continue.
TipTap the viewfinder to focus on small text like a model number before you take the shot.
Add many items in one go
Several items mode turns every photo into its own entry, up to 50 at a time. Take the photos with the camera, pick them from your photo library, or mix both.
 Step 03
Switch to Several items and start shooting
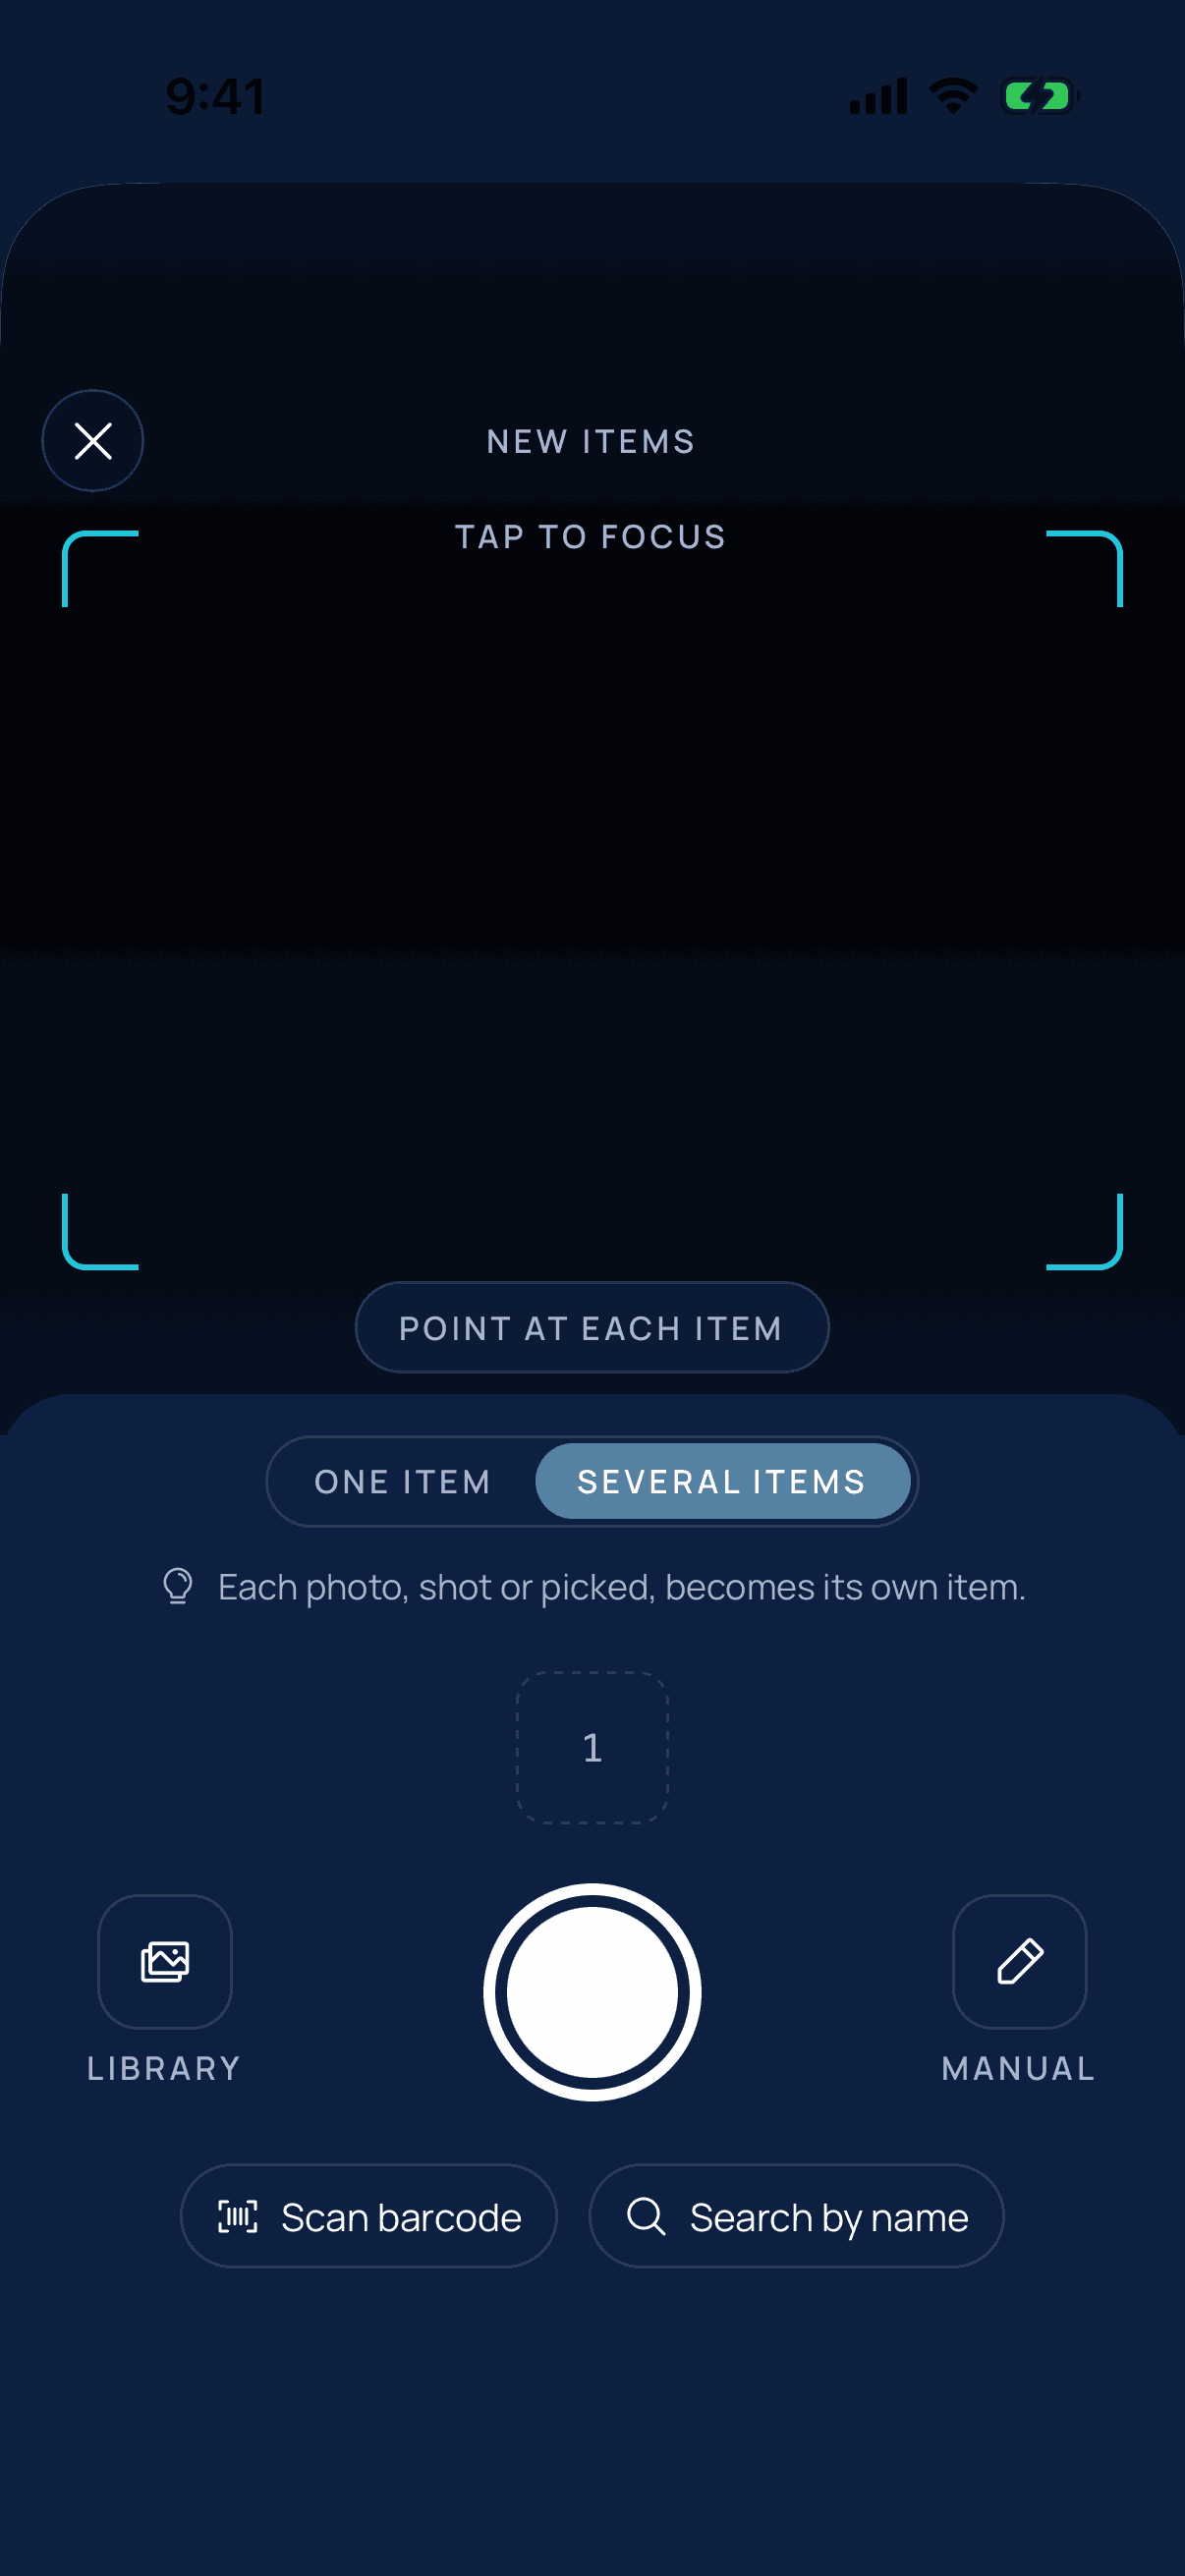
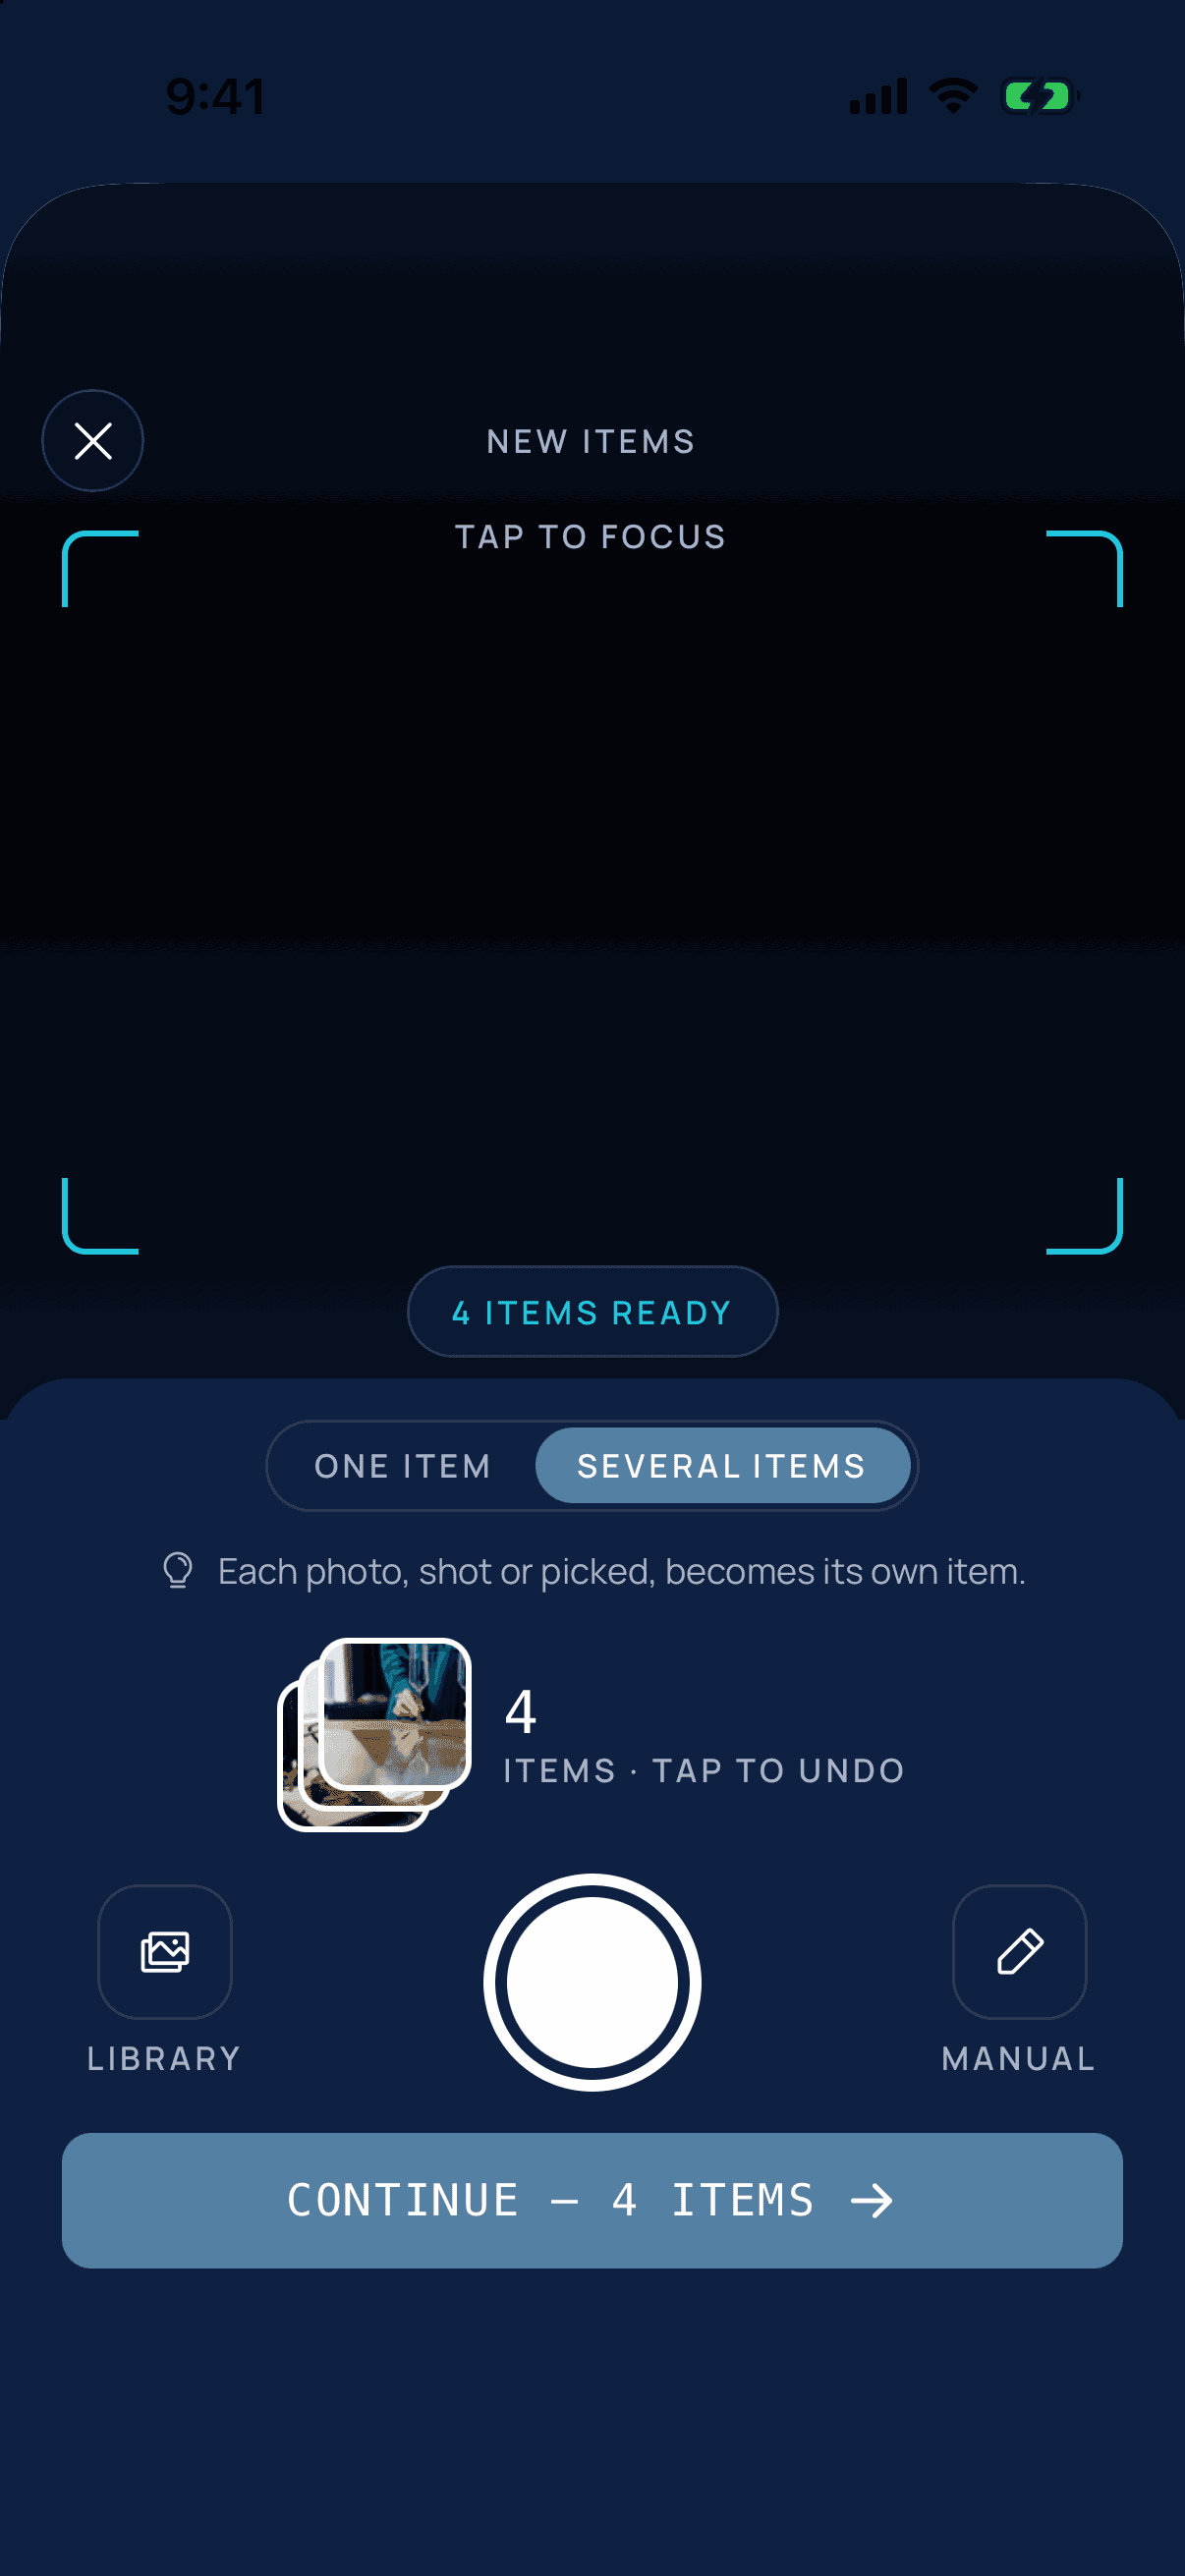
Make sure Several items is selected under the viewfinder. Then take one photo per thing: walk along the shelf, tap the shutter, move to the next item.
The counter shows how many items you've got so far. Nothing is uploaded or identified yet, so you can go as fast as you like.
 Step 04
Or pick photos from your library
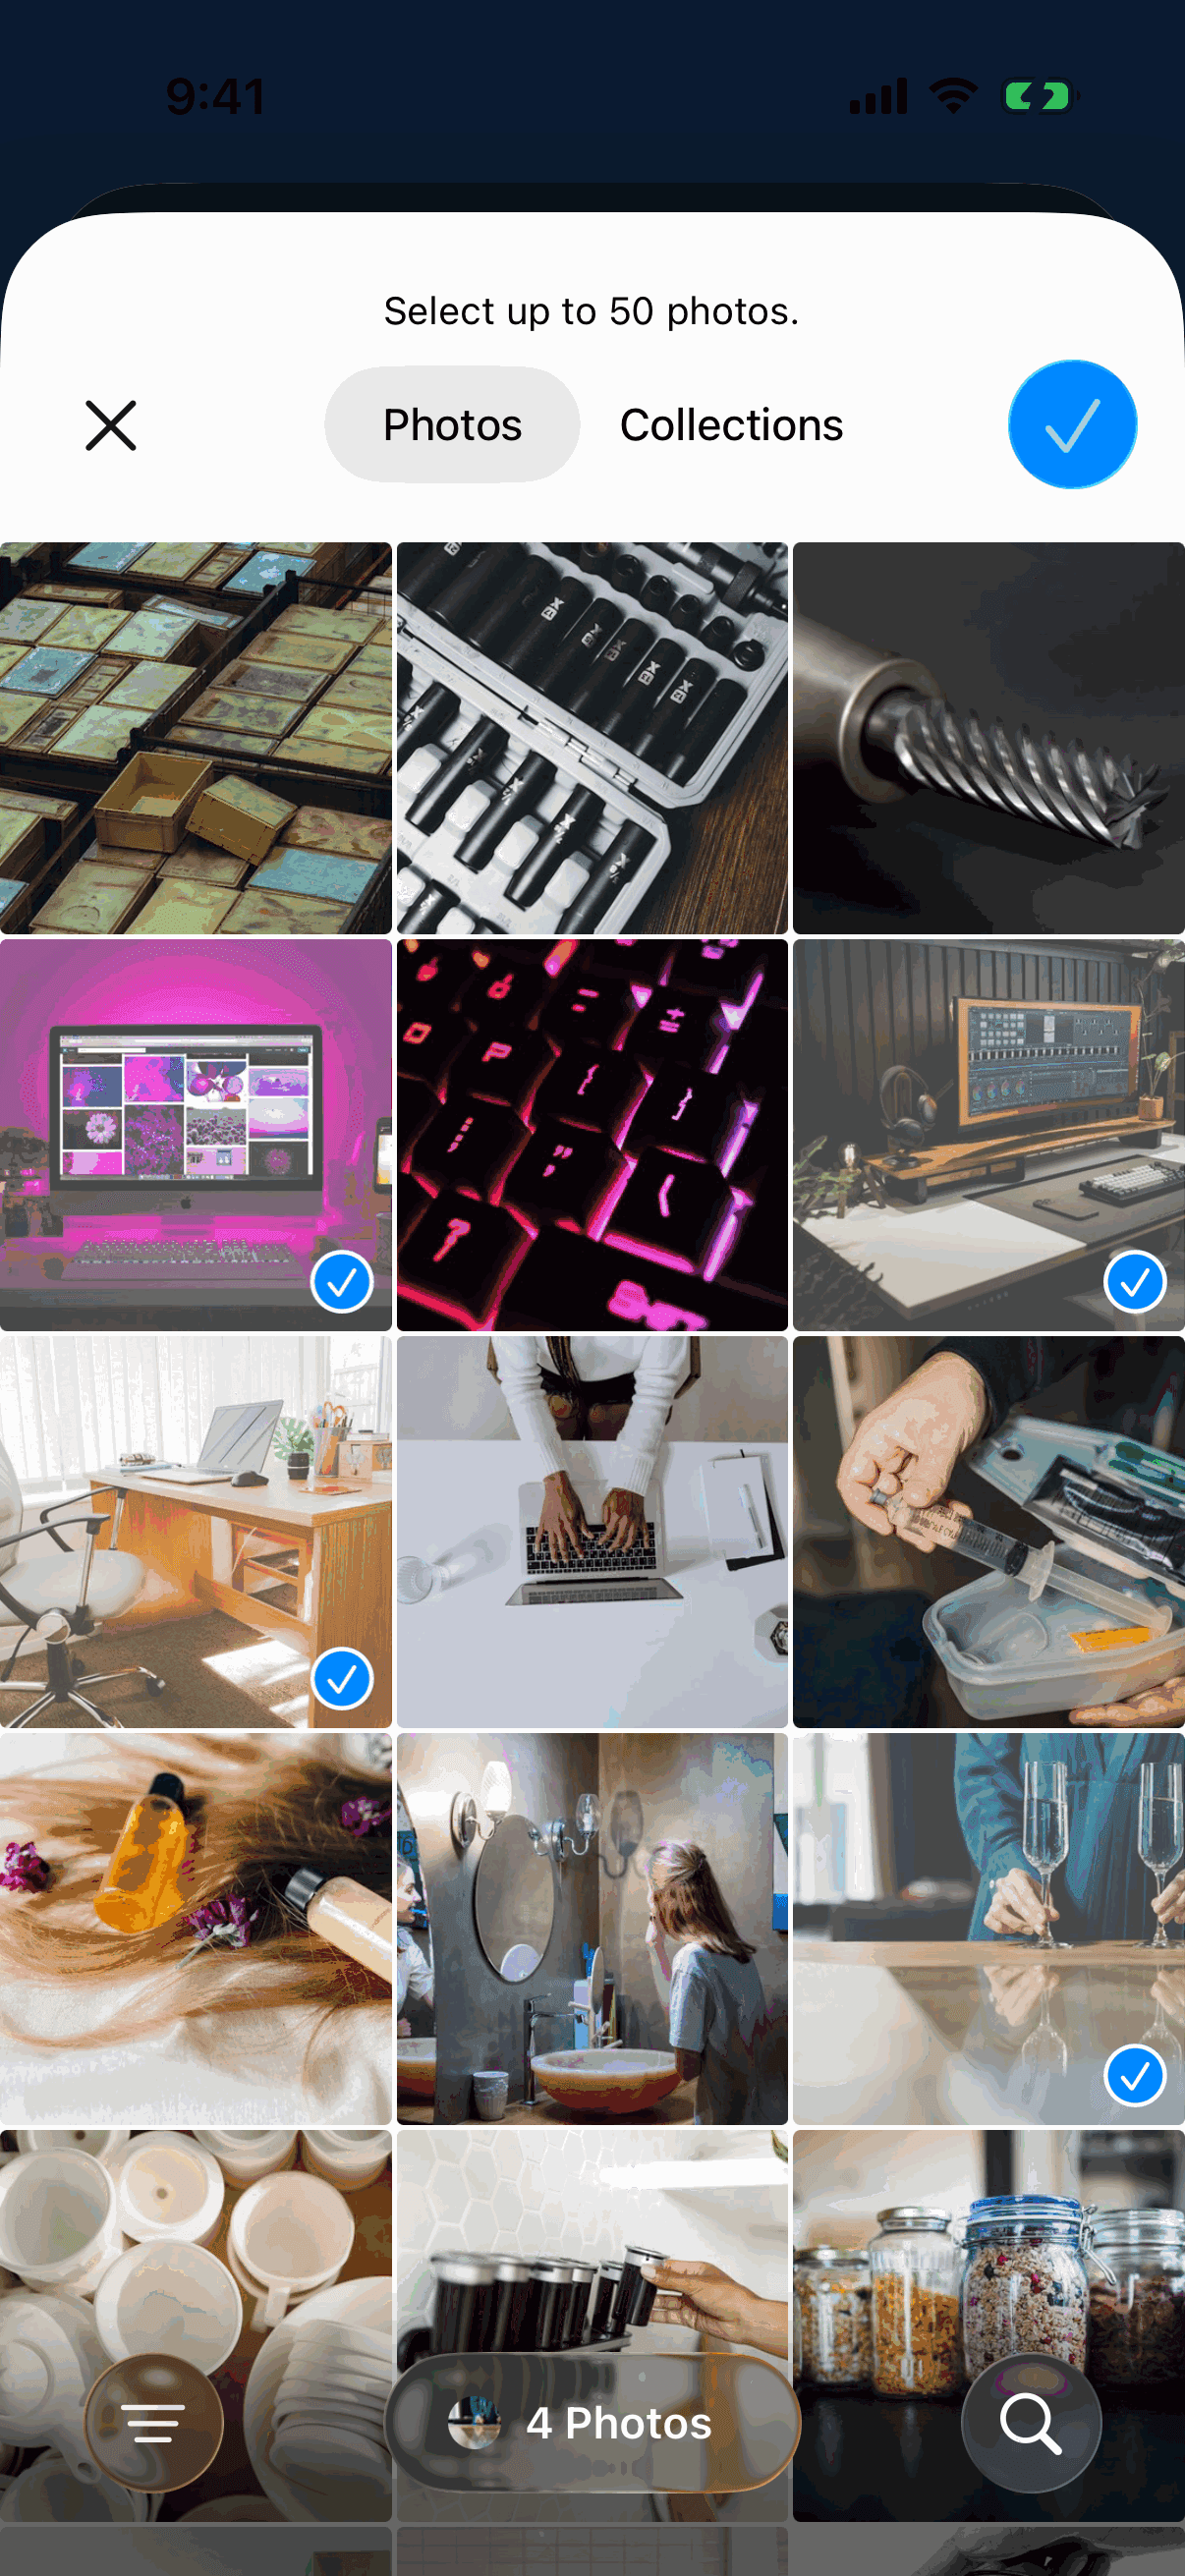
Already took the pictures? Tap Library and select up to 50 photos, then tap the check mark.
Library photos land in the same tray as camera shots, and the One item / Several items switch applies to them too. In One item mode, everything you pick becomes one item with several photos.
TipA good routine for a big room: take all the photos with the iPhone Camera app first, then add them to Myne in one batch later.
 Step 05
Check the tray, then continue
The tray shows the photos you've lined up, and the button tells you how many items you're about to make. Tap the tray to undo the last one. Tap Continue when you're done.
Confirm before anything is saved
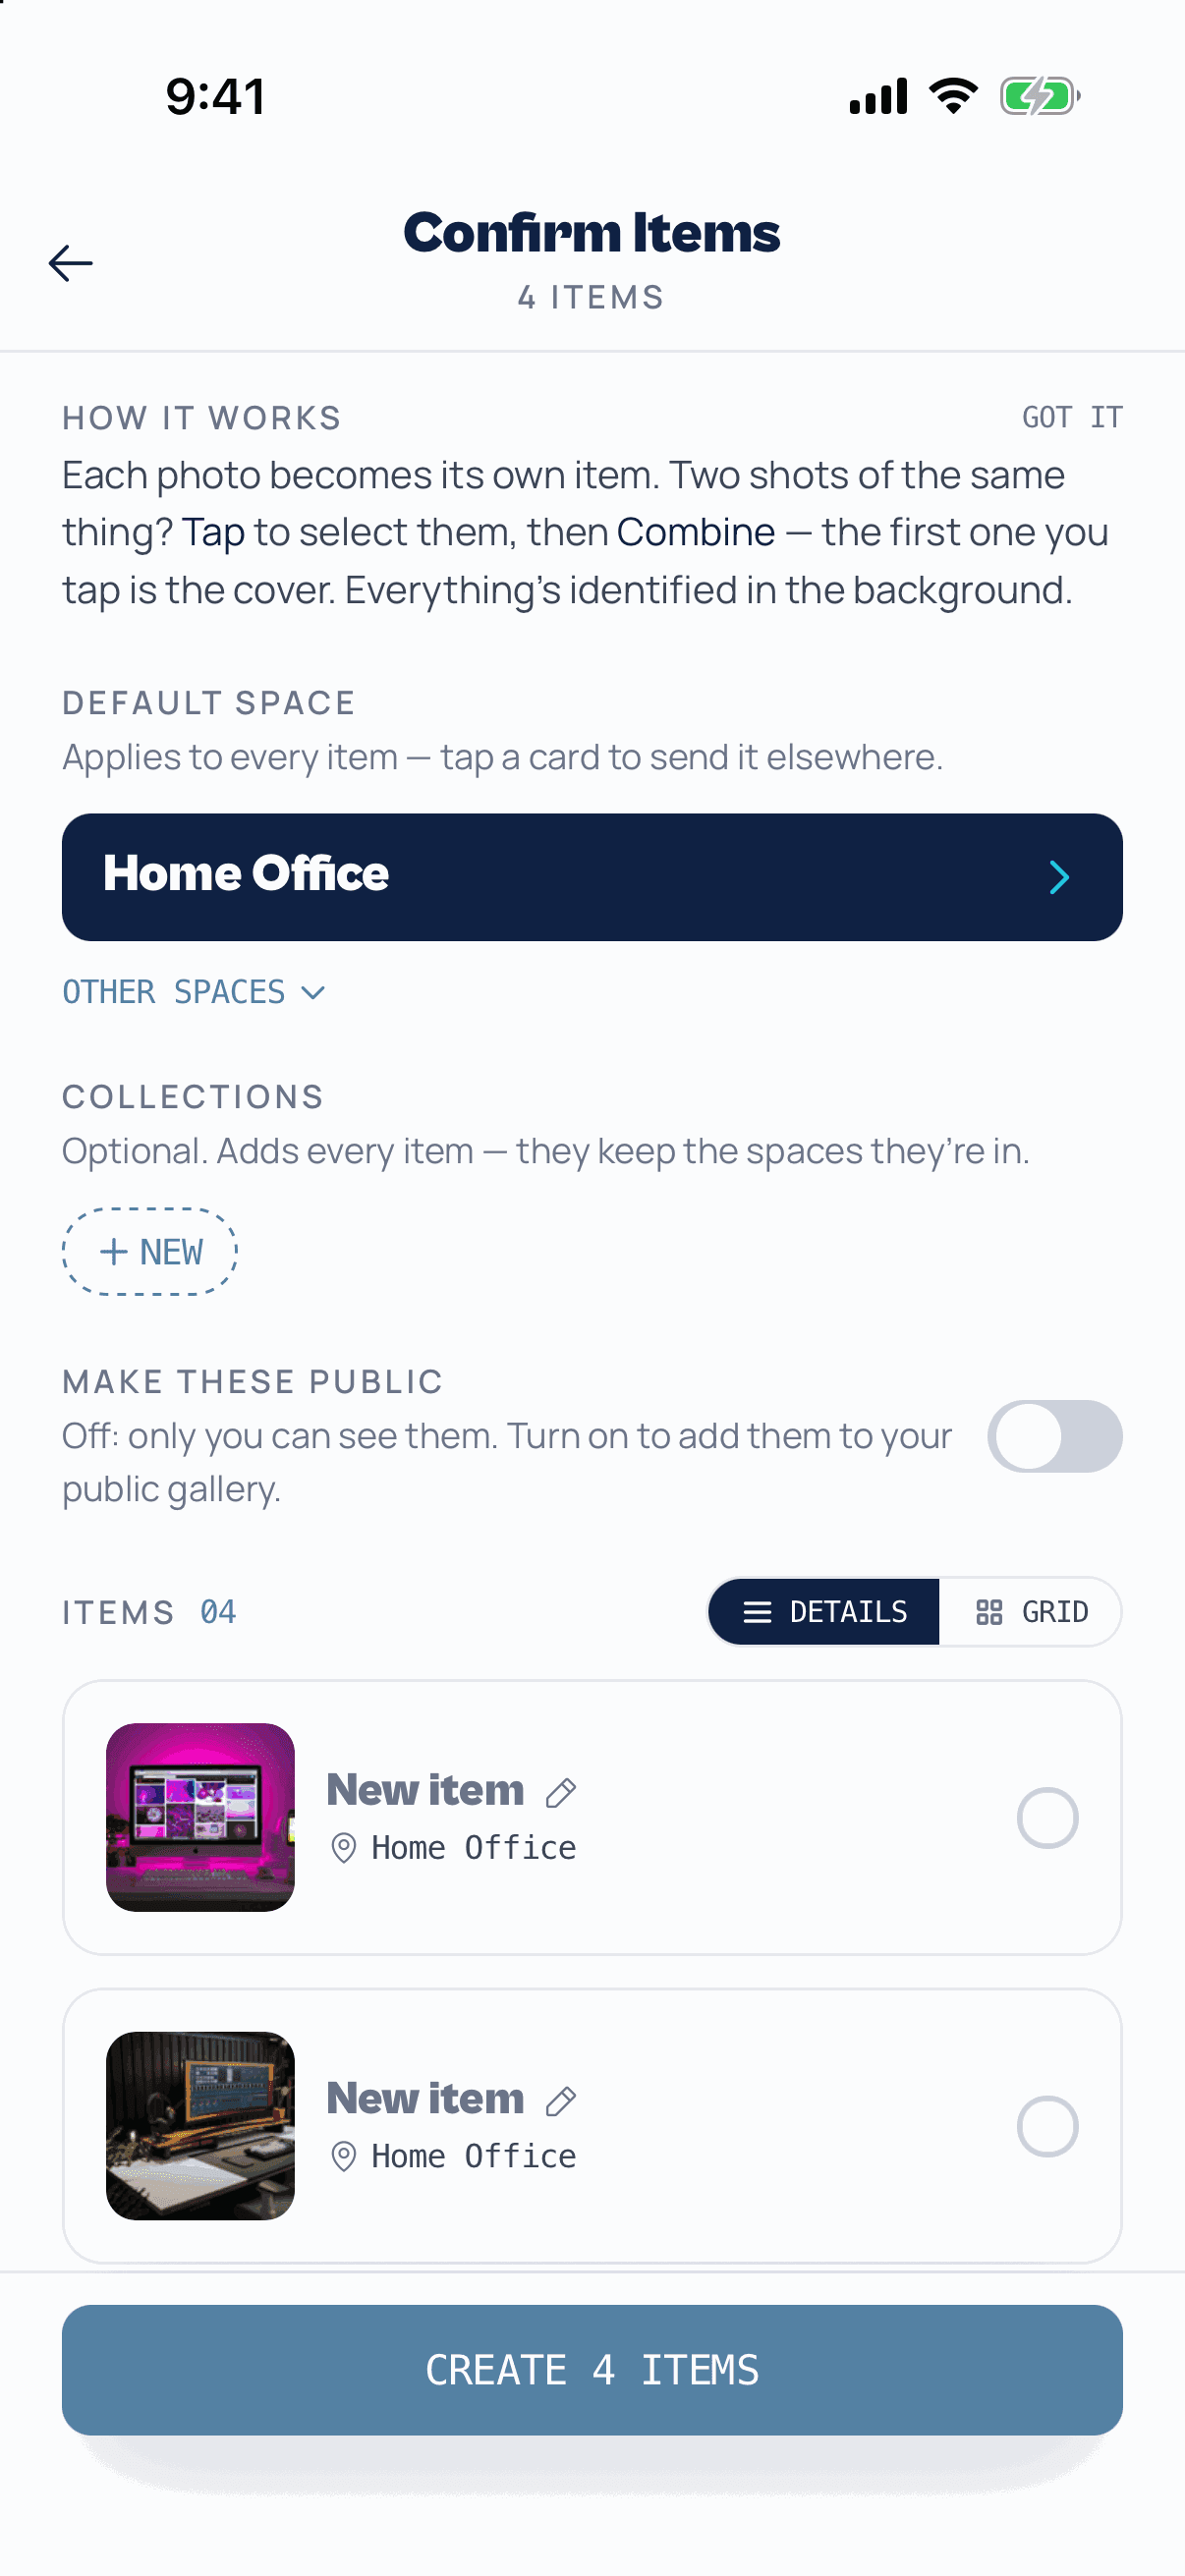
Whichever way you added photos, you end up on Confirm Items. This is where you decide where things go. Myne hasn't identified anything yet, so there's nothing to fix here, only choices to make.
 Step 06
Choose where it all goes
Default space is where every item will be filed: Home Office, Kitchen, the hall closet. Tap it to pick another space or make a new one.
Below it you can drop everything into a collection and choose whether the items show in your public gallery. Both are optional, and private is the default.
 Step 07
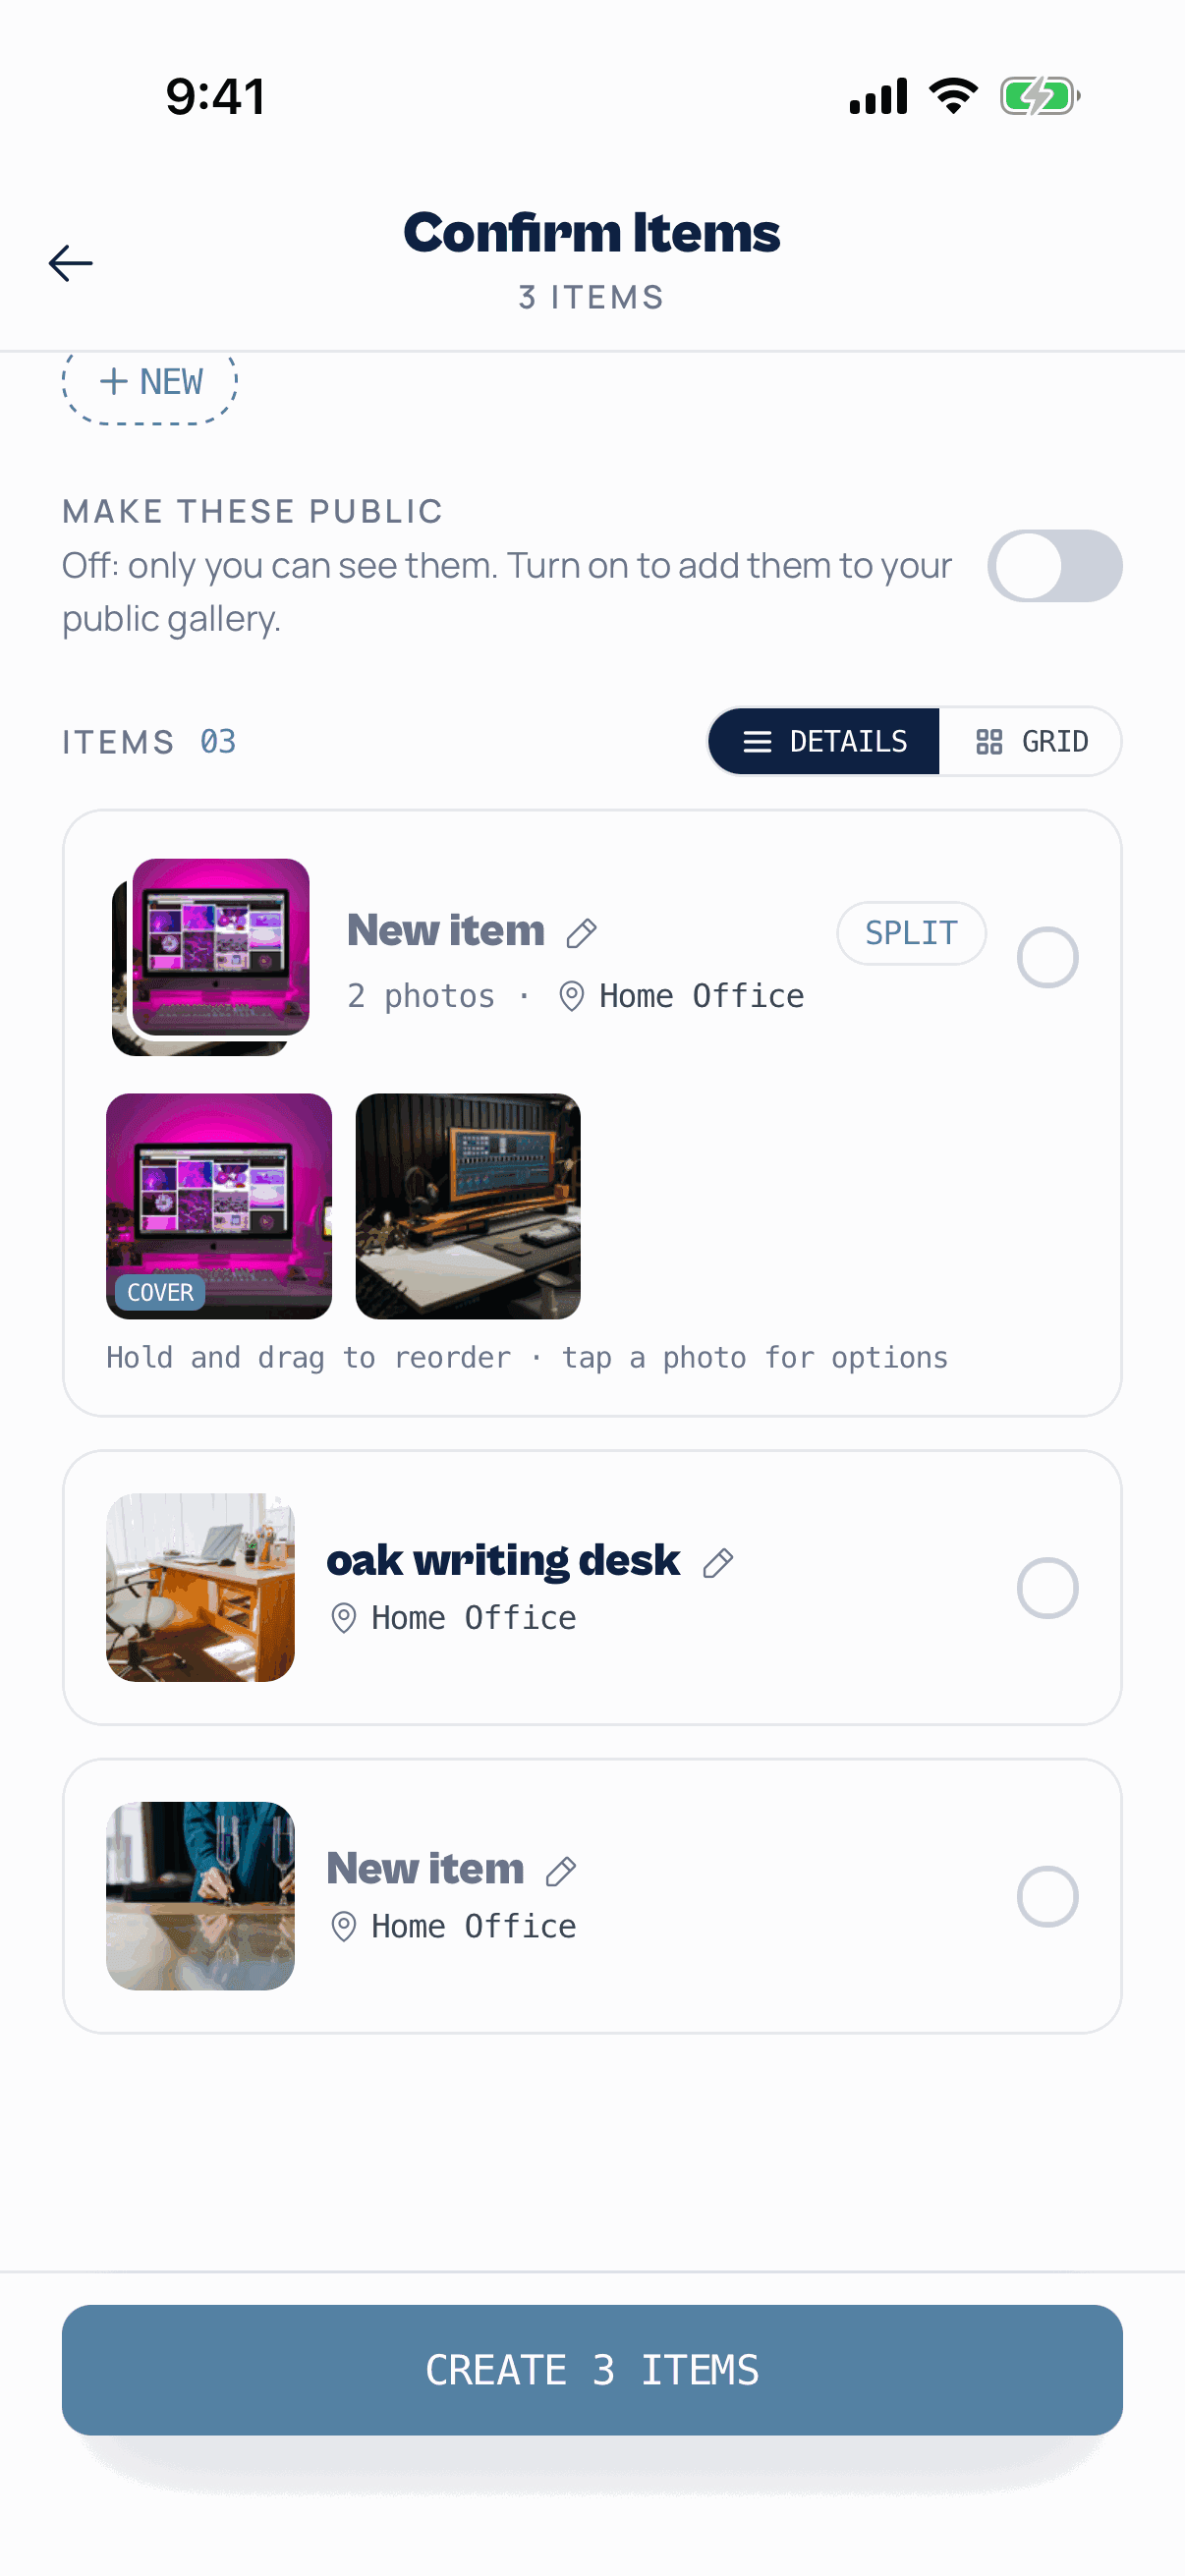
Name an item, or give Myne a hint
You don't have to name anything. Myne works it out from the photo. But if you know what it is, tap New item and type a name or a hint such as "oak writing desk" or "sony headphones". The hint steers the identification.
 Step 08
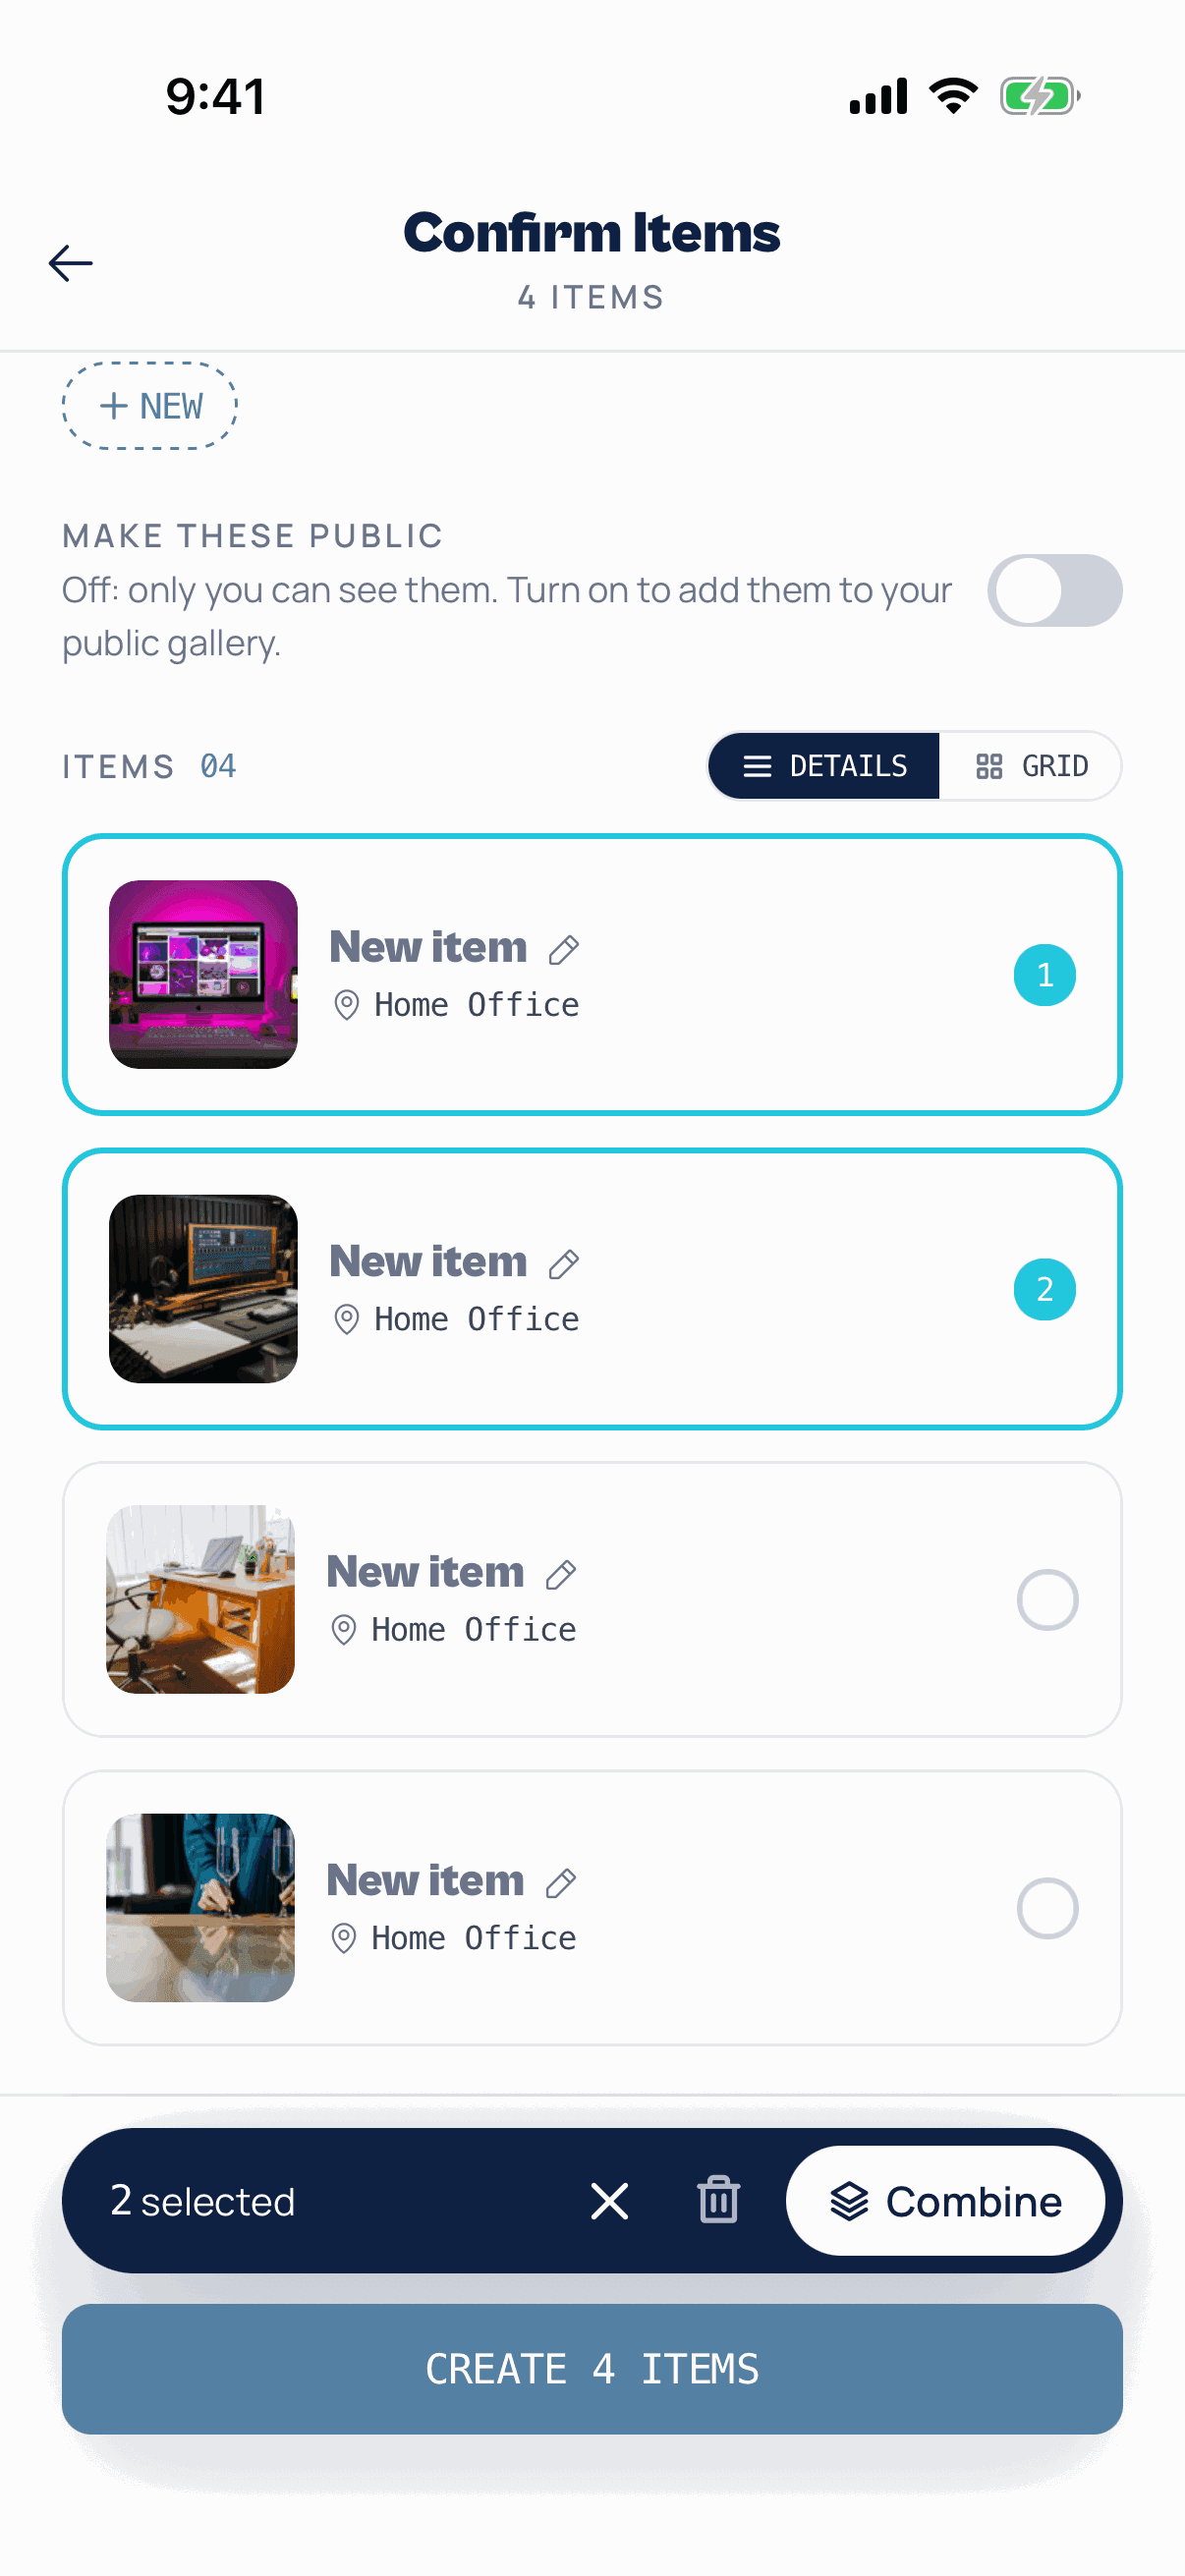
Combine two photos of the same thing
Took two photos of the same item in Several items mode? Tap both cards to select them, then tap Combine. The first one you tapped becomes the cover photo.
A combined card shows its photos and a Split button if you change your mind. You can also delete the selected cards from the same bar.
 Step 09
Send one item somewhere else
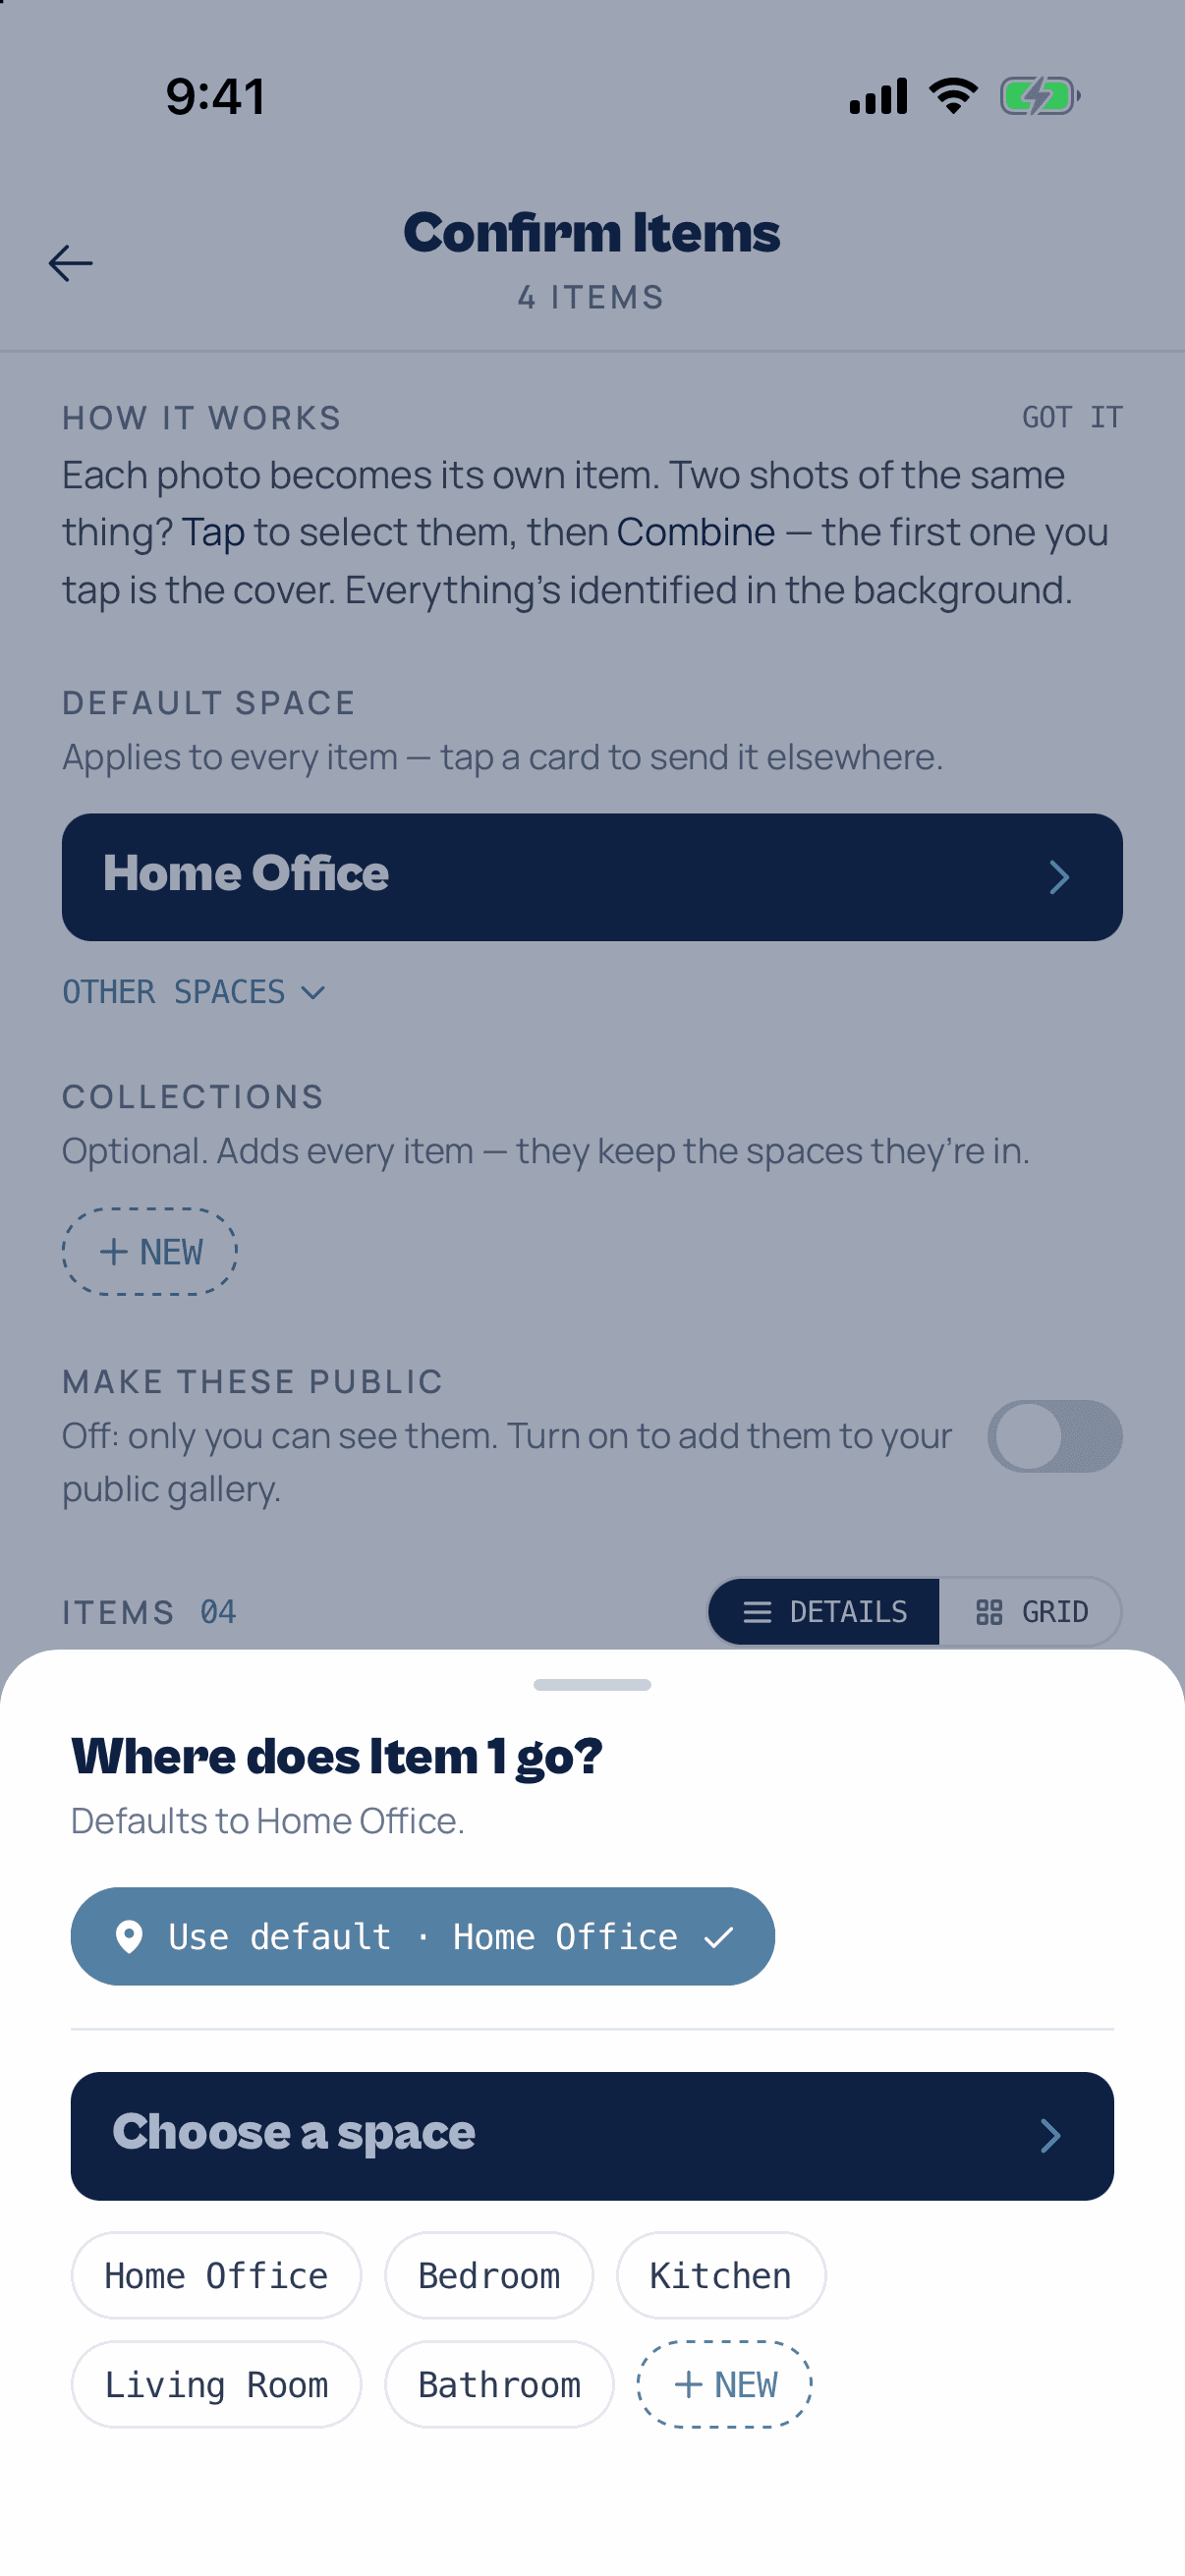
Each card shows the space it's going to. Tap that line to send just that item elsewhere, say the blender to the Kitchen while the rest stay in the Home Office.
Use default puts it back with the others. Then tap Create to save everything.
Let Myne identify everything
After you tap Create, the photos upload and Myne identifies each item in the background: what it is, a category and an estimated value. You don't have to wait for it.
 Step 10
Watch it work, or go do something else
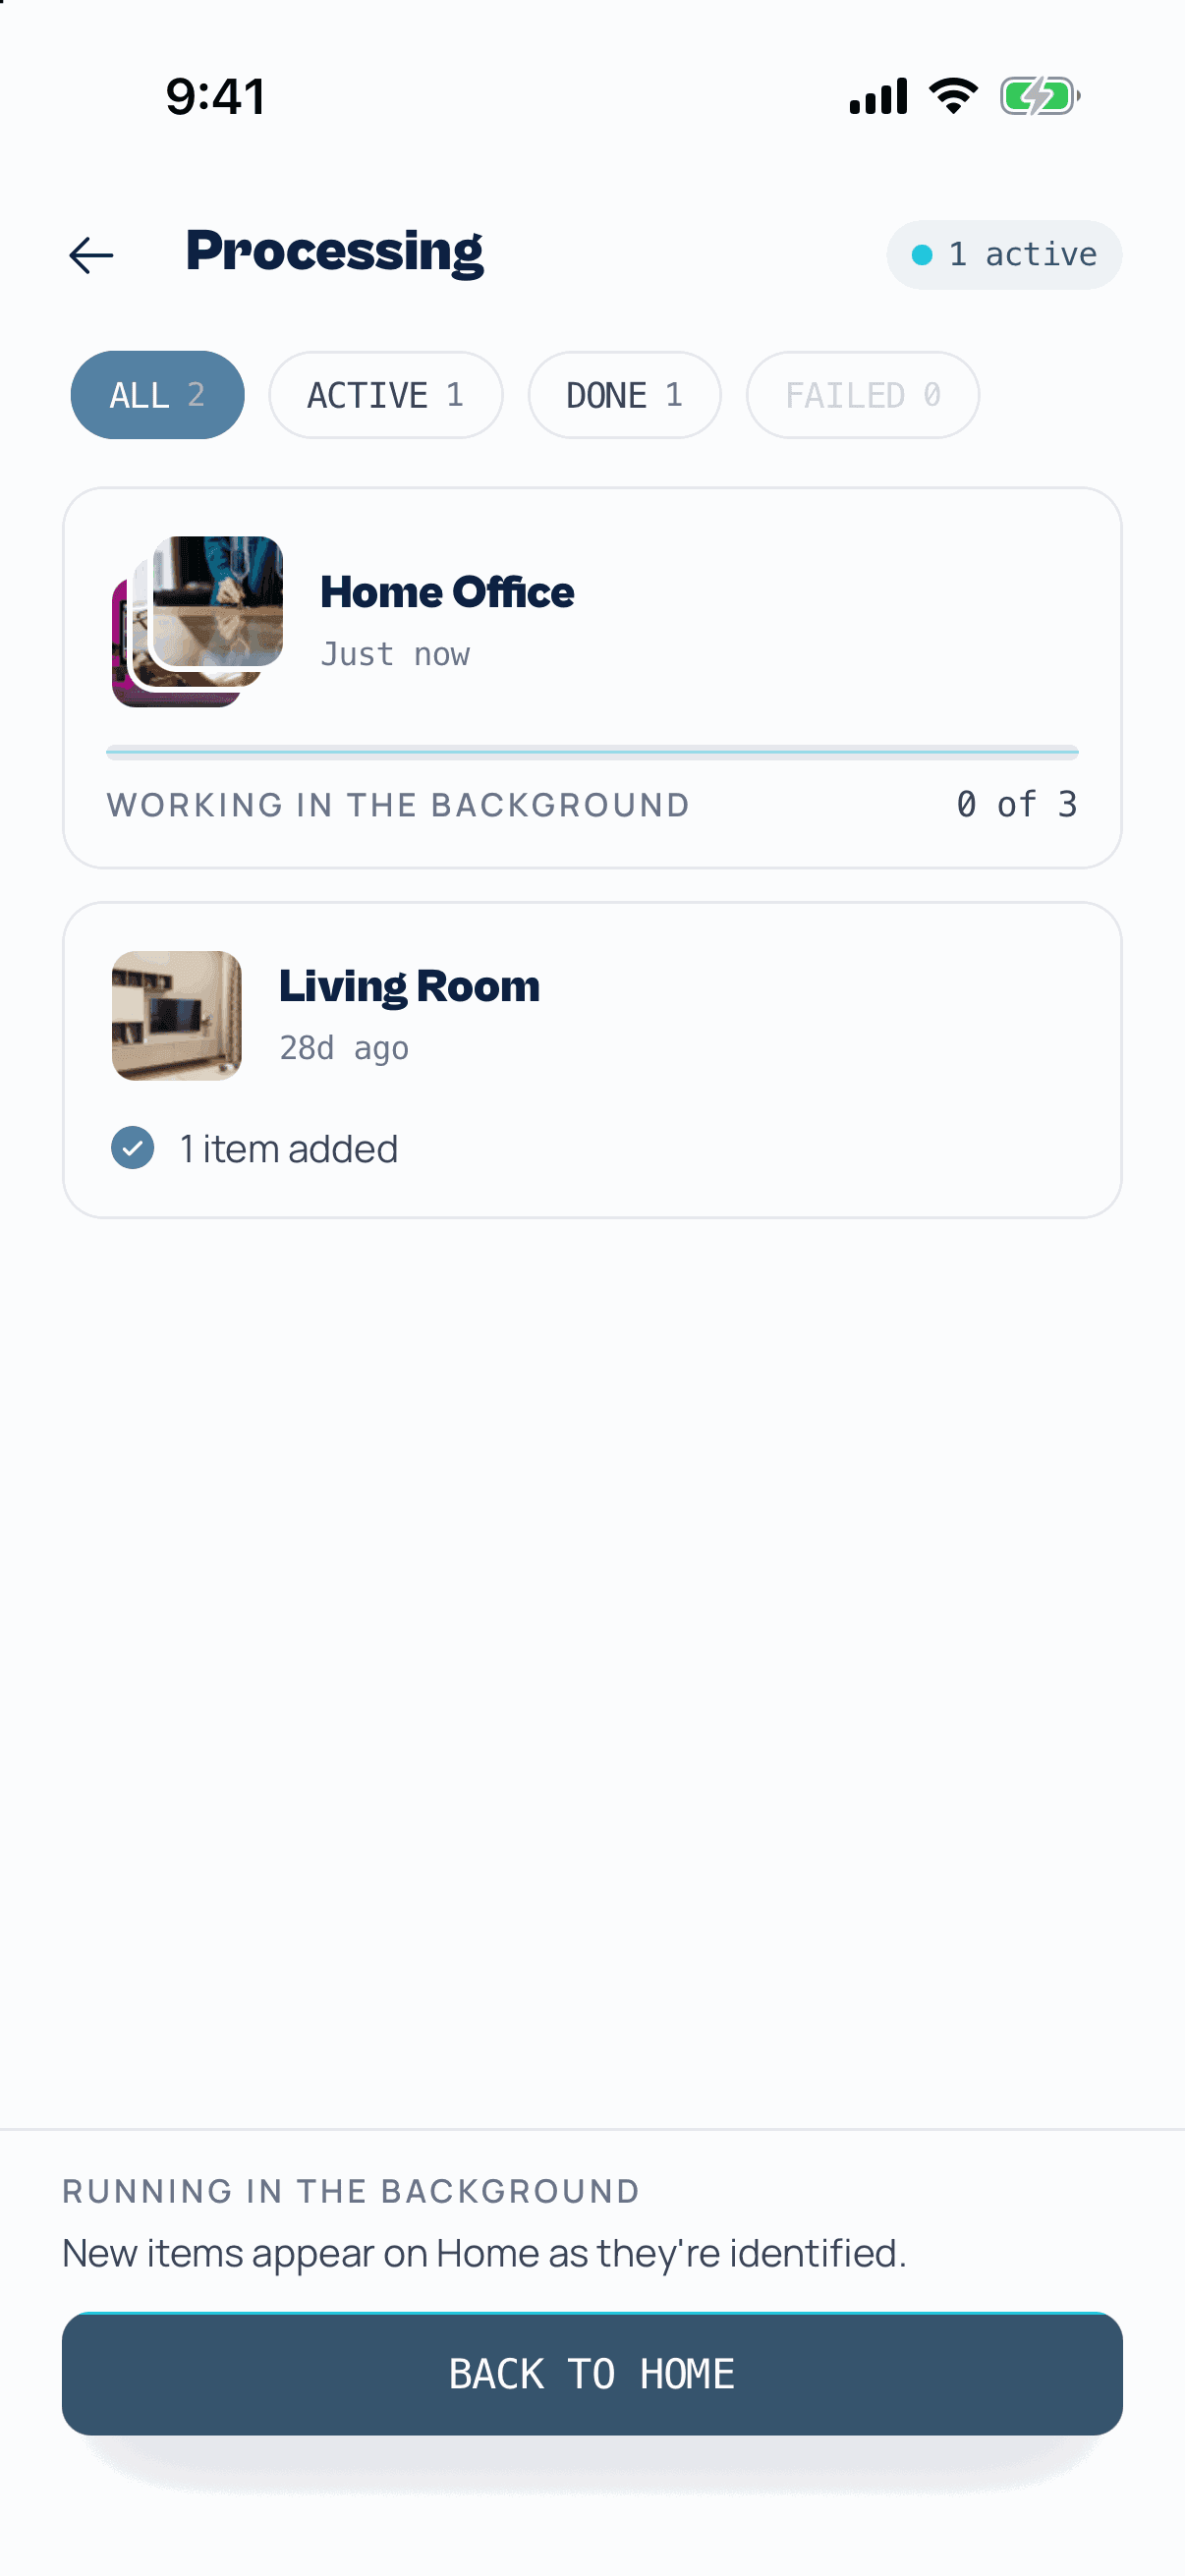
The Processing screen shows each batch and how far along it is. Tap Back to Home and new items appear there as they're identified. Most finish in seconds.
If a batch fails, say the connection dropped, it waits here with a retry.
 Step 11
Check the ones Myne isn't sure about
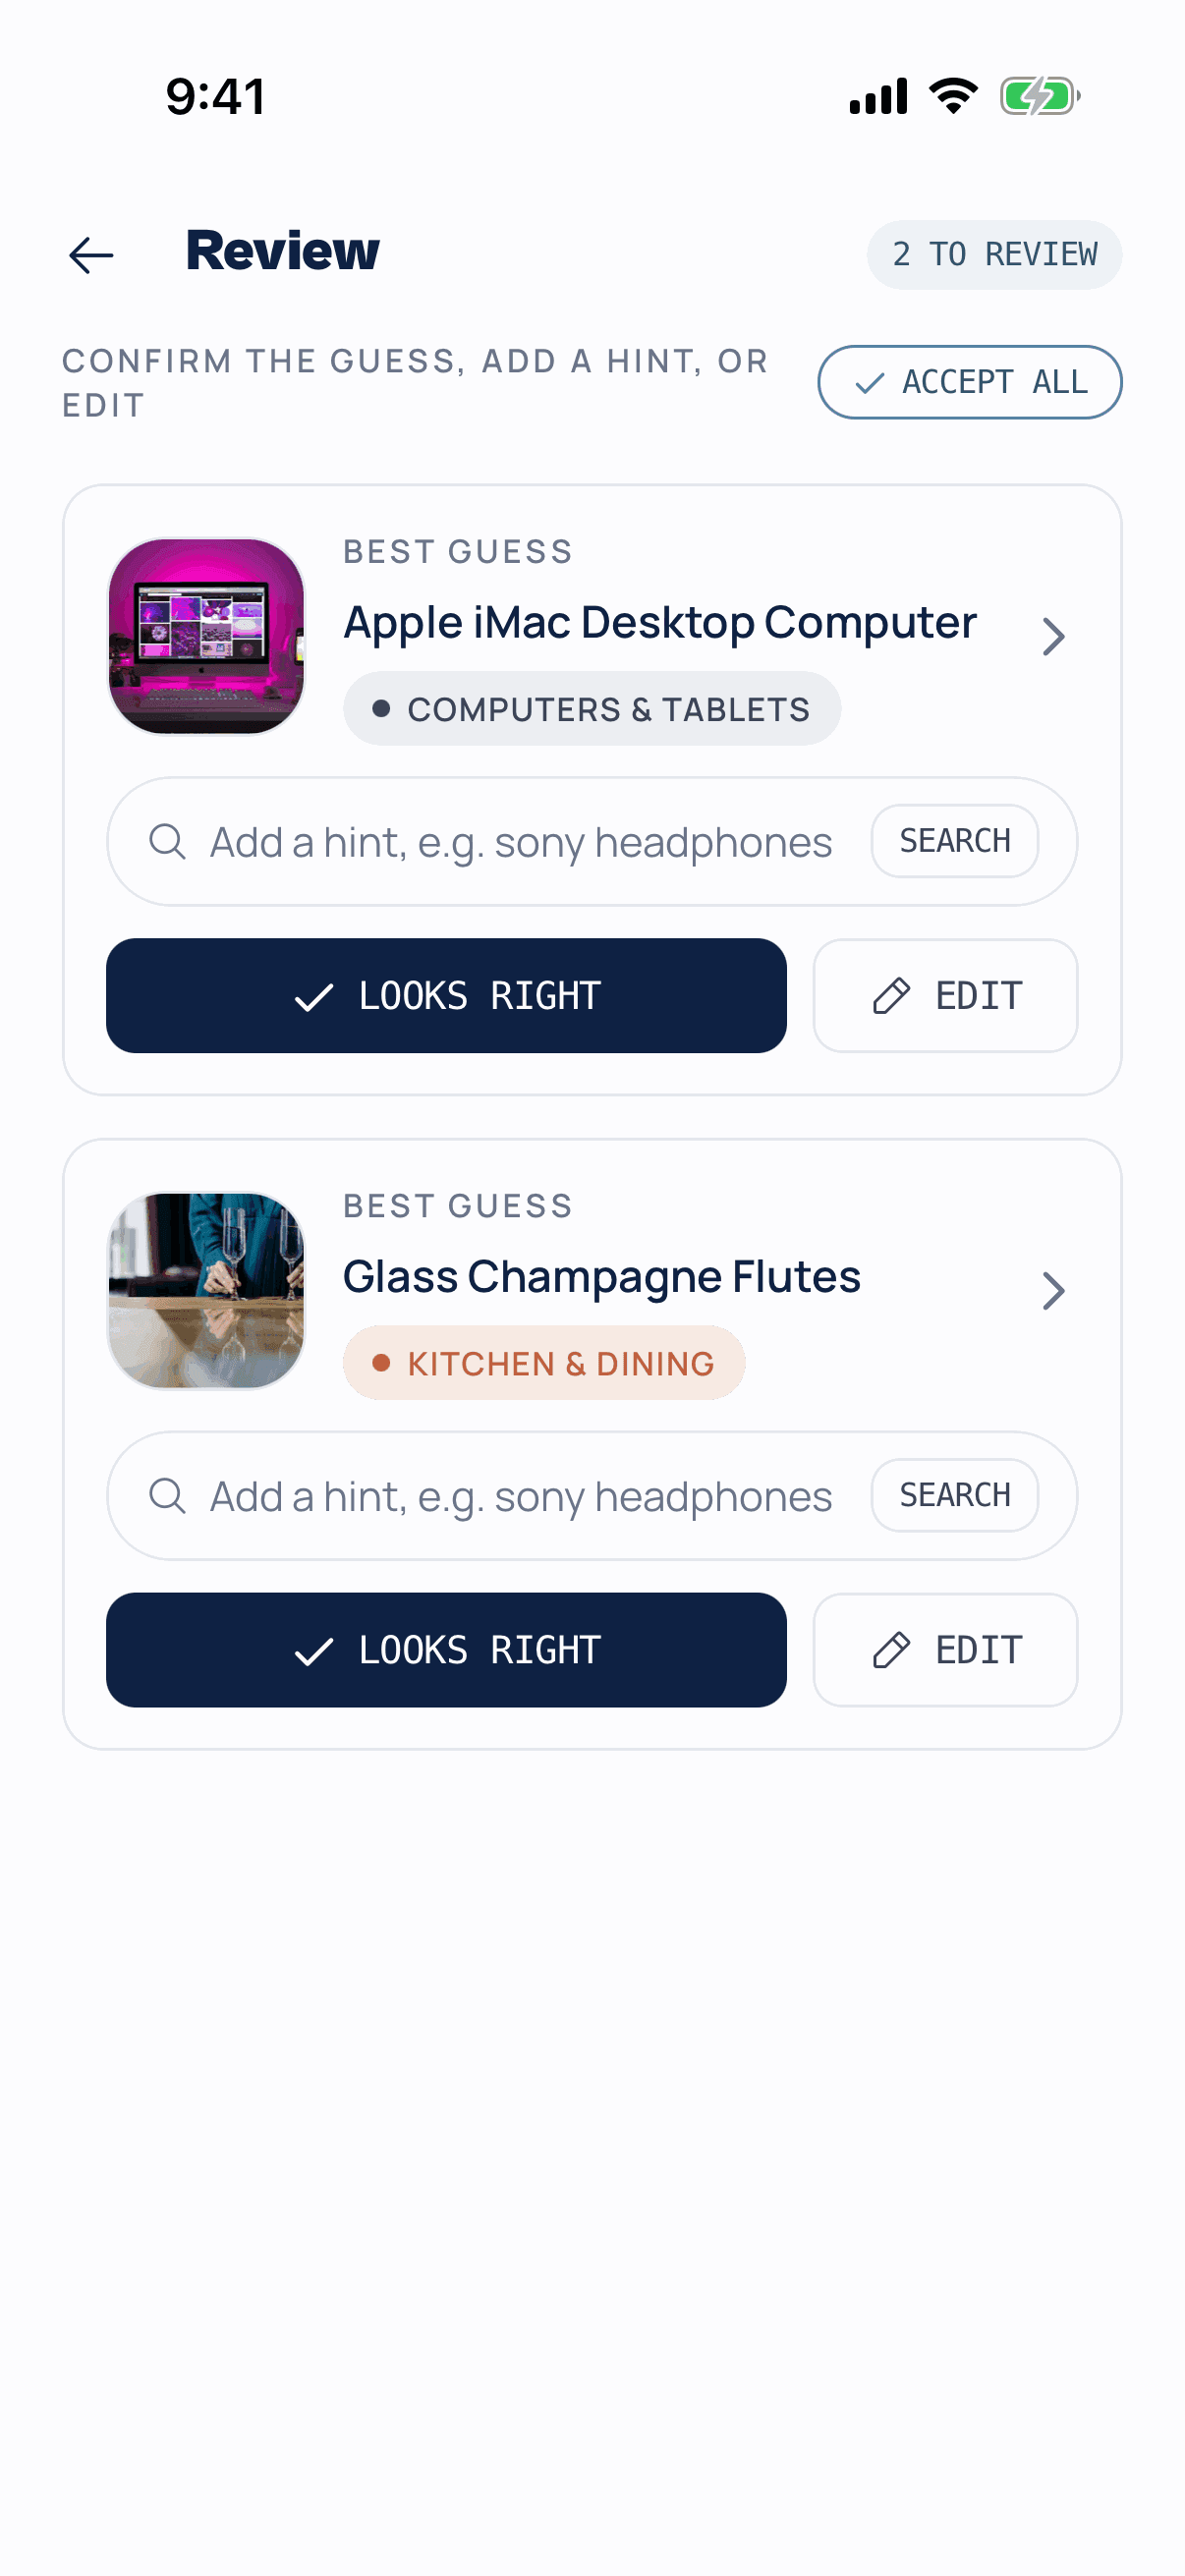
When Myne is confident, the item is saved and that's it. When it isn't, the item goes to the Review queue. Find it on Home under Activity.
For each one, tap Looks right if the guess is correct. If it's wrong, type a hint and tap Search to try again, or tap Edit to fill it in yourself. Accept all clears the whole queue at once.
 Step 12
Open an item to add the details
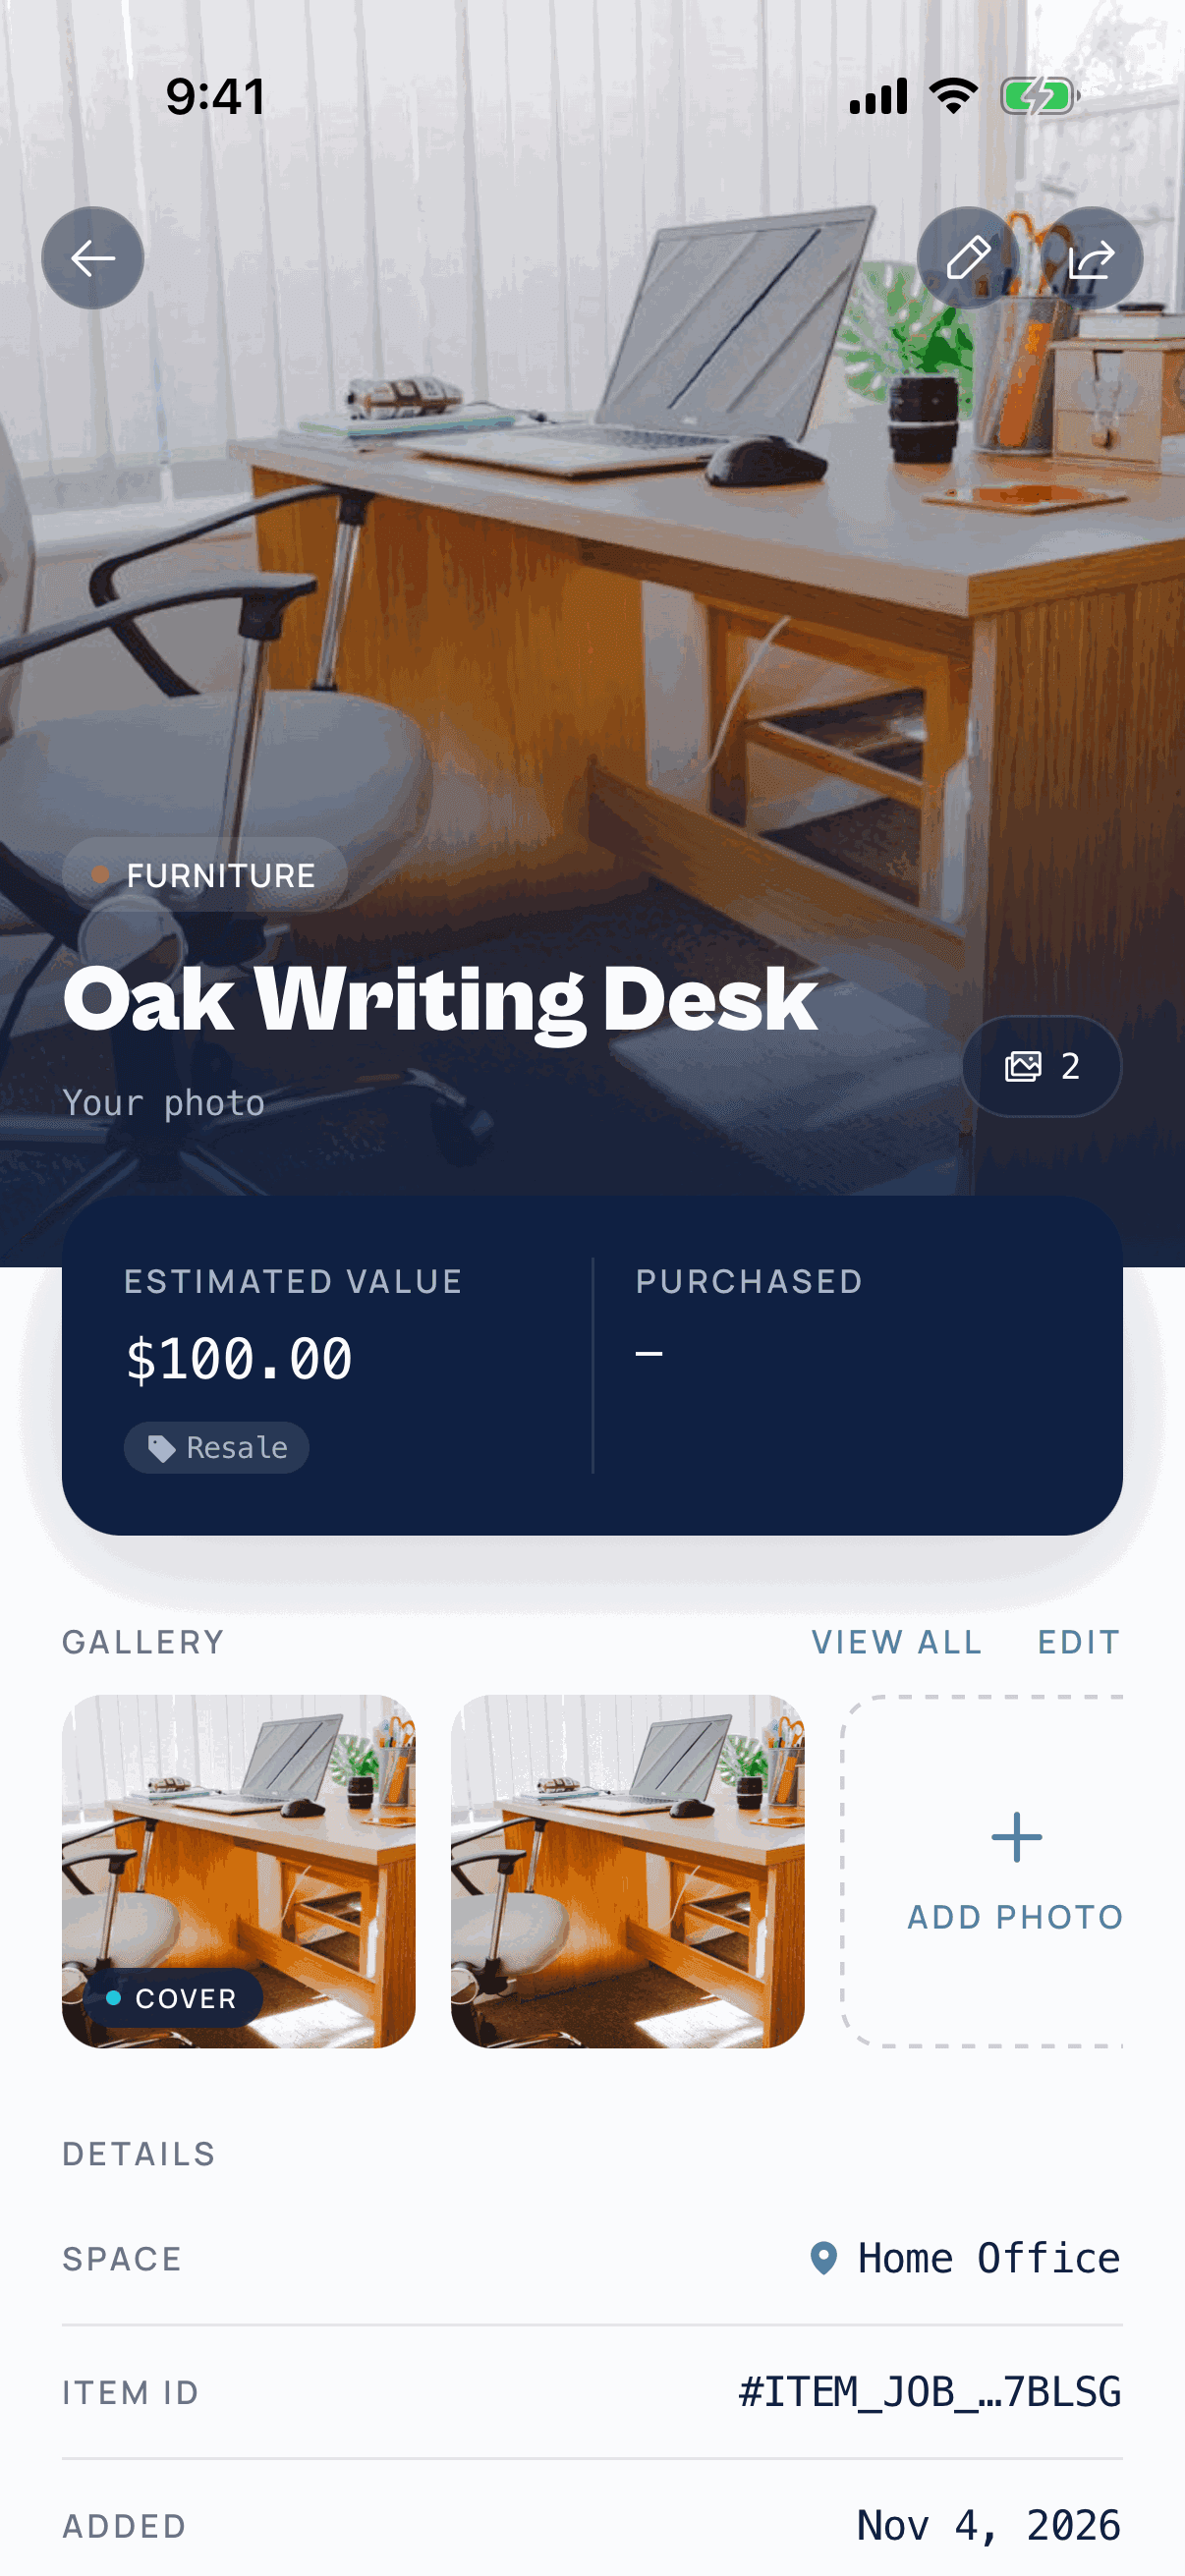
Tap any item to see its page: the estimated value, its photos, its space and when you added it. Tap the pencil to edit the name, value, category or notes.
This is also where you add more photos later, like a receipt or a serial number.
Other ways to add
For boxed and packaged things, a barcode is quicker than a photo. And if you'd rather type, the camera screen has Search by name and Manual too.
 Step 13
Scan a barcode
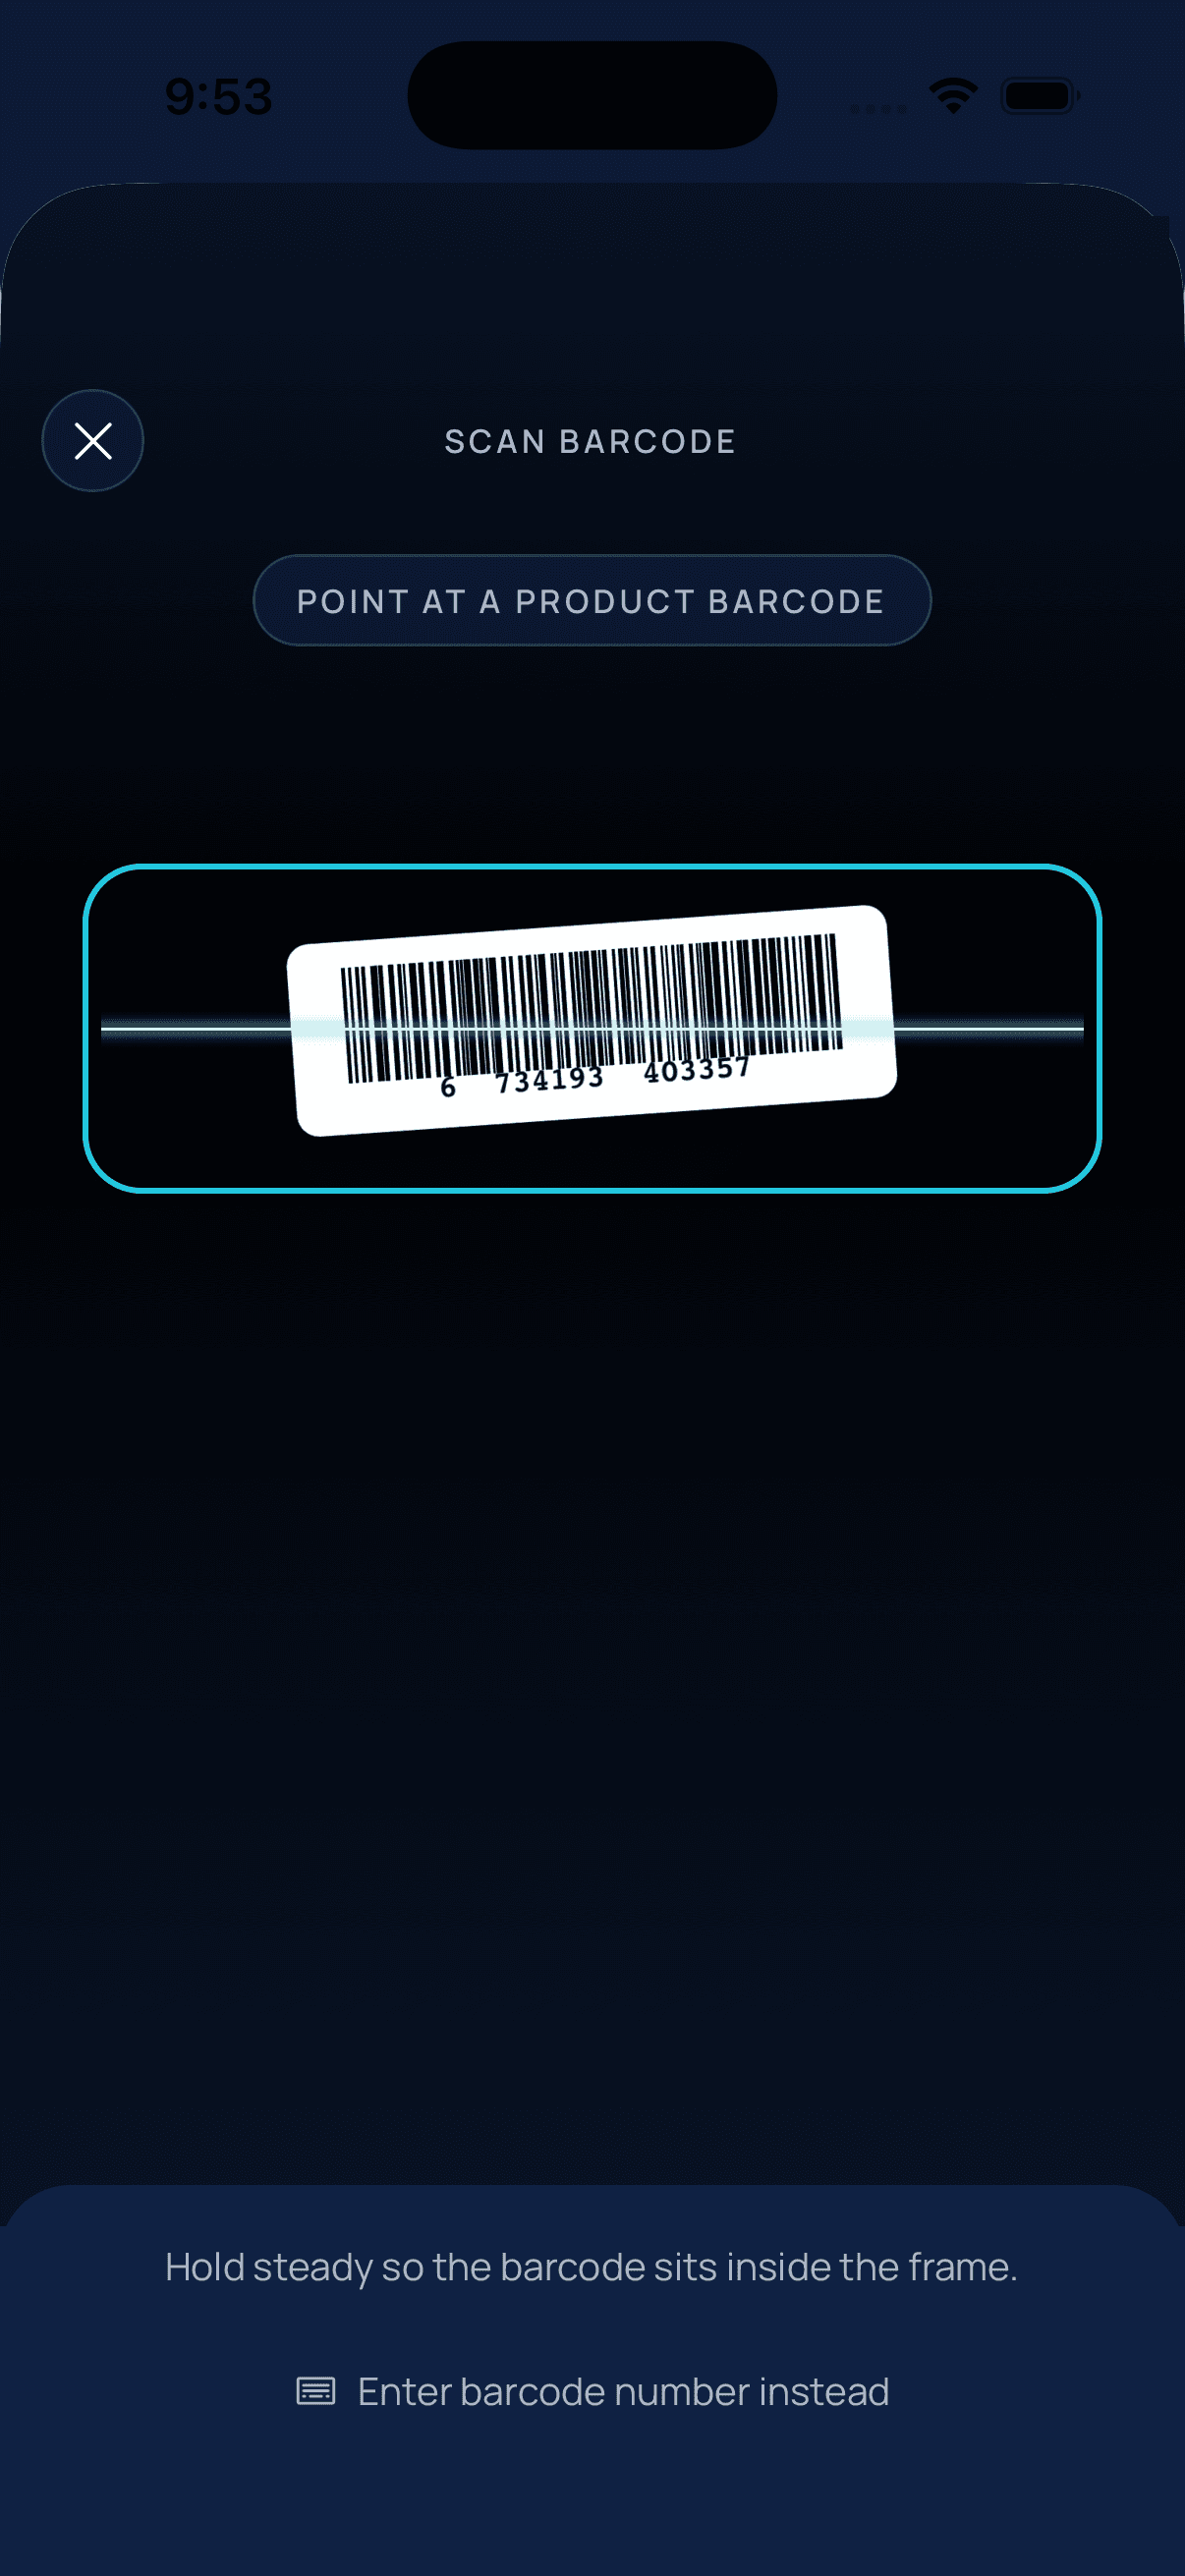
On the camera screen, tap Scan barcode and hold the barcode inside the frame. If it's hard to read, tap Enter barcode number instead and type the digits.
 Step 14
Check the details and save
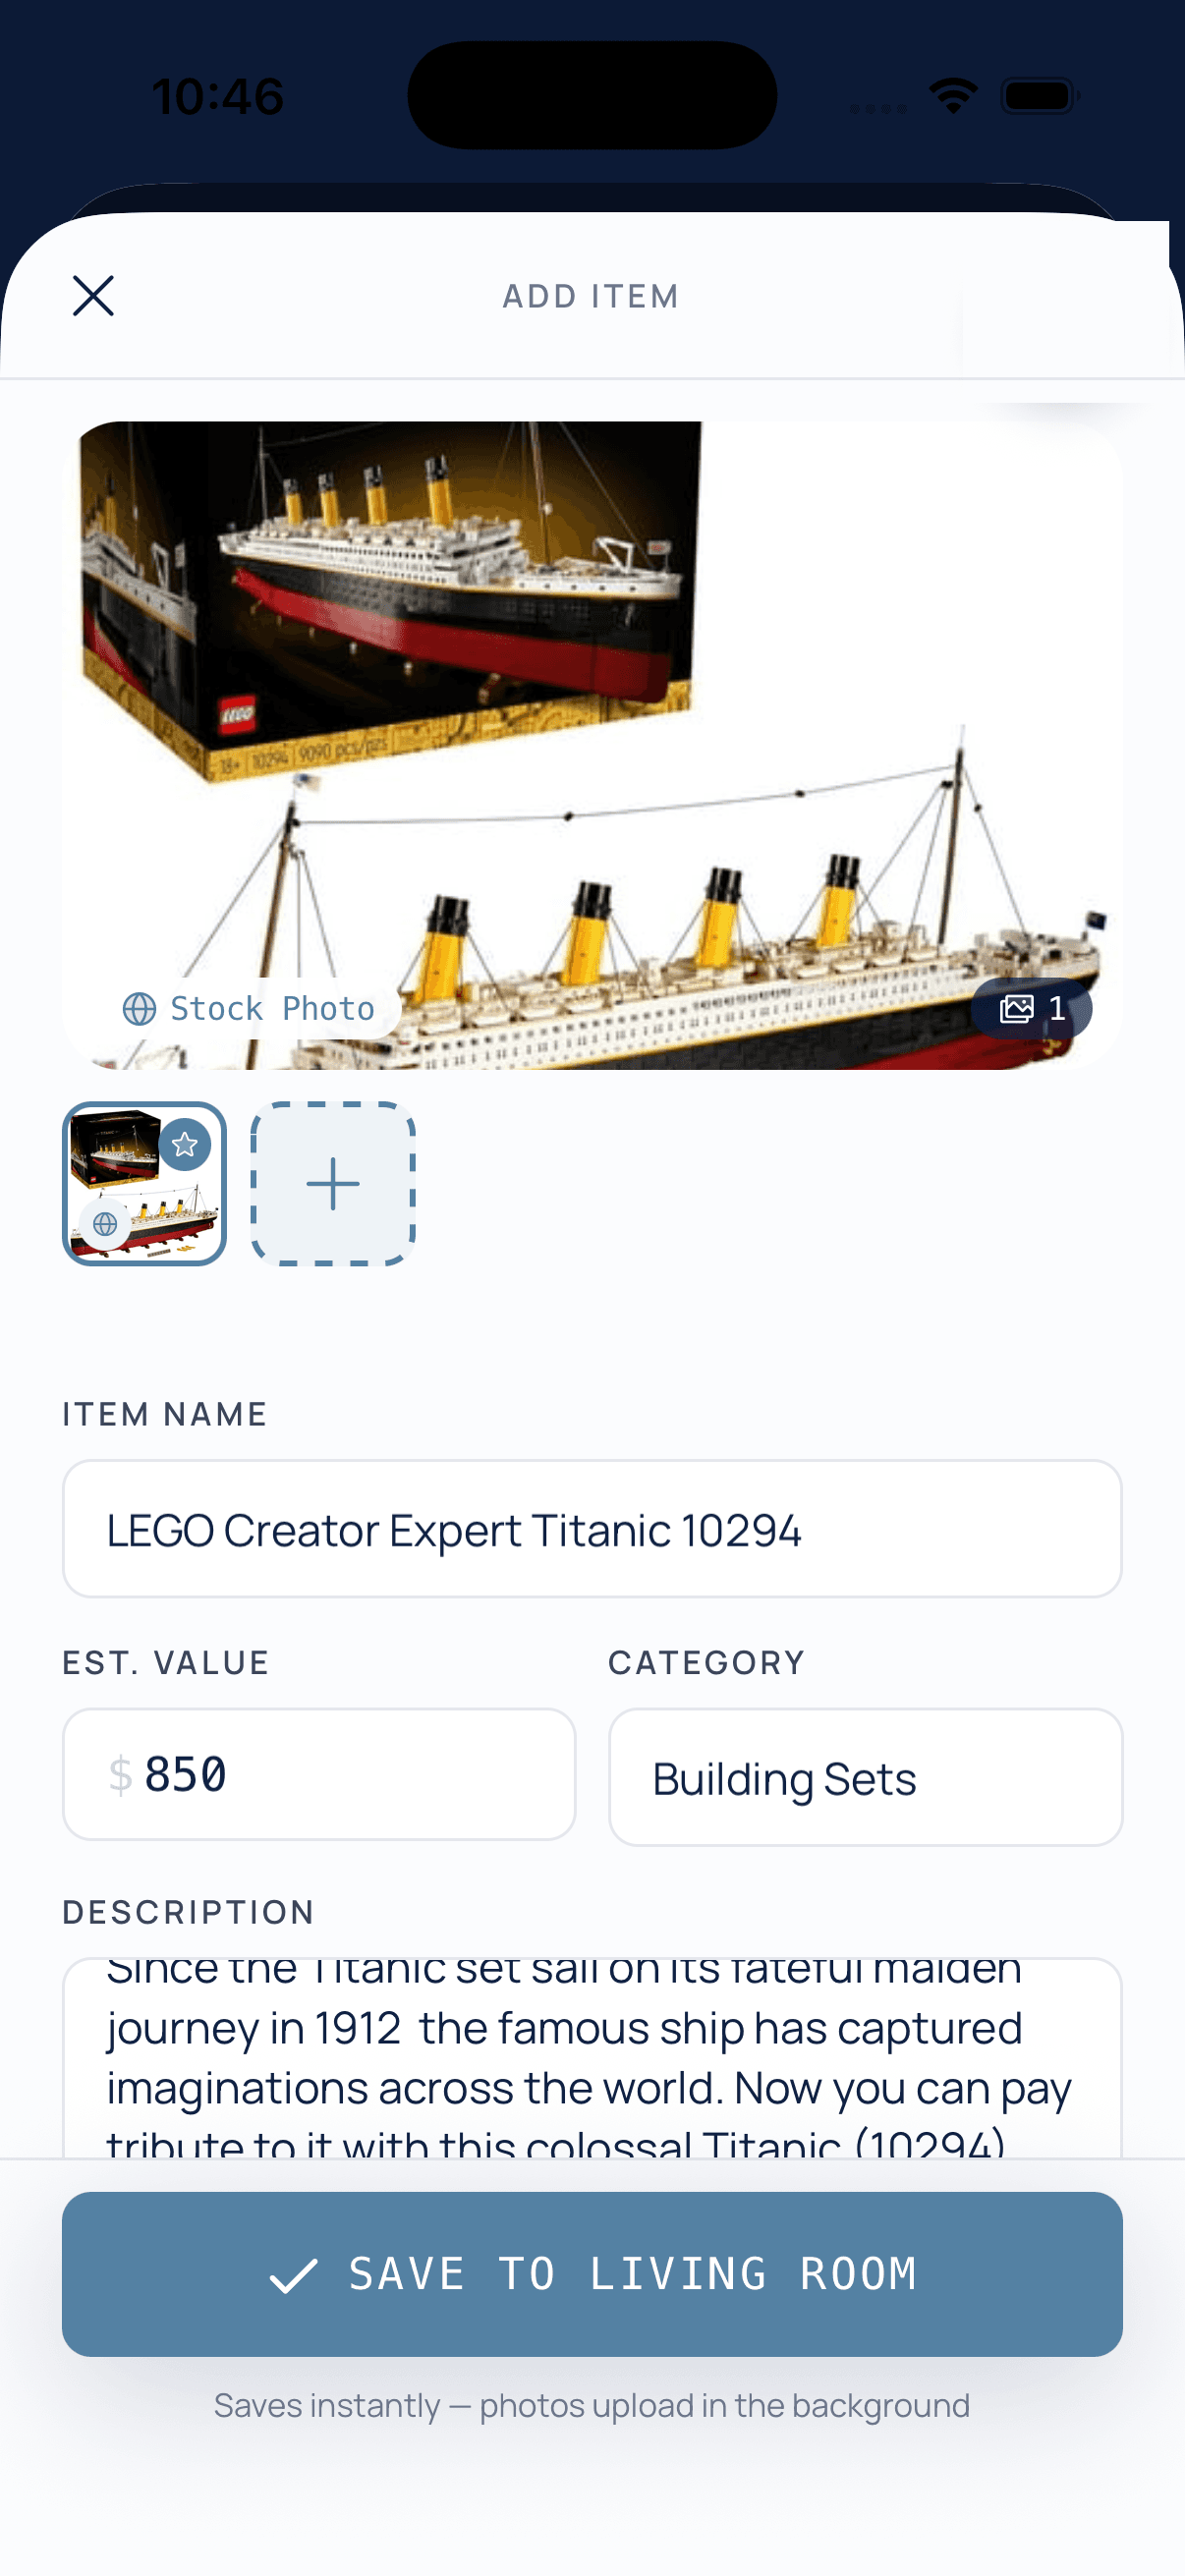
Myne looks the product up and fills in the name, a stock photo, the value and a description. Change anything that's off, then tap Save. It's saved straight away.
Search by name works the same way when there's no barcode: type what it is and pick the match. Manual is a blank form.
Keep going
How to browse and find things
Search, sort and filter everything you own, walk your spaces, and change many items at once.
Read →How to use collections
Group things that belong together, even when they live in different rooms, and share them.
Read →Stuck on something else? The support page answers the common questions, and you can write to us from Settings in the app.
Add your first shelf.
Photograph a shelf, tap Create, and Myne fills in the rest. Free to start.